Replaces
Part Details
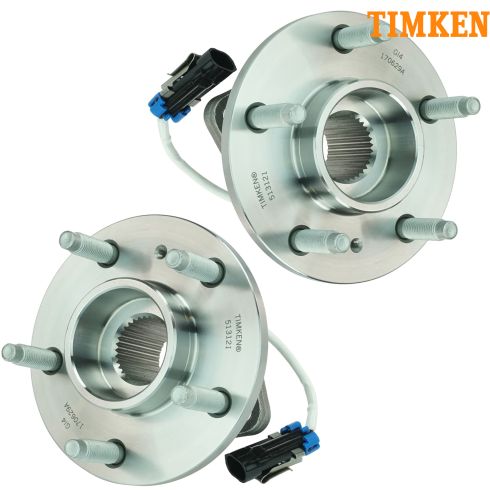
Authentic Timken brand products supplied and packaged by Timken. In some cases, Timken will source parts from other high quality suppliers such as SKF and Koyo. These parts are subjected to the same testing and quality standards as all Timken products.
Item Condition:
New
Lifetime Warranty
This item is backed by our limited lifetime warranty. In the event this item should fail due to manufacturing defects during intended use, we will replace the part free of charge. This warranty covers the cost of the part only.
FREE Shipping is standard on orders shipped to the lower 48 States (Contiguous United States). Standard shipping charges apply to Hawaii and Alaska.
Shipping is not available to a P.O. Box, APO/FPO/DPO addresses, US Territories, or Canada for this item.
Expedited is available on checkout to the United States, excluding Alaska, Hawaii.
Final shipping costs are available at checkout.


Created on:
Tools used
Brought to you by 1AAuto.com, your source for quality replacement parts and the best service on the internet.
Hi, I'm Mike Green. I am one of the owners of 1A Auto. I want to help you save time and money repairing and maintaining your vehicle. I'm going to use my 20 plus years' experience restoring and repairing cars and trucks like this, to show you the correct way to install parts from 1AAuto.com. The right parts installed correctly, that's going to save you time and money. Thank you and enjoy the video.
In this video, we will be replacing the hub on this '98 Pontiac Grand Prix. This hub fits a whole bunch of different GM cars, Buick Century, Regal, Cadillac Deville, Eldorado, Olds Mobile, Chevy Impala, Monte Carlo, Bonneville, Grand Prix, Montana Transport, Chevy Venture, all kinds of different stuff. Here's the list of tools you need for the Grand Prix. Really what you need is basically metric sockets from 13 mm up to 19 mm, plus the large hub nut, which is anywhere from 32 to 35 mm and then the rest of the stuff and plus throw in there some penetrating oil and a hammer and rubber mallet.
If your hub doesn't come apart as easily as the one that did in this video, you may need an axle or a gear puller. If you are working with hand tools, start on the ground. Remove your lug nut covers, and loosen up your lug nuts. I've got the benefit of air tools, so I'm going to raise and secure the car and remove the wheel and tire.
I've removed the wheel and turned the wheels all the way to the right here, so I can access the brake caliper bolts, which is the inside ones, one here and then this one here. Those bolts are 15 mm, I am going to remove them. You don't want the brake hose on the caliper to be stressed, so I just kind of took a wire tie and tied the caliper up here, then remove the brake disc. Be careful not to touch the disc and if you do touch it, just clean it off with some rubbing alcohol or mineral spirits when you put it back together.
There's three bolts that hold the hub on. I'll go in behind here and show them to you. There's one here, one up in the middle there, and then back here next to the, this is the steering tie rod, there is one right there. It'll help probably using a little penetrating oil, right on the opposite side. Now we are going to remove those bolts. They are 13 mm, 1/2 inch is a standard equivalent actually it fits, but I am using 3/8 drive tools, so I going to remove those three bolts and the reason you have to use this size tool, is to get in behind on this top one, you need smaller tools in order to get in there. Then you get a nice big handle to work it.
I'm just going to kind of fast forward through here. As I remove these three bolts and as you can tell, they take quite a bit of force to get going. It will help if you have a large breaker bar and then just swivel the steering back and forth to make it easy to get to the bolts on each side. Now I am going to remove the middle hub nut. I have impact tools, so that makes it really easy. If you don't have impact tools, what you want to do is, before you remove the brake caliper, have somebody hold the brakes and then with hand tools, you can pull that hub nut off. This hub nut is 35 mm, so you'll need a 35 mm socket.
Now you need to get the axle back out. You don't want to use a hammer and whack it hard, but what I'd do is just give it a check. If I see it move a little bit with the hammer, which it does, then I would have you break out the rubber mallet and whack away. Rubber mallet is not going to hurt the insides of your CV joint. Now I got the two lower bolts out and the top one is really loose, so now it is kind of a matter of not being nice. You got to pound on each side of the flange and the hub and slowly work the flange out of the steering knuckle.
I have the hub work loose, now I am just removing the top bolt the rest of the way. I just kind of left it in there in case I hit it hard enough and it just came flying out, just safety. Unplug the harness right here and flip up this with your thumb and pull it off. This is what you would rather not see happen. Basically, the hub has been in there so long, the back part stayed in the steering knuckle and this came apart, so what I am going to have to do is use some driving tools and just try and drive the rest of it out of the steering knuckle.
As you see, it turns out to be not much of a problem. You just beat on it with the punch and hammer and it pops out. Don't worry about damaging it or anything like that. I poked a few holes in it.
You just want to push the clip off of this bracket and the rest of that comes out. Push in on the axle and kind of up a little bit and your connector comes out.
Clean up some of the corrosion on here. I'm just gonna use some penetrating oil just to lubricate it. Now it's ready for the new one to go in. Okay, here's our new hub from 1A Auto and not only is it prettier and shinier, it's all in one piece, as it should be, as opposed to three separate pieces. If you kinda use your imagination here this is all the same, it's gonna bolt up the same and now we are gonna put it in and it's not going to make a big groaning grinding noise.
Okay so that ends this part of this video, part one. Check out our other videos to see the installation of the hub.
We hope this helps you out. Brought to you by www.1AAuto.com. Your source for quality replacement parts and the best service on the internet. Please feel free to call us toll free 888-844-3393. We're the company that's here for you on the internet and in person.
Tools used
Brought to you by 1AAuto.com, your source for quality replacement parts and the best service on the Internet.
This is Part 2 of installing a hub on this 1997 Deville, same as any '97 to '99. The tools you'll need for this, just a little refresher. Hopefully, if you've already gotten it out, you've already got all these tools together.
Okay, now you want to unseat the hub. You want to be careful not to damage this backing plate. Then they come off pretty easy. As they start to come out, push your axle kind of to the side and feed the harness clip through. New hub from 1AAuto: exactly the same. Just take your ABS clip out of there. You want to feed this in with the ABS clip kind of up that way. This goes on like that. Put the hub on, put the clip through, push it through, push on it a little bit. Four bolts probably the easiest one here feed it through, through the backing plate and into the hub. Start it. Use my socket ratchet extension. I'm not going to tighten it up a lot, just get that bolt going for you a bit. Make sure it's in there properly. Then you take your top one, same thing. Feed it through, through the backing plate. Push on the hub some. Start the bolt. Okay, we'll fast forward as we put in those two front bolts and then spin it over to the rear.
Okay, take my clip, clip it on, and plug in my ABS lead. Now, my third bolt, I'm going to tighten up most of the way so it's snug. Now, the rear we're going to tighten up, we're going to snug it up, and then do the same thing for the other ones. Then we'll torque them afterwards. Okay, now I'm going to tighten these to 70 foot-pounds. Then, I'm going to put my hub nut on here and I'm just going to use my impact wrench to get it seated. I'm not going to tighten it yet. I'm going to torque it when it's all back together. What I like to do is I just put one lug nut on, just to kind of help hold it in place.
The bracket goes between the knuckle and the rotor. Then the bolt goes in with the space around the back. We'll speed it up here, as we just put those bolts in and tighten them up preliminarily. Tighten them up to 85 foot-pounds.
You're going to want to use a wire brush. You're going to actually take these slides off, and you'll want to clean out where the pads move back and forth. Now, your pads. Obviously, I'm not putting new pads in, because mine are fine. All this vehicle really needed was a new hub. So put the pads back in and start placing them, like that.
If you're putting new pads on, you'll need to . you can see my cylinder is out of the caliper some . so, you'll need to push that cylinder back in. You can do that with a large C-clamp. Now, that can go right down like that.
Okay, put the slides back in, make sure they're nice and clean and have some grease on them. Tighten them up with your ratchet and socket, and pull them nice and snug. They should be probably about 25 to 30 foot-pounds. Then remove that lug nut.
Now we can put our tire back on. Start the lug nuts by hand, tighten them up preliminarily with your wrench, and then you'll do the rest of the tightening when the car's on the ground. Now we want to tighten this to 118 foot-pounds. And now here with the car on the ground, tighten the lug nuts up to 90 to 100 foot-pounds using a star pattern. And then, most important is the last step. Make sure whenever you take your brakes apart, pump your brakes a bunch of times first. Do a test stop from five and then ten miles an hour.
We hope this helps you out. Brought to you by www.1AAuto.com, your source for quality replacement parts and the best service on the Internet. Please feel free to call us toll-free, 888-844-3393. We're the company that's here for you on the Internet and in person.
Tools used
Brought to you by 1AAuto.com, your source for quality replacement parts and the best service on the Internet.
Hi, I'm Mike Green. I'm one of the owners of 1A Auto. I want to help you save time and money repairing or maintaining your vehicle. I'm going to use my 20-plus years experience restoring and repairing cars and trucks like this to show you the correct way to install parts from 1AAuto.com. The right parts installed correctly: that's going to save you time and money. Thank you and enjoy the video.
In this video, we're going to show you how to replace the front hub on this '97 DeVille, same as any '97 to '99 DeVille. Tools you'll need are jack and jack stands, 15 and 19 millimeter sockets with ratchet and extension, a breaker bar or a pipe for some extra leverage on some of those tougher bolts, a 13 millimeter 3/8 drive socket with a ratchet and extension, a large 34 millimeter socket, a large hammer, and a flat blade screw driver.
Use the screwdriver. I like to use a rag so I don't scratch the wheel or the center cap right underneath there. Your lug nuts 19 millimeter if you don't have the benefit of air tools, you want to start with the wheel on the ground, loosen the lug nuts then ready to secure the vehicle and remove the lug nuts the rest of the way. Also at this point, since we're doing the hub, if you don't have access to air tools with the vehicle on the ground, you're going to want to use your breaker bar and your 34 millimeter socket to loosen up that center hub nut.
Okay, now with your wheel turned, you can see right inside here, you can see that little hole in the brake pad, that is actually a wear indicator, it would indicate on this brake pad you're in good shape and then if you look at your outer pad, we can see that there's still some pretty good life left in it and then you want to make sure you check on both sides because sometimes you can have one side that's not worn, and the other side can be more worn but our brakes are fine. I have checked both sides, but I am going to take them apart and put them back together just to show you how to do it.
The next thing you want to do is removes these two bolts here which releases your caliper. These two bolts are 15 millimeter. These should just pull apart pretty easily. We'll speed it up here as we take out those bolts. Make sure that before you put these back together, that these pins are nice and clean and they have a little bit of grease on them. These look very good. Now, wrench the caliper off. We put the caliper up here out of the way. There's our inner pad again, and our outer pad and you can see the wear mark there and they've still got some good life on them, not a ton of miles but definitely don't need to replace them yet. But if you did want to replace them, you can just pull your pads right out like that. Now check your rotors and on this vehicle, well, with most vehicles, what you want to do is take your back of your fingernail, run it along the rotors, feel for any deep groves or gouges and then just kind of inspect the condition of the routers and these look absolutely fine. If you feel any grooves or there's too much rust or corrosion or your rotors look thin, then you do want to replace them.To remove and replace the rotors, there's two large bolts here and here. These bolts are 15 millimeters as well. What I have here is my ratchet and I'm going to use a piece of pipe. Okay, the pipe goes on there, gives me some extra leverage and then I'll push slowly down on the pipe. I can feel the bolts start to break loose. On top here I'm going to use a short extension. With this pipe again, it's easy pressure to the bolt to break lose. And then once that's bracket's off the rotor comes right off.
To remove the hub, there are three bolts. See one here, one up in there, then one around the other side. What you want to do is use some penetrant, spray the back sides of those bolts and let it sit for a while. Okay, while it's sitting, we're going to remove our hub nut; it's 34 millimeter. If you don't have an impact tool, what you need to do is loosen this while your tire is still on the ground and you do that with a big breaker bar and your pipe probably. Since I have impact tools, it'll come right off. You want to make sure your axle is free of your hub and generally you don't want to just bang on this thing repeatedly but what I usually do is just give it one good wrap and watch the axle in relation to the hub and if the axle moves, that means it's nice and free and most of the time they are free. Just give it one good hit and I saw it move.
This will come apart pretty easily. I'm going to use 3/8 inch drive tools, they're narrower, allows you to fit them in better. I'm going to put my 13 millimeter socket on there and then I use a piece of pipe again to create some leverage. Then slowly apply the pressure and the bolt will start moving. We're juts going to fast forward through removing the front two bolts and then turn our attention onto the rear bolt. Additionally, while I'm back here, I'll pull and disconnect my ABS harness. Remove the clip from the backing plate. Now, we're going to fast forward as we manipulate the steering and just remove those bolts the rest of the way. Now, you want to unseat the hub and you want to be careful not to damage this backing plate and then they come off pretty easy. Then, just start to come out, push the axle kind of the side and feed the harness clip through. Now that's the end of part one. We'll stop there with the hub off and if you want to see re-installation, just check out our other videos for the one with the same name but part 2.
We hope this helps you out. Brought to you by www.1AAuto.com, your source for quality replacement parts and the best service on the Internet. Please feel free to call us toll-free, 888-844-3393. We're the company that's here for you on the Internet and in person.