How To Bleed Drum Brakes on your Car
Created on: 2010-03-26
Learn how to bleed the drum brakes on your older vehicle by watching this video for instructions, and some helpful tips.
-
step 1 :Raising the Vehicle
- Raise the vehicle with a jack if necessary
- Secure the Vehicle on jack stands
-
step 2 :Filling the Master Cylinder
- Open the master cylinder
- Fill the master cylinder with DOT 3 brake fluid
-
step 3 :Bleeding One Front Brake
- Enlist an assistant to work the brake pedal
- Loosen the bleeder valve using penetrating oil as necessary
- Run a hose into a bottle or drain pan
- Connect the hose to the bleeder valve
- Instruct the assistant to press the brake pedal
- Loosen the bleeder valve
- Tighten the bleeder valve
- Instruct the assistant to release the brake pedal
- Repeat until no more air flows out and fluid comes out
- Check the master cylinder
- Add fluid as necessary
-
step 4 :Bleeding the Other Front Brake
- Loosen the bleeder valve using penetrating oil as necessary
- Run a hose into a bottle or drain pan
- Connect the hose to the bleeder valve
- Instruct the assistant to press the brake pedal
- Loosen the bleeder valve
- Tighten the bleeder valve
- Instruct the assistant to release the brake pedal
- Repeat until no more air flows out and fluid comes out
- Check the master cylinder
- Add fluid as necessary
-
step 5 :Bleeding the Rear Brakes
- Loosen the bleeder valve using penetrating oil as necessary
- Run a hose into a bottle or drain pan
- Connect the hose to the bleeder valve
- If there’s no tip on the bleeder valve, prepare a rag to catch fluid
- Instruct the assistant to press the brake pedal
- Loosen the bleeder valve
- Tighten the bleeder valve
- Instruct the assistant to release the brake pedal
- Repeat until no more air flows out and fluid comes out
- In the event of a clogged bleeder, unclog the bleeder with a drill bit or pick
- Check the master cylinder
- Add fluid as necessary
- Repeat these steps for the other side
-
step 6 :Adjusting the Brakes
- Pump the brake pedal to check the brakes
- Adjust the brakes
- Check the drum tightness
- Pump the brake pedal again
- Continue to adjust the brakes until the drums give some resistance
- Refill the master cylinder
-
step 7 :Road Testing the Vehicle
- Make sure the brake pedal gives some resistance
- Move the car and make sure it’s not leaking brake fluid
- Press the brake pedal
- Put the car in gear
- Make sure the brakes hold the car in gear
- Accelerate to 5 miles per hour
- Test the brakes
- Accelerate to 10 miles per hour
- Test the brakes
- Continue until you are comfortable with the brakes
- Try braking on the road
- Check that the car stops straight and doesn't pull to one side
- If it pulls, consider bleeding brakes again or diagnosing other issues
Tools needed
-
Rust Penetrant
7mm Wrench
8mm Wrench
Jack Stands
9mm Wrench
5/16 Inch Wrench
5/16 Inch Drill Bit
Pick
3/8 Inch Wrench
1/4 Inch Wrench
Brake Fluid
Rubber Vacuum Hose
Drain Pan
Floor Jack
Cloth Rags
Assistant
Brought to you by www.1aauto.com, your source for quality replacement parts and the best service on the internet.
Hi, I'm Mike Green. I'm one of the owners of 1A Auto. I want to help you save time and money repairing or maintaining your vehicle. I am going to use my 20-plus years experience restoring and repairing cars and trucks like this, to show you the correct way to install parts from 1aauto.com. The right parts installed correctly: that's going to save you time and money. Thank you and enjoy the video.
In this video we are showing you how to bleed drum brakes. You are going to need to bleed the brakes if you've done any work on the brakes themselves or if you feel like your car is not providing good stopping power or pulling left or right during braking. Bleeding the brakes can sometimes cure some of those issues. Our subject vehicle is a '59 Pontiac Bonneville. It has manual adjust brakes, which are different than most newer cars which adjust automatically; just a note.
You'll need a wrench anywhere from 1/4 inch to 3/8 inch or 7mm-9mm depending on your application, latex or rubber hose and a plastic bottle, an assistant to help you out, and you'll want to probably raise and secure the car although not all vehicles will you have to raise to do the brake bleeding on. Brakes need to be assembled. All rotors and drums and pads and everything need to be on. In our video we do have the tires off the vehicle; you do not have to remove your tires to bleed the brakes.
The first step in bleeding your brakes is . this car is an old '59 Pontiac . what we are doing right now is we're opening up the master cylinder and adding brake fluid. You want to fill the master cylinder full and also you are going to want to stop and check it from time to time while you are bleeding the brakes. Usually we do one wheel and then we'll check the master cylinder then do the next wheel etcetera, etcetera. This is an old car, so you use DOT 3 hydraulic brake fluid. You have a helper in the vehicle pressing the brake for you: dear old dad in this one. Now we are in behind the brake drum here and this is the bleeder valve.
Before you bleed what you want to make sure is you get these loose. It may require you to put some penetrating oil on there or something. These are brand new so they'll be loose enough. You want to make sure you can get those loose because sometimes they will break off and then you'll need to replace your wheel cylinders or brake calipers or whatever, anyways. You are going to want to put your wrench on. What I have is this kind of handy bleeder's mate. You can see that one end of the hose goes down into the fluid and the other end of the hose I'm going to connect to that bleeder valve. I've got my wrench on the bleeder valve. I'm going to take my hose and I'm going to try and keep this where you can kind of see it, and put my hose on the bleeder valve.
Now this is somewhat the environmentally correct and clean way to do it. We're going to hopefully not spill any brake fluid all over the place. The other thing you can do is just put a rag or a catch pan underneath and bleed away. What I'm going to do, let me get this bottle secured, and you can watch right here, I'm going to tell my guy in the car to hit the brakes and then I'm going to open up the valve and you will see all the air bleed into the bottle. "All right hit the brakes. All right let off." Basically what I am doing is a series of hit the brakes and let off, which forces the fluid into the lines and we just redid the total brakes on this so there is no fluid in the line so it's actually going to take it a little bit to do. You want to just pump the brakes a few times to see if you can get anything?"�
"All right hit the brakes." There he goes. "Let off; brakes; let off." I'm saying hit the brakes so, "hit the brakes." I'm tightening it and then I'm telling him now, "let off." "Can you hit the brakes here?" I'm not hearing anything. We need to check the fluid. We're going to now check the fluid because we may have drained all the fluid from the master cylinder just filling the lines. We did one wheel until we had no bubbles. Now we've moved to the other side. We are going to repeat the procedure. We'll put our wrench on. "Okay, brakes." Then you see all those bubbles, hear them too. "Let off; brakes; let off; brakes; let off." Here I am in the rear of the car. This is the back of the brake drum. This is an old car, so you can see here this is the bleeder. It doesn't even have a tip on it. It's old style it just has a hole in it; probably the original cylinder for the car. I'm just going to do it the old way I'm just going to use a rag and kind of catch the fluid.
"Okay brakes; okay let off." We are actually having an issue here with this rear brake. Just to show you this is the bleeder and I'm putting a pick into it just to make sure. It does feel like it's got some stuff. I just took the bleeder all the way out and what you can do is just take a drill bit that's a little bit smaller and kind of run it through there. I'm just going to put the pick into the wheel cylinder as well and make sure there is no stuff. I did get a little bit of fluid; extra fluid came out. That can happen. If you are bleeding for awhile and you're not getting any fluid out it's probably a clogged bleeder or some stuff has gotten into your wheel cylinder.
On this car, like I said, we had done work to all four brakes so we bled them repeatedly. This car has manually adjusting brakes so we did find that we had to work the brakes a little bit, and make sure the adjusters were tight, and then work the brakes again. If you have a very old car that has manually adjusting brakes keep that in mind. What you will want to do is pump the pedal, make sure the brakes are working, then adjust them. While you are adjusting it spin the drum a little bit and basically adjust it until the brakes give a little resistance. Then, pump the brakes again. Then, spin the drum again. Like I said, adjust it until the drum gives a little resistance. Now we're just going to top off our fluid and we're putting on our wheels and tires and we'll go on a road test.
You've done your brake work, and you've bled the brakes, and you're getting ready to road test. Obviously that's the most dangerous part of what you are doing. Basically, first thing you do is just start up the car, apply the brakes, put it in gear. Make sure the brakes just hold the car in gear. If they hold the car in gear that's a good sign. Then, I would maybe go 5mph; put the brakes on make sure they stop the car. Then, 10mph and work your way up until you are comfortable that the brakes are working well enough. Then go road test it. When you road test it you want to feel for: does the car stop straight? Does it pull to one side or the other? If it pulls, you may want to look at bleeding the brakes again. Also keep in mind that the pulling could be something other than the brakes. That's it. We hope we helped you out and thank you.
Also before you road test, make sure you press on your brake pedal and you have a good solid pedal, it doesn't go all the way to the floor or anything like that. After you press down hard move your car and just make sure you're not leaking brake fluid anywhere under the car.
Brought to you by www.1aauto.com. Your source for quality replacement parts and the best service on the internet. Please feel free to call us toll free 888-844-3393. We're the company that is here for you on the internet and in person.
Shop Products
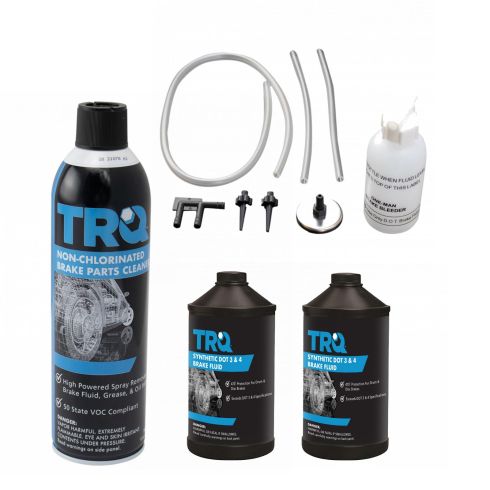
Brake Caliper Service Kit 50 State Formula 12oz
- Magnetic Base
- (1) Brake Bleeding Kit
- (2) 12 oz DOT 3 & 4 Brake Fluid
- Designed for easy one man brake bleeding
- Dot 3 & 4
- (1) 13 oz Non-Chlorinated 50 State Formula Brake Cleaner

Why Does My Wheel Wobble Bad Bearing
If you are experiencing wobbly or noisy wheels on your vehicle, check out this video to learn some of the causes, and how to diagnose them!

