How to Replace Alternator 2000-04 Ford Focus
Created on: 2012-10-22
Watch this video to learn how to fix battery charging problems. The experts at 1A Auto show how to replace the alternator on your 00-04 Ford Focus.
-
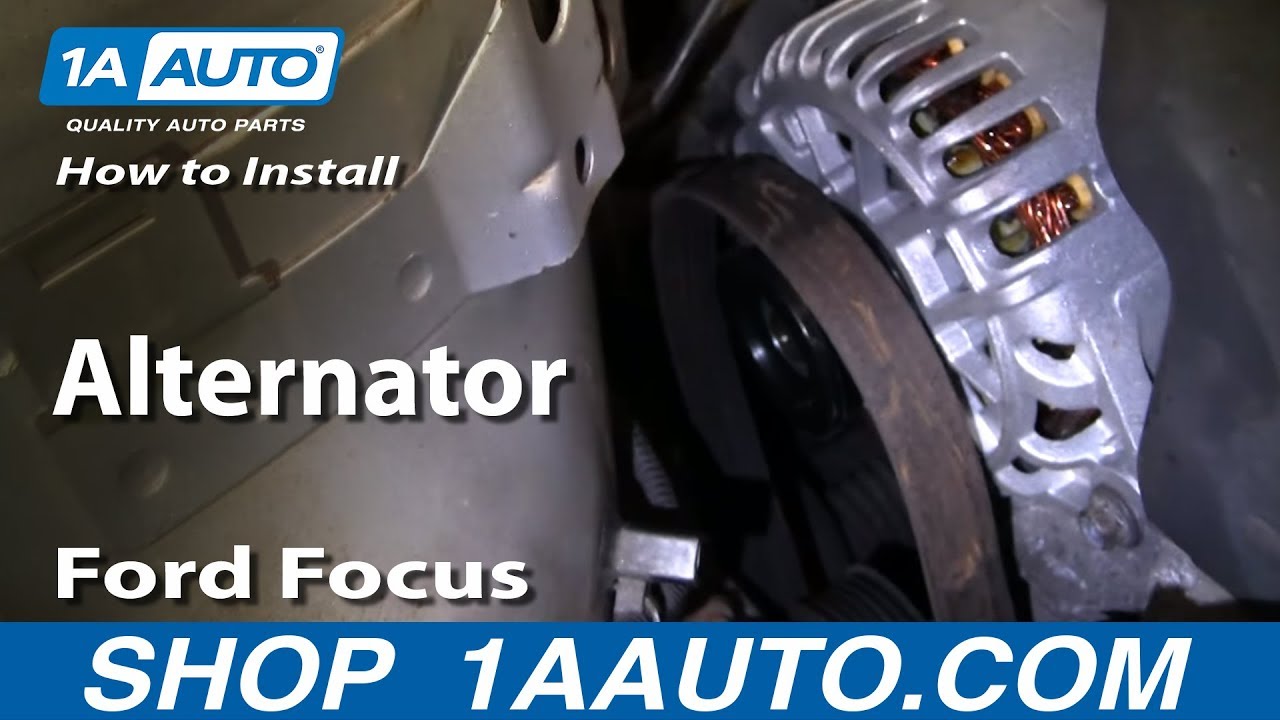
step 1 :Accessing the Alternator
- Using a 10mm socket disconnect the negative battery cable
- Remove the 10mm bolt in front of the water bottle
- Disconnect the clip on the back of the water bottle and lift it out of the way
- Lift power steering reservoir up and out of the way
- Remove the two 10mm bolts on the dust and rock cover under the car
- Remove the cover to access the belt tensioner
- Using a 15mm wrench and pipe (for leverage) turn the bolt on the tensioner clockwise to loosen the belt
- Pull the belt off of the alternator pulley and push it out of the way
- Undo the bolt on the wiring harness near the alternator
- Using a 7mm socket remove the bolts holding the solenoid shaped object over the alternator (on the firewall)
- Push the object towards the middle of the car
-
step 2 :Removing the Alternator
- Remove the 10mm bolt on the front of the alternator
- Using a flexible ratchet remove the opposite 10mm bolt on the alternator
- Pull the Alternator up and out
- Disconnect the connector on the back of the alternator
- Remove the 10mm nut from the alternator power wire. Pull the power wire free
- Disconnect the line over the alternator by disconnecting the green clip. Force everything out of the way
- Lift the alternator out of the engine
-
step 3 :Replacing the Alternator
- Fit the alternator down into the engine
- Once its down in line it up and reconnect the wires, and harnesses
- Line up the tubes that were forced aside
- Replace all of the bolts in the alternator
- Reconnect the green clip
- Put the object on the firewall back into place
- Replace the harness clip
-
step 4 :Reinstalling Your Belt (If Necessary)
- Use the belt diagram to make sure the belt is in place on each pulley
- Using the 15mm wrench with pipe loosen the tensioner and pull the belt down into place
- Tighten the tensioner when everything is lined up
-
step 5 :Replacing Bottles and Covers
- Replace the dust and rock shield over the belt tensioner
- Push the power steering reservoir back into place
- Push the water bottle back into place and reinstall the bolts
- Reconnect the negative battery cable
Tools needed
-
A Piece of Pipe (for leverage)
15mm Wrench
Socket Extensions
Flat Blade Screwdriver
Jack Stands
7mm Socket
10mm Socket
Ratchet
Swivel
Hi. I am Mike from 1A Auto. I hope this how-to video helps you out, and next time you need parts for your vehicle think of 1AAuto.com. Thanks.
In this video we are going to show you how to replace an alternator on this 2003 Ford. This vehicle has two liter, Zetech engine. Tools you will need are a jack and jack stands. You will need to raise up the vehicle and access the belt from underneath to get it off. 10mm socket with a ratchet extension. You'll need a flexible handle, couple of the bolts are a little hard to get to so you'll need kind of a flexible handle to get into it. 15mm wrench, a pipe for some extra leverage, flat blade screw driver, and a seven millimeter socket. You don't need to remove belt fully, but if you do change your belt or if you take the belt all the way off or it just kind of slips off you want to know how to get it back together. This is the diagram for it.
10mm socket, loosen up you negative battery cable and disconnect it. On the passenger side of the engine compartment there is a 10mm bolt right here. Use a wrench socket extension. Take a look back in here you will see a little clip. What you are going to want to do is get a screwdriver down here, pry out on the water bottle a little bit, lift it up, and off. Okay. Pull these out of the clip and move your water bottle out of the way. Right here is your power steering reservoir, lift that up and move it out of the way as well.
Looking up from underneath you will find two bolts that hold this cover on, their 10mm as well. I'll just fast foreword here as I remove those two, 10mm bolts. If you look right up in here this is your belt tensioner. Put a 15mm wrench on there. I like to use a nice big piece of pipe, helps you get some extra leverage. As you go clockwise on that it actually loosens up the belt and you can pull the belt off of your AC compressor down here. Slowly let your wrench go.
Now reach in, pull the belt off the alternator pulley, and push it down out of your way. Okay we still need to create a little bit of room here. We're going to undo the bolt here that holds the bracket for this wiring harness. We are going to switch to a seven millimeter socket and remove this right here. Okay. Sorry about the angle there. We are kind of removing, it looks sort of like a round solenoid on the back firewall. Two, 7mm bolts hold it in place. Remove that and you can move it over towards the middle of the car to get it out of the way.
Okay. You can see our alternator right here. It is held in by a 10mm bolt over here, and I can't really film it, but there is a 10mm bolt basically opposite of that back towards the back of the car. The front one I am able to go down in there with just a regular ratchet and socket, 10mm. Okay, and I loosen up that first bolt using some force. Actually if you use your piece of pipe, put it on that ratchet, give yourself a little extra leverage, help get it loosened up. First I just loosen that one up. For that back one, it will help to have a flexible handle or a longer too, to get some leverage on it. Okay. I am going to fast forward here. What I do is take that flex handle and put it down in there. You need it flexible so it can kind of get around the pulley as well as get to the bolt. Generally what I have to do is turn it about an eighth of a turn, and then I have to take it back out, reposition the socket on the handle, then turn it another little bit of a turn, until you get it going. Once you get it out a certain distance you can change over to your ratchet and get it out the rest of the way with the ratchet. Then once you have that one out ... When you pull it out it, it will come out, it will hit the body of the car. If you just force it kind of down, you can get it down and out. Then once you have that one out, then you can turn your attention to the one that is very easy to see. Put the ratchet on there, loosen it up, and take it right out.
Okay I am going to reach in and pull your alternator up and out. Okay, as you saw I was able to, move by hand ... Sometimes you may need to use a crowbar or a large screwdriver and pry it a little bit to break it free. Then you just want to kind of just pull it up and out a little bit. Pull your alternator kind of up and out so you can easily see where the power wire goes in. That is by looks a 10mm nut and right here is where it connects. Where your harness connects to the alternator. Okay go in with a long screw driver and reposition the alternator by pressing on the side of the connector and I'm going to pull up with my left hand, pressing on the side with my screwdriver and pulling it with my left hand and disconnecting that connector. I'm just going to fast forward here as I use a ten millimeter socket and a ratchet to reposition the alternator so you can get to that nut that holds the power wire on ... remove that power wire from the alternator. There's really no right great angle to video it. So I am going to fast forward through it.
Okay, now the challenge is to get the old alternator out and the new one back in. Kind of try to move some things out of the way. Disconnect that harness. Okay we can pull this off of there. We want to disconnect this line which I am pinching in on this green tube. Pushing that green clip up and out. Disconnecting that. Okay now what you want to do is take these two ... and pretty much force them, bend them, down below where the alternator is. The alternator can come out. It's a tight fit, but it comes up and out. Here's the new alternator from 1AAuto. Put it right down in, basically, the same way. Once you get it down in you are pretty successful. Okay, rotate it in place.
Okay I'm gonna kind of fast forward as we put everything back together. It's just a reversal procedure. Get the alternator down in there, kind of bend the tubes back up into their correct position, reconnect the lead, and then reconnect the power wire. Tighten up the 10mm knot that holds that in place. Continue to fast forward. Work the alternator into place. Could be a little difficult sometimes but work it into place. Start the easy bolt first, the one you can see right ... easily at the engine. Start that one in first and then start the other one that's on the back side. Again, you'll have to start with the head way down to the body and kind of angle it up in until you get it in. Then tighten those bolts up and then you can start putting the other stuff back up in the firewall where it belongs.
Okay, put the green clip back on and reconnect that hose to that tube. Put the item back on the firewall. Start those bolts in. Make sure you reconnect the wiring harness and put that harness clip back on where it belongs. Be sure to tighten everything back up.
If you did take your belt all the way off, you don't have to, but if you did here's the belt routing diagram, that'll help you get it back on there correctly. Okay, so from the top, you can see we've got the belt pretty much forced down. We've got it on top of our alternator here and we got it on top of our power steering pump here, and below this idler pulley. Okay so the belt comes down and take this loop and you need to kind of twist it and force it up onto the water pump. Then this loop comes down, you'll have to bypass your AC compressor for right now. Put that under the crank and pull it as tight as you can. You're going to take your 15mm wrench again, put your pipe on there. Loosen that tensioner, pull your belt down, and make sure it's on there. I see one little problem. It's not quite on the crank correctly. Okay I am just going to fast forward here. Unfortunately I do not do a good job of filming it, but just check you pulley. I noticed that it's not ... It's one groove off on the crank so I loosen it back up, take it off the AC compressor pulley, get it onto the crank pulley correctly, check all the rest of the pulleys to make sure it's on there right, and then put it back on again. Okay. Just confirm belts on the alternator well and on the power steering pump correctly.
I am going to continue to fast forward as I put that dust and rock shield back in place. Use the two bolts and bolt it back in place. You can see I am using air tools now just to kind of get it done quickly. Just continue through fast forward as I put that power steering reservoir back in place. It just kind of presses in the place with the rubber grommets. Then put the coolant reservoir back in place and put the 10mm bolt in place to hold it. Okay reconnect your negative battery cable and tighten it up. Okay. Battery light goes out and stays out.
We hope this helps you out. Brought to you by www.1AAuto.com. Your source for quality replacement parts and the best service on the internet. Please feel free to call us toll free 888-844-3393. We're the company that is here for you on the internet and in person.


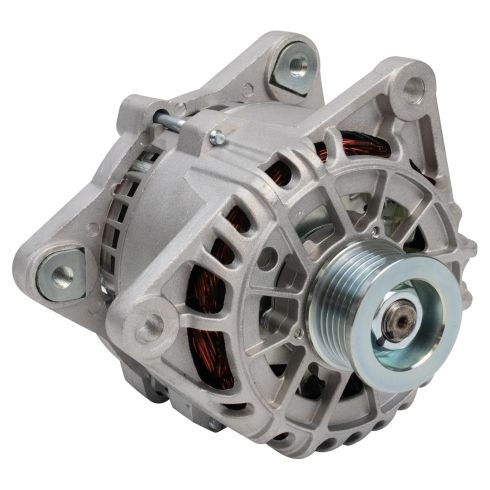
Ford Focus Alternator TRQ ALA94453
- Yes
- 110 A
- 12 VDC
- Serpentine
- 6
- 63 mm
- 22.5 mm
- FORD
- Clockwise (Right)
- No
- No
- Internal
- Yes
- No
- 0.91 in
- 2.48 in

How to Replace Alternator 1994-2005 Ford Explorer 4-0L
Battery ran down? You might need a new alternator! Check out this video to learn how to replace it in your 94-05 Ford Explorer

