
How to Replace Camshaft Position Sensor 2003-09 Toyota 4Runner
Created on: 2019-10-16
Check out this video to learn how to replace the camshaft position sensor on your 03-09 Toyota 4Runner.
-
step 1 :Removing the Camshaft Position Sensor
- Remove the two 10 mm nuts to remove the engine cover
- Remove the 10 mm camshaft position sensor bolt
- Remove the camshaft position sensor
- Disconnect the electrical connector
-
step 2 :Installing the Camshaft Position Sensor
- Apply grease to the O ring of the sensor
- Insert the sensor into position
- Connect the electrical connector
- Install the 10 mm bolt
- Install the engine cover, positioning the rear hooks first
Tools needed
-
Socket Extensions
10mm Socket
Ratchet
Pocket Screwdriver
Hey friends. It's Len here from 1A Auto. Today we're going to be working on our 2006 Toyota 4Runner and I want to show you how to remove and install a cam sensor. If you need this or any other part, check us out, 1AAuto.com. Thanks.
Okay friends, so now that we've got the hood up, going to take a look at this cover, this has to come off. You're going to notice a 10 millimeter right here and a 10 millimeter nut there. Can use a ratchet, you can use your electric device, whatever you've got, just remove the nut. Looks like that. Nothing too special. Do this one, same as the first. We'll set it aside. Grab your cover lift it straight up like this and then you're going to draw it towards you. You're going to notice you got a little hooky-do there and there and those just kind of sit right on this rubber and that rubber. We'll set this aside.
If you look right under here, you're going to be able to see right where your cam sensor is located. You've got your wiring harness that leads to it, and then of course you've got your mounting bolt right there. This is also a 10 millimeter. I'm going to use my ratchet and a 10 millimeter socket. We'll remove that mounting bolt and then we'll see if we can pull out the sensor and get it over to a working position where we can get the wiring harness off.
We're just going to take out this bolt that's got a, it's a nice and long bolt, obviously. Just takes a couple extra turns here to get it out apparently. Here we go. That's what our bolt looks like. We'll set this aside. Grab the sensor, try to wiggle it around, make sure it breaks free and then draw it up or away from the engine there. Pull that right out of there. Awesome. We have a clear view of what we're dealing with. On the backside you can see where the little clippy-do is. You're going to squeeze that. This is going to lift up and it should unlock for you. Give it a squeeze, if you notice the lock doesn't come up far enough, you could use something as simple as a pocket screwdriver. Just stick it in, try to give that a lift and then just separate it just like that.
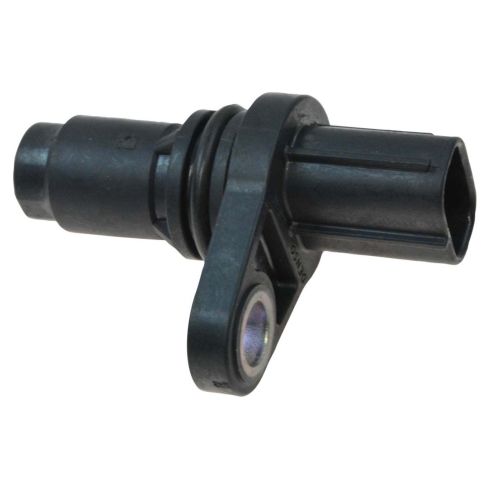
Awesome. There's our sensor. Let's do a quick product comparison and we can move along. Okay, so we have our brand new cam sensor here. It's time for the install. Okay, so you'll notice right along your sensor you have this little rubber O-ring. It's a good idea to put something on there that's going to act as a lubricant. You can use some silicone paste or a tiny amount of grease, whatever you might happen to have. If you had to, you could use a little bit of oil, but you need some sort of lubricant because when it presses into the engine, this needs to slide. Let's bring it right over. See if we can't slide it in.
Awesome. I'm going to take my clip, take a peek, make sure you don't see any funny colors in there. If you see any blues, oranges, reds, pretty much anything besides metal, you know you got a problem. This one looks great. We're going to just connect it right in. Listen for a click. Perfect. We have our mounting bolt right under here. See if we can get it started. All right, so now we're just going to snug that right up. I just switched to a ratchet wrench just because it's a little bit finer tooth for me and I can get it in here a little easier than that ratchet. Still sticking with my 10 millimeter. It's just a wrench instead of a ratchet with a socket.
Okay. Sounds like it just bottomed out right there. I'm just going to give it a teeny little tweak and that's it. I'm just going to grab that wiring harness, give it a tug. It does not want to come off. I would say that's definitely locked in. We can move along. We've got our little hooky-dos on the cover here and then the rubber's right there as I showed you before. I just go just like this, so I can see. Slide them on there. We're going to bring this down nice and easy. We're going to line up the studs with the holes. Perfect. We've got our two nuts, they're both the same. We'll snug these up, give it a little tug. That feels good. Make sure you have all your tools and parts out from underneath the hood and down the road you go.
Thanks for watching. Visit 1AAuto.com for quality auto parts shipped to your door, the place for DIY auto repair. And if you enjoyed this video, please click the subscribe button.
Shop Products

How to Code a New Vehicle Ignition Lock Cylinder Step by Step Guide
How to properly code a new ignition cylinder to fit your old keys.

