
How to Replace CV Axle Shaft 1995-2005 Chevy Cavalier
Created on: 2013-08-26
Check out this video to learn how to replace the CV axles on your 95-05 Chevy Cavalier.
-
step 1 :Removing the Wheel
- Loosen the lug nut caps with a 19mm socket
- Pull off the hub cap
- Loosen the lug nuts with the vehicle on the ground
- Raise the vehicle with a floor jack
- Secure the vehicle on jack stands
- Remove the lug nuts
- Pull off the wheel
-
step 2 :Removing the Axle
- Apply penetrating oil to the axle nut
- Remove the hub nut with a 30mm socket and breaker bar
- Remove the hub nut washer
- Apply penetrating oil to the axle splines
- Push the axle out of the hub with a hammer and a block of wood
- Turn the spindle assembly by hand
- Apply penetrating oil to the strut assembly nuts
- Loosen the 21mm nuts from the strut assembly with a breaker bar and pipe for leverage
- Remove the 21mm nuts with a ratchet
- Tap the bolts out of the strut assembly with a hammer
- Pull apart the lower nut and spindle with a pry bar
- Apply penetrating oil to the brake line bracket bolt
- Remove the 13mm bolt from the brake line bracket
- Pull the spindle back and pull the axle out of the hub
- Pry the axle away from the output housing with a pry bar
- Pull the axle out by hand
-
step 3 :Installing the New Axle
- Push the transmission end of the axle in, making sure the clip locks in
- Push the axle all the way in, and push the hub end into the hub
- Install the hub nut and washer
- Preliminarily tighten the hub nut
- Insert the 13mm bolt into the brake line bracket
- Line up the spindle with the strut assembly
- Insert the bolts into the strut assembly
- Tap the bolts in with a hammer
- Put the 21mm nuts on to the strut bolts
- Tighten the 21mm nuts to 100 foot-pounds of torque
-
step 4 :Reattaching the Wheel
- Slide the wheel into place
- Start the lug nuts by hand
- Tighten the lug nuts preliminarily
- Lower the vehicle to the ground
- Tighten the hub nut to between 145-150 foot-pounds
- Tighten the lug nuts to 90 foot-pounds in a crossing or star pattern
- Put the hub cap on, lining up the notch with the valve stem
- Tighten the lug nut covers with a 19mm socket
Tools needed
-
13mm Socket
A Piece of Pipe (for leverage)
Torque Wrench
Hammer
Rust Penetrant
Pry Bar
Jack Stands
19mm Socket
Block of Wood
21mm Socket
30mm Socket
Ratchet
Floor Jack
1/2 Inch Breaker Bar
Brought to you by 1AAuto.com, your source for quality replacement parts and the best service on the Internet.
Hi, I'm Don from 1A Auto. I hope this how-to video helps you out, and next time you need parts for your vehicle, think of 1AAuto.com. Thanks.
In this video, we're going to show you how to replace the front axle. On this particular one, we're going to do the front right on a 2000 Chevy Cavalier. This is for a Cavalier with the 3-speed automatic transmission. It's going to be fundamentally the same operation of the right axle to the left axle. To perform this repair, you're going to need a new axle shaft from 1AAuto, a jack and jack stands, 30, 21, 19, and 13 mm sockets and socket wrench, breaker bar and a pipe to go over it if you need extra leverage, as well as a pry bar.
Take a 19 mm socket and, by hand, remove the lug nut caps that are attached to the hubcap. Once you have done that, pull your hubcap off. If you don't have the benefit of air tools, start with the vehicle on the ground. Loosen the lug nuts first, then raise and secure the vehicle. Remove the lug nuts the rest of the way as well as the wheel and tire. Put a little oil on the axle nut. Using a 30 mm socket impact wrench. If you don't have that tool, you can use a long breaker bar while somebody holds their foot on the brake to keep the axle from spinning. Also remove the washer that goes behind that nut. I'm putting a little bit more oil on the axle splines. I'm going to use a block of wood and a hammer to hit the axle out of the hub.
Two nuts hold the lower end of the strut to the steering knuckle. Turn the whole spindle assembly so you can get better access. I'm going to use some oil and spray down those two nuts on the lower part of the strut assembly just to make it easier for them to come off. Using a 21mm socket with a breaker bar and a pipe for extra leverage, I want to break those nuts free, both the top and the bottom. Once I've got those nuts loose, I'm going to use a ratchet to make it faster for me to get those off. Now fast forward as I take those two nuts off. I'm going to use a hammer to tap out the bolts that go through. Be sure not to hit too hard or hit the threads because you don't want to have a hard time putting the nut back on. Use a pry bar or a long screwdriver and pull apart the lower strut and the spindle. We need a little bit more room, clearance, to get that axle out of the hub so I'm going to remove the bracket that holds the flexible line to the solid brake line. That's going to give me an extra inch. That's a 13mm. I'm going to go ahead and fast forward as I remove that bolt.
Now I've got enough room to pull the spindle back and pull the axle out of the hub. Here's a view of where we're going to pry the right side axle out from. Under the car, for the right side axle, I'm prying between the axle shaft itself and the output housing. Once that's loose, give it a couple of tugs, and there's a little sur-clip inside that keeps it in, and it'll come right out.
To reinstall the axle shaft, put the transmission end in, make sure it lines up. Push it in firmly and make sure that the clip locks in. Do it a couple of times, make sure to push it in a couple of times, twist it, and then you can re-seat the hub end just by pushing it all the way in and then pushing it into the hub. Reinstall the washer and the nut that go on the end of the axle.
Here, we're just kind of preliminarily tightening the nut. We actually didn't get a shot of torquing it. You want to torque this nut after you put the wheel back on and you have the vehicle on the ground. You want to torque it between 145 and 150 foot-pounds. Reinstall the 13mm bolt that holds the brake line to the inner wheel well and I'll fast forward as I tighten that back up. Now, line up your spindle with your strut assembly and get it to the point where the holes line up and you can reinstall your bolts. Those bolts are splined a little bit so you can go ahead and use a hammer and seat them there fully before going ahead and using or putting the nuts back on. Once I've got those seated, I will reinstall the 21mm nuts that go on the ends and I'll fast forward as I tighten those up. With those two tight, I'll go ahead and torque them to 100 foot-pounds.
You can reinstall your wheel at this point and get the five lug nuts tight. With the car back on the ground or the wheel back on the ground, I'm going to torque the lug nuts to 90 foot pounds in a star pattern. Once I've got that done, I'm going to use the 19mm socket to tighten up the plastic caps on the hubcap. Just remember, there is a notch in the hubcap here for the valve stem. You're going to want to line those up. Once I've got those lined up, go ahead and tighten them up.
We hope this video helps you out. Brought to you by www.1AAuto.com, your source for quality replacement parts and the best service on the Internet. Please feel free to call us toll-free, 888-844-3393. We're the company that's here for you on the Internet and in person.
Shop Products


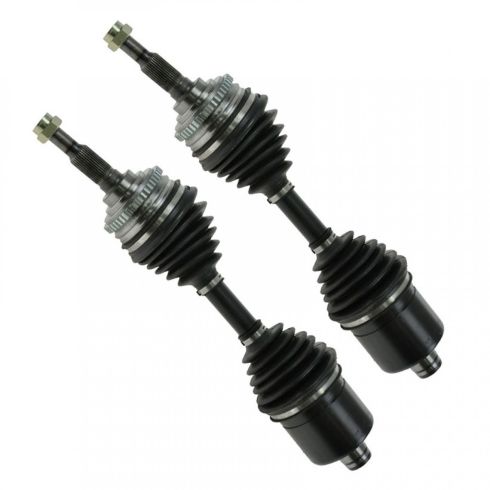
1995-05 Chevrolet Cavalier Pontiac Sunfire Front Driver & Passenger Side 2 Piece CV Axle Assembly Set Cardone Reman CAACS00009
- 2 Piece
- (1) Front Driver Side CV Axle Assembly
- (1) Front Passenger Side CV Axle Assembly

How to Replace Front Driver Side CV Axle 2011-15 Chevy Cruze
This video shows you how to install a driver side CV axle on your 2011-15 Chevy Cruze.

