
How to Replace Door Latch Cable 2007-13 Chevy Silverado
Created on: 2019-02-15
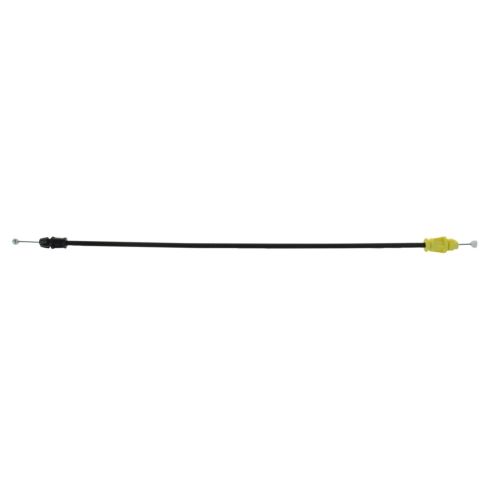
How to replace a door latch cable on 07, 08, 09, 10, 11, 12, 13 Chevy Silverado
Tools needed
-
Socket Extensions
T30 Driver
Window Crank Removal Tool
10mm Socket
Ratchet
Needle nose pliers
Trim Tool Set
Hi, I'm Mike from 1A Auto. We've been selling auto parts for over 30 years.
What's up, guys? I'm Andy from 1A Auto. Today I'm going to show you how to remove and reinstall a manual door inside cable for this 2008 Chevy Silverado work truck. If you need this part or other parts for your vehicle, click the link in the description and head over to 1aauto.com.
Open the door. We're going to remove this window crank. We need a window crank removal tool, so we're going to position the window crank in this up position right here. Take the tool. If you want to put it in the same location that it was, you could mark it before you take this off. And then once you get this, slide this down. There's a little pin, a little clip we have to remove. Just push it down and then it slides right off.
To take this lock button off, I'm just going to use a pick tool. Just get in behind here, slide that little lock piece off and slide the button off. Next, underneath here, I'm gonna take a trim tool. Just slide under here. You can use a pick also. Get underneath there. Slide this cover off.
Next, we're going to take this cover off. Take my pick tool or a trim tool. Slide the cover off. There's a clip right there, a clip right there. We're going to use a 10mm socket, an extension, and a ratchet. And there's three bolts. One bolt here and two bolts there. Take those out. Might have to hold this handle up a little bit to get this bolt out. Take that bolt out. Take that bolt out. We'll just use a magnet to take that bolt out.
Next, we're going to take this trim piece off. I'll just use my trim tool behind here and pry. It's just clips that hold this on. Three clips hold on.
Next, I'm going to use a trim tool. I'm going to pop these clips holding the door panel on. Just go around the perimeter of the door panel and pop it off.
Once those are all popped off, you should be able to release right there. We're going to need to release the handle cable right here. There is two ears on the bottom of this door panel so you can put it in service position so that you can leave it there while you're working. All right, to take this cable off the inner door handle, I'm just going to use some needle nose pliers. Get in there, just get it squeezed. There's a tab, a couple tab I'm going to squeeze on the cable. That will release. Sometimes if you twist it a little bit it helps out. Pull that cable, slide it off, and then there's a ball on the end of the cable. This is where the two tabs are. You just need to squeeze these two tabs just like that to release it. Now I can grab the door panel and just slide it out.
If you rolled your window down, we're going to roll it up at this point. And I'll just take the handle off. Next, we're gonna take this inner vapor barrier off, or insulation off. We're just going to slide. Some sticky adhesive is attaching it to the door. Generally it peels right off fairly easily. Just being careful not to rip this. If it does rip, you can use some tape to tape it back together. Just fold it down out of the way.
I'm going to take these two plugs off first--we'll just use a trim tool. Pull those off. We want to disconnect these rods that go from the door handle to the door latch. There is a little yellow retainer right here that holds it on. You need to grab with your fingers on the back side. I'm going to slide it out, pop it off just like that and that rod will come off. And for the top rod that goes to the lock cylinder, I'm just going to take the rod and I'm going to push it towards the outside of the door. Sometimes it's is a little bit tricky. I'm going to try using a pick tool. Get in here and twist it. Almost.
I'm going to take these Torx screws out. I'm going to use a T30 Torx bit and a ratchet. Once I get to the last one, I'm going to have to support the latch. Grab it from the inside, push it on, and you can grab the latch. Now I'm sliding it out. There is a connector connected to it. So I'm going to try to disconnect the connector. Move this cable out of my way first. Kind of hard to see this connector. I'll pull it out once I get it disconnected. All right. I'm going to have to pull this piece out right here, this grommet. For the lock rod, in order to slide the lock rod down, we're going to take the latch and we're just going to twist it around the window regulator. Just like that. And slide it right out.
To a show you how this works, I'll just plug it in. And as you can see as I push this down, it is stuck in the connector and it's in the lock position. I just push up underneath here to release it. Take your pick tool or a screwdriver just under here. It slides right out. Just like that.
To take this cable off, I'm just going to use some needle nose pliers. Just going to grab right here, these two tabs, push down, and slide the cable out. Let's do that again. Squeeze these two tabs, slide that out like that, and I can move this little latch. Slide that out.
We're going to reinstall this cable. We're going to slide this piece underneath this little latch first. Slide that out just like that, then we'll push this cable on and lock it in place.
To reinstall this latch, we're going to slide this cable around the window regulator first. Make sure these rods are facing upwards. And then we're going to twist this around the back just like that. And this this lock rod to the lock rod button. It's going to go through here and we'll guide that up. And then the other rod, you're just gonna push that to the back. Just keep that back there for now. As long as this lock rod is in position right here, then we can start the bolts on the outside. Get these started. Then I'll take my T30 Torx socket and a ratchet, just start tightening these up. I'm going to tighten them down evenly first. Once they're all like that then I'm going to just go back and snug them all down. All right, that's good.
Next, we can connect this connector. It's kind of hard to see. Reach in there, push the connector into position, and then push down on the lock and then I'll suck it the rest of the way in. We'll just slide this into position here--a little latch for that and then this was under here before. Just like that. This little cover can go over this rod, the lock rod, just like that. Then on the inside, this rod is going to go to the lock, the door lock cylinder. We're going to get it lined up. There's like a V and it's going to go in the middle of the V and you grab it and just pull to lock it into place.
You're going to push this into this retainer. It's like a door, you open the door. This is going to get it lined up right there. Once that rod is in there you can close the door. Make sure that's latched you can grab the handle, just make sure that operates properly.
Now slide this into position. Pull the cable through here like that. There's a hole right here that the door has a pin that goes through there, so get that lined up. That looks pretty good. A lot of times on these door panels, this little bracket breaks off the door panel right here. It's a common problem. It's not something that's extremely crucial for putting the door panel back on, the door panel will stay in position even with that broken, so don't worry about that too much. We can take the door panel and make sure this lock rod goes through that hole right there. That's good right there. Get this little door pin in the hole on this side. Once that's in position, make sure the rest is there. Once that's all, all the pins are lined up, you can start pushing it on.
I'll reattach this. If you had a foam insulator, you would put that in there now. This vehicle doesn't have one. Line these pins up, lock that in place. We're going to take these two bolts right underneath the handle, use our 10mm socket, extension, and ratchet. Just get that one started and then I'll get the other one started. Snug it up. Then I'll snug up the other one. And down below here underneath the handle, get this bolt in and tighten it down. Snug it down.
Take these two covers. This one's going to go down below. There's a little pin right there that goes through that hole, so you know which direction it goes. Get that in position. Lock it in place. This one is going to go in this position. There's a pin little slot there. Lock that in place. All right,
now I'm going to install the new crank handle. Remember this washer? It's going to go on the backside. You just put this into position. Put it on the same way that you took off the old handle. Get it lined up. Make sure it's locked in place and it's good to go.
Then we'll take this lock button. Make sure this lock rod is all the way up. We'll take the button, slide it into position, and then push down on the lock part. Make sure it works properly. Then you're all set.
Thanks for watching. Visit us 1aauto.com for quality auto parts, fast and free shipping, and the best customer service in the industry.


How To Replace Door Latch Cable 2004-08 Ford F150
How to remove, install, or replace a broken, snapped, rusted, or jammed door latch cable on 04, 05, 06, 07, 08 Ford F150, pickup, truck.

