
How to Replace Door Lock Actuator 1997-2005 Chevy Venture
Created on: 2011-02-16
This video will show you how to replace the door lock actuator on your 97-05 Chevy Venture or Pontiac Montana. You can do it yourself and 1A Auto shows how
-
step 1 :Remove the door panel
- See our other videos for a more detailed breakdown on how to go about this.
- Carefully remove your water shield.
-
step 2 :Unlock your window from your window track
- Depress the tabs on the clips holding the window to the track, and slide the actuator track to the side.
- Lift the window up and secure with painters tape.
-
step 3 :Remove the door handle
- Remove the three bolts mounting the door handle using a 10 mm socket, ratchet and extension.
- Unplug the actuator lead.
- Pull the door handle out of the outside of the door.
- Unclip the door lock and door latch rods.
-
step 4 :Disconnect the speaker
- Detach the wiring harness from the door.
- Disconnect the speaker.
-
step 5 :Move the window actuator out of the way.
- Remove the five 10 mm bolts.
-
step 6 :Prepare to remove the door lock actuator
- Remove the three screws on the edge of the door securing the lock actuator
- Unpin the weather strip and move it out of the way.
- Unplug the lead and pull the window actuator out.
- Use a screwdriver to unclip the plastic mounting piece holding the door lock actuator to the window actuator.
- Disconnect the door lock and door latch rods.
- Pull the door lock actuator assembly out and unscrew the actuator from the assembly.
-
step 7 :Install the new door lock actuator
- Secure the new actuator to the door lock assembly with a Phillips screwdriver.
- Put the bracket back on the door lock actuator and mount the door lock assembly onto it.
- Transfer the clip from your old actuator to the new one.
- Clip the door lock and door latch rods into the door lock actuator assembly.
- Install the whole thing into the door panel.
- Plug the wiring harness back in and clip the wiring harness neatly back along the window regulator.
- Bolt the window actuator and door lock actuator assembly back in using your socket and ratchet.
-
step 8 :Reassemble the rest of the door
- Plug the window actuator
- Reinstall the speaker and plug in the wiring harness for it.
- Test that the lock works ok.
- Replace the weather stripping
- Reinstall the door handle, clip in the lock and latch rods and bolt in the 10 mm bolts.
- Replace the rubber plug.
- Lower your window down into the actuator track and secure it with the clips.
- If you want to see a more detailed breakdown of the door panel re-installation, check out our other videos.
Tools needed
-
T10 Torx Driver
Socket Extensions
Flat Blade Screwdriver
T30 Driver
Painter's Tape
10mm Socket
Ratchet
Brought to you by 1AAuto.com. Your source for quality replacement parts and the best service on the internet. Hi, I'm Mike Green. I'm one of the owners of 1A Auto. I want to help you save time and money repairing and maintaining your vehicle. I'm going to use my 20+ years experience restoring and repairing cars and trucks like this to show you the correct way to install parts from 1AAuto.com. The right parts installed correctly, that's going to save you time and money. Thank you and enjoy the video.
In this video we're going to show you how to replace the door lock actuator on this '98 Chevy Venture, same as most '97 to 05s. We going to do the driver's side which is the same as the passengers' side, also same as the Montana, Silhouette. This is a long video because you have to take a lot of things apart. Nothing is all that difficult, just involved. The tools you'll need are a flat blade screwdriver, a 10mm socket with a ratchet and extension. Some painter's tape, a T30 Torx bit and ratchet driver and a T10 Torx driver. The first step is going to be to take the door panel off. I'm going to speed through this. If you want to see this video in regular speed you can check out our other videos for the Venture door panel removal. You just remove, it's pretty easy actually. Remove your switch panel, the little plate from behind the door handle, a couple bolts, and then release some pins and pull the door panel off. Then remove your water shield. Next you want to unlock your window from your window track. Sounds a little weird but basically there's a couple tabs. One here and then one here, and you press those tabs and at the same time slide your; you can see this is sliding. Slide your window track back and that unlocks the window. Now you can see I lifted the window up; I used some painters tape just to secure it. With your window up and out of the way you're going to want to remove three bolts. One there, one through this hole here, and one through this hole which I already removed there's a black plug on the end that I removed. Let's see if I can see that bolt in there. There it is right there. You removed those three bolts, they're 10mm bolts. You'll want a ratchet with a 10mm socket and extension. I'll get right in there.
Obviously you don't this long of an extension, but probably a six inch will do. As you're removing these if you can be careful not to let them fall down, but if they do they fall down and you can grab them as you'll see. They fall right down. Now you're going to want to unplug this lead here. From the outside take your handle, pull it out. Then use a screwdriver and work it right in there. Push that out. Then your handle, pull this harness out and your handle comes up and off. What you want to do is to keep these rods kind of put, they have little clips right here and you can clip them in so they'll stay put.
Now you're going to want to take these harnesses apart. They pull out and there's one pin right here that you can either pull, you might use a pair of pliers and tug a little on it. You'll want to disconnect your power window motor, which is pushing up on a little clip here and pulling that out. Now remove your speaker. Use a screwdriver to pry a little tab here and the speaker comes out. Just press on it with your screwdriver, a little tab and remove the lead. Now you'll want to remove 10mm bolts, the one, two, three, four, five and there should be a sixth one here. This vehicle is missing one. You'll notice I didn't remove this one all the way, it actually can slide out. Next you'll need a T30 Torx bit and you'll want to remove these three screws here. Then you can see here there's a weather strip. It's actually held on by a pin here. That pin's already broken on this vehicle. This must have been taken apart before. You can pull that weather strip up and out. Now you're going to want to pull this out, up and out. These harnesses slide that up. This harness here is connected in and what we can do now is take our screwdriver and push that forward. There's a little tab that locks it. This whole thing comes out. There's a little bolt in here.
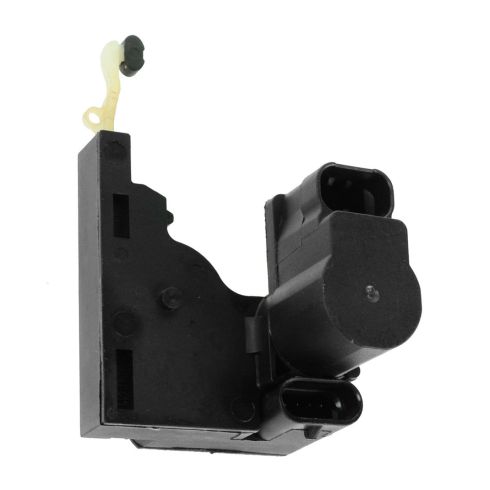
Here's our lock mechanism that has our actuator. It's got two rods into it that just turn. Just turn like that and it comes off. Here's our lock mechanism with our actuator. Here's our new actuator so you can see there's two screws here, one, two. These are T10 Torx screws so you remove them. Then your actuator comes down and off. Then the new one, the biggest part of this is this little rubber bumper down here goes into this indent and pushes in. Then you push your actuator down and on. Then we put these screws in, start the second one. Now to reinstall, this is a little bracket that helps you put everything back together. What you'll want to do is put this bracket back on if you took it off, just by sliding it in and then pulling it back. Then your actuator put these two rods into these grommets. Pull it back and then turn it and then that bracket goes into the back of the actuator and locks everything in place. Then these two rods, this one clips right there. On your old actuator there's another little clip here that you can pull off and it clips on there so this rod then goes right up there and clips on. The assembly can go back up and in. Before you get too far make sure you bring these harnesses back up and around and pull this back. Plug in your harnesses here. The black one goes to your upper connection and then this one goes right down here. This one slides onto here and goes down below. That's routed correctly. These to there and now you can push this all back in. Okay, I wrestled with this a little bit here.
What I learned actually, if you dip the back part way down then slide it back and then bring the back up into place it prevents those rods from getting hung up and that's what I'm messing with here. One of our longer screws, start it in right here. When you're sliding that back you may get these rods hanging up in here. Just be aware of that as you're sliding it back. Put our hand through the door handle hole. Start these three. Now we'll start our other screws just to make we have everything in place. I'll fast forward through putting those bolts in, just putting them in finger tight and now I'm going to actually turn my attention to the wiring. Make sure all the harnesses are all routed the same way. Plug the window motor back in and then again still making sure those wires are all routed the same way. Now we'll fast forward even faster through tightening up those bolts and they should nice and snug. They don't have to be too tight. Let's reinstall our speaker. Plug it in. These two tabs go in and it locks in place. Now we'll fast forward tightening up those three T30 screws for the lock mechanism. Okay, we just hook up our door handle and our switch. We do a quick test with the control.
Okay, everything seems to be working correctly. Make sure we leave it unlocked. You're going to want to put this piece of weather strip back up and in. Slide it in here and there's a whole channel that it kind of pops into. Make sure it's right there and if you were able to get this pin apart then you can put the pin back in. You want to do this one first. You want to feed your harness in here and make sure it goes behind this channel here so it doesn't get stuck in the window. Put that on first and now put that on. Push your handle in from the inside; you can see I've got my extension and my 10mm socket. Carefully feed my bolt in there. We'll fast forward through that same procedure for the other two bolts. Then you want to use your ratchet handle and tighten them up nice and snug. They don't have to be too tight. Then finally reconnect your power lock harness. Then put that little rubber grommet or plug back in. Get one side in and squeeze it in. Slowly bring your window down. Make sure it stays in its track. Slide the track back. The window does need to go into these black clips here; slide that back and secure it. Okay and like in the beginning I'm going to fast forward through and put the water shield back on and the door panel. Again, if you want to see this part in regular motion, just check out our other videos for the venture door panel installation and removal.
We hope this helps you out. Brought to you by www.1AAuto.com, your source for quality replacement parts and the best service on the internet. Please feel free to call us toll free 888-844-3393. We're the company that's here for you on the internet and in person.
Shop Products

How to Replace Door Lock Actuator 2002-06 Chevy Trailblazer
Check out this video to learn how to replace the door lock actuator on your 02-06 Chevy Trailblazer, or GMC Envoy.

