
How to Replace Front Brake Pads and Rotors 2007-09 Chevy Equinox
Created on: 2017-01-06
This video will show you how to remove, clean, prepare, and install the front brake rotors and pads 07-09 Chevy Equinox
-
step 1 :Removing the Wheel
- Loosen the 19mm lug nuts with the vehicle on the ground
- Raise the vehicle with a floor jack
- Secure the vehicle on jack stands
- Remove the lug nuts
- Pull off the wheel
-
step 2 :Removing the Brake Pads
- Remove the T30 Torx bit from the rotor
- Remove 14mm bolts from the brake caliper
- Pry the brake pads into the caliper with a flat blade screwdriver to push in the pistons
- Pull the caliper aside
- Pry the brake pads off with a flat blade screwdriver
-
step 3 :Removing the Brake Rotor
- Remove 18mm bolts from the brake caliper bracket
- Pull off the brake caliper bracket
- Pull the rotor off
- If the rotor will not come off, thread the lug nuts and strike the hub area of the rotor with the ball end of a ball peen hammer
-
step 4 :Cleaning the Brake Parts
- Clean off any rust on the hub/centerbore with a wire brush
- Coat the hub with brake grease
- Install the rotor backwards and clean it with brake parts cleaner
- Install the rotor and spray the front with brake parts cleaner
- Reinstall the T30 Torx screw to the rotor
- Remove the brake shims
- Clean the shims with a wire brush
- Remove the brake pad slides
- Apply anti-seize fluid or white grease to the slides
- Push the slides on with a flat blade screwdriver
-
step 5 :Installing the Caliper Bracket
- Put the bracket back into place
- Start the 18mm bolts by hand
- Tighten the bolts to 137 foot-pounds of torque
-
step 6 :Installing the New Brake Pads
- Put an old pad in the caliper
- Use a large C-clamp and the old pad to push the pistons back
- Install the new brake pads into the bracket
- Apply brake grease to the pads
- Put the caliper on
- Thread bolts by hand
- Tighten 14mm bolts to 20 foot-pounds
- Clean the rotor with brake parts cleaner or mineral spirits
-
step 7 :Reattaching the Wheel
- Slide the wheel into place
- Start the lug nuts by hand
- Tighten the lug nuts preliminarily
- Lower the vehicle to the ground
- Tighten the lug nuts to 100 foot-pounds in a crossing or star pattern
Tools needed
-
Large C-Clamp
Socket Extensions
Torque Wrench
14mm Socket
Hammer
Channel-Lock Pliers
Jack Stands
18mm Socket
19mm Socket
Flat Blade Screwdriver
T30 Bit
Bungee Cord
Anti-Seize Grease
Ratchet
Wire Brush
Floor Jack
1/2 Inch Breaker Bar
Hi, I'm Mike from 1AAuto. We've been selling auto parts for over 30 years! We're dedicated to delivering quality auto parts, expert customer service, and fast and free shipping, all backed by our 100% satisfaction guarantee. So visit us at 1AAuto.com, your trusted source for quality auto parts.
In this video, we're going to be working with our 2008 Chevy Equinox 3.4-liter V6 all-wheel drive. We're going to show you how to remove and replace your vehicle's front brake pads and rotors. We recommend that these always be done together, as well as any pair. So, you do your pads and rotors on both your front left and front right wheel.
If you like this video, please click subscribe. We have a ton more information on this and many other vehicles. If you want these parts for your car, you can follow the link down in the description over to 1AAuto.com.
Here are the items you'll need for this repair: 14-19mm socket, ratchet, socket extensions, breaker bar, T-30 Torx bit, bungee cord, mechanic wire, hammer, wire brush, brake grease, brake cleaner, flat blade screwdriver, groove jaw pliers, torque wrench
Using a 19mm socket and breaker bar, loosen all of your lug nuts about one turn with the weight of the vehicle on the tire. This will make it easier to remove them once we raise and support the vehicle. Raise and support your vehicle.
We're doing this on a lift to make it easier to show you what's going on. However, this job could easily be done in your garage or driveway using a jack and jack stands. Remove the rest of your lug nuts by hand. Remove the wheel and tire from the vehicle. Sometimes they get a little stuck on there, because it's an aluminum wheel on a steel hub. You have to wiggle them a little bit to break them free.
Using the T30 Torx bit and a ratchet, loosen up that bolt. Thought I might've needed that pry bar to counter support it, so it wouldn't turn. However, this one came out nice and easy. Remove the two 14mm caliper bolts, one at the top and one at the bottom, with a 14mm socket and ratchet. Be sure to crack both of these loose before removing either one fully. Remove the caliper. Secure it up and out of the way with a bungee cord, zip ties, or mechanics wire. Remove the pads from the slides. You can use a flat blade screwdriver if you need a little more leverage here.
These are coming out pretty easy. Using an 18mm socket and breaker bar, loosen the caliper bracket bolts. Again, you're going to want to get both of these loose before you remove either one fully. Once you've cracked them loose, you should be able to remove them the rest of the way with a socket and ratchet. Remove the caliper bracket and place off to the side.
Remove the rotor. Ours is frozen on there pretty good. We're not reusing our rotors. We can hit it just about anywhere to make sure it pops off the hub. However, if you plan to reuse yours, hitting it in between the studs can get it off without damaging anything. Your rotors are really stuck on, you're just going to have to knock them off and replace them.
Here we have our old brake pads and rotors that we removed from our vehicle, and our new parts from 1AAuto.com. As you can see, these parts are exactly the same with the same size rotor. They're also vented. They have the same 5-bolt lug pattern, same centerbore. The same bolt location for your rotor screw. Same brake pads. You can see why it was time to change these out. That's almost completely worn away. These probably had a couple thousand miles left on them. It's a lot better to change your brakes just before they need it, rather than after the fact, to make sure that your vehicle is always operating and stopping safely.
Each side also comes with one of these brake squealers. Which is designed to start dragging against the rotor and making some noise to give you an audible alert that it's almost time to do your brakes. You can see we have some rust and corrosion build up. These marks are from removing it with a hammer. They were pretty well frozen on there. We have a nice, smooth, even surface on our new rotor. If your old brakes are squealing, not stopping the way they should be, grinding, or are creating a pulsating brake pedal from a warped rotor. These new parts from 1A Auto are going to go in direct fit just like your original equipment. We fix you up right.
Using a steel wire brush or some Emory cloth sandpaper, or something like that, to remove the rust build up on the face of your hub. Clean that, as well as the centerbore, to make sure that there's no rust build up that'll make our rotors sit unevenly or freeze on prematurely. Once you've removed the bulk of the rust, we're going to apply a thin coat of brake grease to the face of the hub, as well as around the centerbore of the hub. This will make sure that if we ever need to remove our rotor, should it be an axle, a wheel bearing, the spindle, or something else, that we need to take our hub off, that it comes of easily. We don't have to hit it with a hammer, like you saw earlier. Making sure that it's removable and reusable down the road. As well as, making future brake jobs easier.
Install the rotor onto the hub backwards. Spray it down with some brake cleaner. This removes the coating they use to keep these from rusting in storage. Turn it around. Make sure you line up that beveled hole. Put the threads in the hub for your rotor screw. Spray down this side as well. Lay the rotor flat on the hub. Reinstall your T30 Torx screw.
If your brake clips, or shims here, have some heavy corrosion or are cracked or broken in any way you'll need to replace them. Ours looks okay. We'll just pop them off. Go nice and easy to try not to bend them. It may help to use a flat blade screwdriver just to help pop that up, especially in the middle. We'll use this small wire brush to clean all the rust and corrosion out of the places that that shim rides on. Once that's cleaned up, we'll clean up the shim itself. We'll grease the contact surface. Again, just a thin coat of brake grease here. Reinstall the clip. Grease the clip itself. Remove the slide from its rubber boot by holding down the boot. Pulling the slide out, if there's old grease that looks bad on there, wipe that off with a paper towel. Ours is okay. We'll put a little thicker coat of grease on there.
Reinstall it into the slide. Repeat all these steps on the opposite side of the caliper carrier. Reinstall the caliper bracket with your 18mm bolts. Tighten the bolts down with your 18mm socket and ratchet. Torque the bolts to 137 foot-pounds. Install your brake pad. I'm placing the rear one with the squealer at the top. That's how it came off of the vehicle. Sometimes they will interfere with the caliper if you place them in certain ways. I like to just put them back however they came off. We'll apply a thin coat of grease to the back. Do the same thing with the pad on the front. Using a pair of groove jaw pliers, slowly compress each caliper piston. If you go too fast you'll start pushing the other one out. Make sure both are fully seated.
We'll remove our bungee cord, mechanics wire, zip tie, or whatever it is you used to secure your caliper. Place it back on to the caliper bracket and pads. Reinstall the two 14mm brake caliper bolts. These don't get a ton of torque. I'm just going to bring them down as far as I can by hand, go straight to the torque wrench. However, you can use a socket and ratchet if you're having a harder time. Torque the caliper bolts to 20 foot-pounds.
Reinstall your wheel and tire. Get all five of your lug nuts on as tight as you can by hand. Lower your vehicle until the weight is back on the tires. Torque your lug nuts to 100 foot-pounds in a cross-pattern. Match the brakes on the other side using this same procedure. You're good to go.
Thanks for watching. Visit us at 1AAuto.com for quality auto parts, fast and free shipping, and the best customer service in the industry.
Shop Products


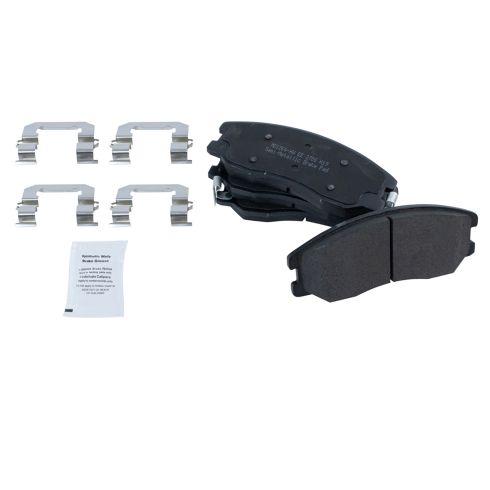
Chevrolet Pontiac Saturn Suzuki Front Semi-Metallic Brake Pads TRQ BFA73711
- Semi-Metallic
- Premium Posi
- Contact Point Grease
- Hardware

How to Replace Drum Brakes on Any Vehicle
The common features of drum brakes so that you can learn how to replace the brakes on your specific vehicle.

