
How to Replace Front Caliper 2007-14 Toyota FJ Cruiser
Created on: 2019-07-26
Watch this video to learn how to replace a brake caliper on your 07-14 Toyota FJ Cruiser! 1A Auto shows you how to do it yourself!
-
step 1 :Removing the Wheel
- Raise the vehicle with minimal weight on the wheel
- Loosen the six 21 mm lug nuts
- Raise and support the vehicle
- Remove the six lug nuts
- Remove the wheel
-
step 2 :Removing the Brakes
- Pry against the brake pads to compress the brake pistons slightly
- Remove the brake line retaining clip
- Remove the 12 mm bolt to remove the brake line retaining bracket
- Remove the tie rod cotter pin
- Remove the 19 mm tie rod castle nut
- Hammer on the knuckle to loosen the tie rod and remove it
- Remove the two 17 mm caliper bolts
- Remove the brake caliper and hang or support it
- Remove the brake rotor
- Remove the two brake caliper pin retaining clips
- Remove the two brake caliper pins
- Remove the brake pad spreader spring
- Remove the brake pads
-
step 3 :Replacing the Brake Caliper
- Temporarily remount the caliper loosely
- Loosen the 10 mm brake line nut
- Pinch the brake flex hose with pinch-off pliers
- Disconnect the brake line from the caliper
- Remove the caliper
- Loosely install the new caliper
- Reconnect the brake line to the new caliper
- Remove the caliper for the next step
-
step 4 :Installing the Brakes
- Apply brake grease to the pad surfaces of the brake caliper, and the rims of the pistons
- Install the brake caliper
- Install the two 17 mm brake caliper bolts
- Torque the 17 mm caliper bolts to 91 ft-lb
- Install the brake pads into the caliper
- Install the upper caliper pin threaded through the spreader spring
- Install the caliper pin retaining clip
- Insert the spreader spring ends into the brake pads
- Install the lower caliper pin
- Install the lower caliper pin retaining clip
- Reinstall the brake line retaining bracket
- Reinstall the 12 mm brake line retaining bracket bolt
- Reinstall the brake line retaining clip
- Remove the temporarily installed lug nut
- Reinstall the tie rod into the wheel knuckle
- Install the 19 mm tie rod castle nut
- Torque the 19 mm castle nut to 67 ft-lb, continue tightening to align the castle nut with the cotter pin hole if necessary
- Insert and peen the cotter pin
- Check the brake fluid reservoir and top it off if necessary
- Open the 8 mm brake bleeder screw to gravity bleed the new caliper
- Close the bleeder when the fluid flows in a steady stream
- Press the brake pedal to seat the brake pads
- Perform a full brake bleed
-
step 5 :Installing the Wheel
- Install the wheel onto the wheel studs
- Install the six lug nuts and tighten them by hand in a crossing pattern
- Lower the vehicle with minimal weight on the wheel
- Torque the 21 mm lug nuts to 85 ft-lb in a crossing pattern
Tools needed
-
12mm Socket
Socket Extensions
Torque Wrench
Hammer
Pry Bar
17mm Socket
Jack Stands
Pocket Screwdriver
21mm Socket
Side Cutters
Flat Blade Screwdriver
Ratchet
Floor Jack
1/2 Inch Breaker Bar
Hey, friends. It's Len here at 1A Auto. Today, I'm working on a 2007 Toyota FJ Cruiser, and I want to show you how to replace the front calipers. It's going to be a very easy job. If you need any parts, you can always check us out at 1AAuto.com. Thanks.
Okay, so what we're going to do first is we're going to take off these six lug nuts, 21 millimeter. You can use a ratchet and a socket if you want, or your air gun. There we are. Got the wheel broken free. Drop this down. Wheel out of the way. Okay, so now we're just going to try to push back the caliper a little bit. I'm just going to go like this. Just try to push back these pistons, best I can. This is just to release the pads from the rotor. Cool. Okay. The rotor can move around freely. If we need to, we can push them back a little further in a minute.
Now, we're going to remove the caliper. One of the first things we need to do is take off this clip right here. Generally, cutters have worked pretty good for this to grab onto it. I'm going to grab some in a second here. There we are. Now this line can move around. It's very important, so when you take your caliper off, it can move around a little bit. I'm going to use a 12 millimeter up here on this bolt. That's going to remove this bracket so it can move around. Get the socket off of there. There we are. Okay. The bracket can move around freely. I'm going to take these off right here. If it's easier and you wanted to, you could take off the outer tie rod end. I'm probably going to do that, that way I can turn this, and I can get to those bolts easier.
Just grab some cutters. There we are. Just wiggle this around. If you have a new cotter pin, you don't have to worry about saving this one, but if you don't, you're going to have to try to save it. We do have new ones, so I'm not super worried about it. This one doesn't look like it's coming out, so I'm just going to cut that off of there. Tie rod and nut is a 19 millimeter. There we are. Took that off of there, 19 millimeter. Just going to give the knuckle a couple of bonks. I want to be careful not to damage the threads on the tie rod or hit the boot. Super important, you don't break your boot open. If you do, you'll have to replace the outer tie rod end. All right. Come around this way. There we are.
Now when we go to install this, we're going to have to make sure that we get that cotter pin out of there. Okay. Because we want to put a new one in there. We'll set this aside. Now we can pivot this, and we can do what we need to do. We're going to use a 17 millimeter to remove the two bolts for the caliper to the knuckle. Same thing to the other one. At this point, the caliper may come down. You want to make sure you hold onto it so it doesn't fall down and hang too far. Bolt number two is the same as the first. Set it aside with the other one.
Now, I want to hang the caliper, not by its flex hose, obviously, so just grab whenever you've got, a coat hanger or something that everybody would have. There we are. We can remove our front rotor. Okay, so now on the brakes, you've got these little clips right here, you can just use a pocket screwdriver, try to pull it right out of there. The way that this one situated straight up against the bolt here, so that's pretty much what your clips going to look like. I'm just going to squeeze this back in. When it's time to re-install it, I'll show you at that point. We'll get the other one out, right along the backside here. There we are. Clip number two, same as the first. Set it aside. With a small hammer, give these pins a couple bonks. Try to drive them out. That's going to release the pads, so the pads may come falling out. So make sure you don't have your face under there or anything like that. Obviously, a little bit of penetrant goes a long way with these. Now I'm just going to use a small punch and I'm going to drive these right out. Okay. Do the other one here. Can we grab our clip and my pocket screwdriver, it's going to go right along this ear right here. Pull it up. This one, same thing.
Might need a stronger screwdriver than this one to get the pads out. They like to stick in there. Okay. It's definitely in there pretty good. Just drive these pins the rest of the way out here. That's what your pin looks like. There's two of them there. They're the exact same. That hole's where the clip went through. I'm just going to use my small hammer, try to give this a couple loving bonks, see if it will come off, a little bit of penetrant. Why not? Okay. Get this out of here. That's what your brake pad looks like. We'll set this aside. Do the same to the other one. Brake pad number two. Let me get this off of here. Put that bracket aside. Just get our caliber. I'm going to bring it back over to where I got it from, right over here.
What I'm going to do now is I'm just going to start in these bolts. Now, I'm going to try to loosen up this line. It's a good idea to spray it down with some penetrant. Okay. If you have penetrant spray, spray it in there. That's a 10 millimeter. Safety glasses, of course. Sometimes the line might want to spin with it, you just got to try to take your time and try to break it free, okay? You don't want your line twisting. You can twist the line and you'll break it or crimp it. Both of those would be very bad. Now that we have the line nice and loose, I'm just going to bring it back to the snugged point where it's not leaking out. We're going to take off these, we'll hang this again. We're going to grab our new caliper and new pads, put them on here, and then we'll put the line in.
So we're going to pinch off our flex hose. Let's use some hose clamp pliers. These are gentle on the flex hose, but they'll stop the fluid from running out. Now that we have that on there, we're going to re-loosen this. There will be some fluid that comes out, so make sure you're wearing eye protection, hand protection, and, of course, have a collection bucket of some sort to collect your fluid. I'm just using a 10 millimeter still. Get this line off of here. There we are. Set our line aside. Okay. We're going to remove our bolts again. There's our left front caliper.
Okay, so what I like to do is I like to put one bolt in, just a little bit here. That just holds the caliper from falling down. I'm going to take my brake line, and line it up so that the threads are getting ready to go in. I like to wobble it around as I go here, just to see if it's actually threading, or if it's just sliding, or skipping a little bit. Okay. Put a little light on the situation up here, and now we've got it started in. I'm going to grab my flare wrench here and caliper down. That's nice and tight.
Now, it's always a good idea to use a little bit of caliper grease on your caliper. I like to go right along the edge right here. That's where the edges of your pads are going to ride, so you want to make sure that you don't get a lot of moisture accumulation there, right up along here. You've got the holes where your caliper slider pins go through, that's where your pad slide. Do the same up on top here. There we are. Just get up on those holes. Let's grab a little bit more. Okay. Now, we're just going to do along the pistons. This is going to help with vibration, dampening, noise reduction. There we are. Cool.
Carefully put it back over. Grab your mounting bolts. If you want to use a little thread locker on these, you can. It's your prerogative. For the purpose of this video, I'm not going to worry about it. We're just going to turn these all the way in, and then we'll torque them down. Now, we're going to torque down these two bolts to 91 foot pounds using a 17 millimeter. I'm just going to turn that. Okay, I'm going to check them again real quick. Okay. Torque, torqued, tight. We can move along.
We've got our pads, our little wear indicator. The wear indicator goes on the inside. I'm just going to slide this right in here, just like that. Do the outer pad, no wear indicator. We've got our two pins, we've got a clip that goes across, and we've got the two clips that hold the pins in at the end. So what we're going to do here, we're going to take our first pin, start bringing it through. Go like that. Put it through the clip again, through the pad, and then through the caliper, just like that. We've got it sticking out right there.
Just going to use our little clip. This will slide through, and make sure it's clipped in so it can't fall out. Okay. Now you just take these little ears and you put them into the slots in the pads, slots in the pads. Okay. These little ears right here, go over the top, and then you have the little prongs, those go into the holes in the pads right there. Take our second one and do the same thing. This one's a little easier because we don't have a clip. Put that in there. There we are. Cool beans. It looks pretty good. If you wanted it to, you can add a little bit more lube to go in between where the pins go into the calipers. You really don't need very much, but it'll help keep them moving if they need to move. So there's that.
We'll get this out of here. We can set our bracket back up, got the hole for the bolt, and then the hole for the ear on the bracket, just going to go like this. I'm going to turn it, so there's less pressure. I'm just going to come up here. A bolt like this, you definitely don't need to use thread locker on it. It might actually be better to use a little bit of Never Seize, if you have access to some, but I'm not going to worry about it for the purpose of this video. I'm going to use my 12 millimeter, tighten this up. Okay.
Take our line, try to bring it down so we can see the groove. We're going to use this clip. This is going to go through with the little flippy ear facing our thumb. We'll just try to bring it in. Sometimes getting these in is pretty difficult. I'm just going to loosen this up again real quick, a little bit. Maybe that will let us get some more movement out of this. Let's set it up where we need it. As soon as I let go, it goes back. Okay. Now, I'm just going to bonk that in with what I have in my hand. A small hammer would work for this. Okay. Just mount this back up. Tight. Okay, tight, tight, all that's tight. Okay.
We've got this right here. When we took it apart we had to break the cotter pin, so I'm just going to need to drill that out real quick, so I'll do that. Okay. So, we get the hole through that, easy-peasy. Now, we'll just clean it off, and we can tighten it down, and put a brand new cotter pin in there. Now we're just going to take the tie rod nut, we're going to bottom it out, and then we'll go ahead and torque it down using my 19 millimeter. We'll go with the assumption that it doesn't want to tightened down, it's just spinning inside the knuckle there. Something you can do if you have access to a long pry bar, just apply upward pressure. Be careful, of course, for your axle, wherever you need to go that you're not pressing on your axle. I'm just going to keep moving around until I find a nice safe spot. That'll be all right, I guess. I'm just going to apply upward pressure. There we are.
Now we're going to go ahead and torque this down, and then we're going to have to bring it continually clockwise until we get to the closest slot that lines us up with our locking point. Okay. We're going to torque this down to 67 foot pounds. Okay, that's torqued. Now it's important to pay attention to, like I said before, where the holes are, there's a hole right here, but it kind of lines up with the castle on that, the castle part of the castle nut, so we need to bring it a little further until it lines up. I'm just going to use my ratchet. I'm just going to go as far as I feel like I need to here, a little bit more. There we are. Slide that right through. It's your prerogative how you want to set this. Some people go side to side, one ear to the other side. Some people go over the top. As long as it's bent and it can't come out on its own, you're doing all right. So you do you, Booboo. Get that on there. That cotter pin can go nowhere. There's no way that this nut's going to be able to loosen up on its own, and the tire rod won't be able to come off causing the wheel to go out of control. So, we're tight, tight, everything's tight coming around here. Perfect. Clear to move onto the next step.
Okay. Now that we've got our caliper on there, what you would want to do next is you want to make sure that your brake fluid's topped off. Okay. It's pretty much close to the maximum line in the master cylinder. Then, you're going to get inside your vehicle, you're going to pump up the break a few times, nice and slow, okay? Til you start to feel something of a pedal. Once you start feeling something of a pedal, you would want to come back underneath, and you're going to gravity bleed your system, so you just take your eight millimeter wrench, open up this bleeder screw, wait til you see fluid coming out. This is called gravity bleeding because it's just using gravity to draw fluid out. Once you've got a pretty good trickle of fluid, you would just take your eight millimeter, snug it up, and then you would want to continue with a manual bleed of your system.
We have videos on that. We also offer a self-bleeding kit that you can get at 1AAuto.com. So, assuming that you get it all done, you got it all bled out, it's nice and good. Make sure that your fluids topped off. Then, take it for a road test. Easy-peasy, nice and easy. Let's get that on there. There we are. We got a few good threads, we can let go, and grab the other five lug nuts. We'll bottom them out, and then we'll bring it down, torque it up. We're going to take our 21 millimeter socket, we're going to torque down our six lug nuts. Okay. You're going to try to make like a star or snowflake pattern, basically crisscross. Okay. You don't want to go around in a circle. All right. If you want to go around again, go around again, 85 foot pounds.
Thanks for watching. Visit at 1AAuto.com for quality auto parts shipped to your door, the place for DIY auto repair. And, if you enjoyed this video, please click the subscribe button.
Shop Products


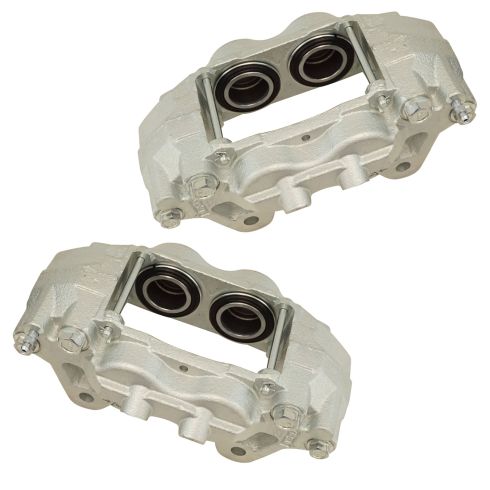
Toyota Front Driver & Passenger Side 2 Piece Brake Caliper Set Raybestos Element 3 RABCS00022
- 2 Piece
- (1) Front Passenger Side Brake Caliper with Mounting Bracket & Hardware
- (1) Front Driver Side Brake Caliper with Mounting Bracket & Hardware

How to Remove a Stuck Brake Bleeder Screw
Watch this video to learn how to remove a brake bleeder screw that’s stuck or rusted on. The experts at 1A Auto will show you how to loosen a stuck screw and bleed your brakes.

