
How to Replace Front Calipers 2004-08 Ford F150
Created on: 2020-08-06
This video shows you how to install a new front brake caliper on your 2004-08 Ford F-150
Tools needed
-
Torque Wrench
Socket Extensions
14mm Socket
Rust Penetrant
Pry Bar
Jack Stands
Liquid Thread Locker
Brake Parts Cleaner
Hose Pinch-Off Pliers
Flat Blade Screwdriver
Socket Driver
Brake Fluid
Wheel Chocks
Brake Grease
Drain Pan
Ratchet
Floor Jack
Swivel
1/2 Inch Impact Gun
Okay, friends, to get started on this job, the first thing that we need to talk about is safety. You want hand protection and eye protection at all times. With that said, safely raise and support your vehicle so you have your front wheel off the ground. We're gonna remove this center cover and then we're gonna remove the lug nuts as well. Get your wheel off of here. Okay, friends, now that we've got the wheel off of here, we have a clear view of our caliper. Of course, when we go to remove the caliper, we're gonna have to take the flex hose off of it. Flex hose is gonna have fluid inside there. We wanna make sure we have a nice collection bucket and it's also gonna be helpful if you have some hose pliers.
Put the bucket on the ground directly underneath where the fluid might come out of and then put our hose pliers right on the flex hose and this is just gonna help try to keep the majority of the fluid in the system. Okay. Now before we go ahead and take off our flex hose, there's a couple things that I wanna do. First, I wanna get the ABS wire away from here so I have a little extra slack. We don't have to worry about damaging it. A little bit of space. Awesome. The next thing I wanna do is remove these two bolts right here. Those are holding the caliper bracket to the knuckle. Once I get them out, I'm just gonna start one in just a couple threads that way there it's holding still and then I'll remove this.
There's that upper one. A couple of good threads like I said just for safety. Take your 14-millimeter and remove your banjo bolt. We wanna pay attention to these gaskets right here. We're not gonna be reusing them in any way but you definitely wanna make sure they come off of the flex hose. There we are. We got our flex hose off of here. Just give it a quick peek. Make sure it's in good enough condition to clean up. This one looks fair, so we'll move along. Let's get this caliper off of here now, and of course, dump out any existing fluid. Now it's time to quickly compare your calipers. Just make sure they're, overall, the same looking and, of course, the bleeder screw's on the same side. Once you've done that, we're gonna go ahead and get the pads out of this one.
A lot of times when you're replacing your caliper, it's gonna be due to a reason that could potentially cause issues with the pads. For us personally, our pads are in brand new condition due to another video that we did. So all I'm gonna do is remove these from here. Otherwise, if yours are in poor condition, it's a great idea to replace them anyway. I'm just gonna push this through like that. Take it out. Slide this. Do the same thing. There we are. Inspect your pads. Make sure they're in great condition. Recycle your caliper. Now it's gonna be time to prep our brand new caliper.
I always like to take off my bolts so I can get to where my sliders are because I wanna take a peek at those. Flip this right up. We'll set this part aside. Now we'll just turn this around. We can move our sliders around. These feel like they're flowing perfectly. Just double-check to make sure their boots are in great condition. Of course, they're brand new so they should be good but I always like to take a peek. Next, I'm just gonna take a little bit of caliper grease and I'm gonna go along this area here, here and then, of course, on the other side. You wanna lubricate any area that's gonna have tins on it. Your kit should have came with some brand new tins. We're gonna make sure we use those.
As you look at them, you're gonna see they have a little flippy do here. Kinda comes off shooting out. That needs to get pressed into this area of the caliper bracket. That's, kinda, what holds it in there. Put this on just like that and then, of course, squeeze right in the center and push it in. Give it a tug. Make sure it's not gonna fall off. Do the same to the other one. Also in your kit, came these little springs. These springs are gonna be what holds the pads separated from each other. If you wanted to, you can do this the way that I'm gonna do it now which is on the bench.
I'm just gonna put the caliper all the way together and then, of course, when we get over to the vehicle, we'll mount it on and then we'll torque everything down. I'll just take my pad. Slide it in right here. Should fit right into the tins. There we are. Do the same for the outer. Okay. We've got both pads in there. We'll put these here for now and then we're gonna move along to right here. On the caliper itself, you wanna add a little bit of the caliper grease along the piston itself right there and then, of course, on these three prongs right along here. That's gonna help with vibration dampening and noise reduction overall.
Now we're just gonna take our little springs. We're gonna put them into the pad. When you put them in, they should slide right into the hole and you're gonna notice it's gonna wanna push the pad out. It should stop once it gets to the little lip right there on each side. Take your caliper, slide it right over the top of these. Now it's gonna be time to install these. It's a great idea to use a tiny bit of thread locker, but we'll call it your prerogative. Let's just bottom these out. Back at the vehicle, next thing we need to do is clean up the flex hose, the area where those gasket is gonna be. I'm just gonna spray it down with a little bit of parts cleaner. Try to wipe it down with a rag.
If it seems as though there's still a lot of crud on there, you could try to pick it off with a screwdriver or a tiny piece of sandpaper, whatever you need to do but it needs to be clean. Go ahead and grab onto that caliper. We're gonna slide it right over the rotor here. There we are. We'll take our two bolts. Of course, if you wanna use a little thread locker, once again, it's your prerogative. Put them in, bottom it out, and then we'll torque them to manufacturer specifications. Now let's go ahead and torque these caliper bolts to 47 foot-pounds. Now we're gonna torque our caliper bracket bolts to 148 foot-pounds. Okay. It's gonna be time to get our flex hose on here. Let's go ahead and get this little piece out of our caliper. We're gonna use this in our old caliper. Now we have our brand new banjo bolt and, of course, two new gaskets. You absolutely need to use new gaskets, no matter what.
Put one of those gaskets right on the banjo bolt. Take the banjo bolt, go through your flex hose. Take your other gasket. Put it on that banjo bolt and now we'll go ahead and put it right onto the caliper and, of course, tighten it up. Okay. Once it's bottomed out, just go a teeny bit more. Give it a nice wiggle. Make sure it's not loose in any way. Remove your hose clamp pliers. Now it's gonna be time to get our ABS wire reconnected on here. You wanna make sure that's secure. If any of the clips are broken, make sure you use a wire tie to hold it on there.
Using a small pocket screwdriver, remove your bleeder screw cover. There we are. Set that aside. Next, what I always like to do is pump up the brake. You pump up the brake and then you come over here and you open up this bleeder screw. Okay. So, I got that pumped up. Now I'm just gonna use my 11. I'm gonna turn this so it's open and then we're just gonna watch right here for brake fluid to start coming out. As brake fluid starts coming out, you're also gonna see a whole bunch of air bubbles. Wait until you don't see any more air bubbles and then we'll continue on with a manual brake bleed. Okay. This is coming out great now.
So I'm just gonna go ahead and close this off and then, of course, we'll continue on with the manual bleed. Okay. So, now it's time for a manual bleed. Something that's important to remember before you go ahead and start that though is if you're replacing more than one caliper or more than one thing that's hydraulically related, you wanna start farthest from the master cylinder as possible. So, if you did anything in the left rear or the right rear, of course, you're gonna wanna go there. It's gonna go right rear, left rear, right front, left front. Where we're only doing the left front caliper right now, this is the only one you're gonna see.
With that said, we're gonna have somebody inside the vehicle. We're gonna make sure we check the brake fluid before we start this because, of course, we wanna have a full master cylinder. I know I do so I'm gonna continue. The person in the vehicle is gonna pump the brake three times slowly. On the third time, they're gonna stay holding and they're gonna hold the brake pedal. At that point, I'm gonna open up the bleeder and fluid's gonna come out. You wanna pay attention to make sure there's no air. Any time you see air, of course, you're gonna have to redo the service again and then once you don't see any more air, you should be all set. So here we go.
Go ahead and pump the brake for me. Here we go. So, I'm just gonna open this up. I can see a whole bunch of air bubbles coming out of there. Try to collect as much of this into the receptacle as possible. Okay. I'm closing it and now they're gonna pump it again. Once they're holding, we'll open it again carefully. Watch for those air bubbles. A lot of air. Let that go for a second here. All right. Go ahead and pump it again. Towards the end of that one, I noticed that I didn't see any more air coming out. It was just solid-fluid but at the beginning, I did see that there was air. So, that tells me that I wanna do it at least one more time and I wanna make sure I have a solid flow of fluid with no air. Let's try it again, please. Here we go.
Once again, still getting some more air but towards the end, I got minimal. Once again, we have to do it again. All right. I got a couple of tiny air bubbles on that one so let's just do it again. Okay. You can let up. At that point, I saw that it was a steady stream of fluid. So that tells me that this should be fine. If you wanted to go again, we'll call it your prerogative. Something else you wanna do is, of course, make sure you clean down any brake fluid that might have gotten on anything at all. Brake fluid will, of course, ruin any paint that it happens to touch on so you wanna clean that off and, of course, if any is on the ground, clean that up as well.
Now I'm just gonna grab my little boot here. I'm gonna pop it on there and we can move along. Now it's time to get our wheel back up on here. We'll start on all of our lug nuts, bottom them out, and then we're gonna torque them to 150 foot-pounds. Next, you need to get your vehicle so the tire is just barely on the ground so it can't spin. We're gonna torque the lug nuts, like I said, to 150 foot-pounds in a star pattern. Once you've torqued it, make sure you put back on your center cover, of course. You always wanna make sure you top off your brake fluid anytime you're done.
Shop Products


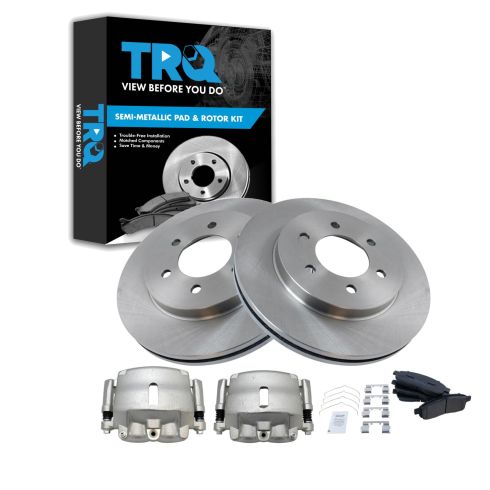
Ford F150 Lincoln Mark LT Front Semi-Metallic Brake Pad & Rotor Kit with Calipers TRQ BKA36055
- Semi-Metallic
- Premium Posi
- (2) Front Brake Calipers with Hardware
- (1) Front Semi-Metallic Brake Pad Set with Contact Point Grease & Hardware
- (2) Front Brake Rotors

How to Replace Rear Brake Caliper 2004-08 Ford F150
This video shows you how to install a new rear brake caliper on your 2004-08 Ford F-150.

