
How to Replace Front Inner Tie Rods 1997-2003 Ford F-150
Created on: 2017-06-20
How to repair, install, fix, change or replace loose and worn tie rods on 97, 98, 99, 00, 01, 02, 03 Ford F-150
-
step 1 :Removing the Wheel
- Loosen the five 19mm lug nuts
- Raise and support the vehicle
- Remove the lug nuts
- Slide the wheel off the hub
-
step 2 :Removing the Inner Tie Rod
- Loosen the jam nut with a 27mm wrench
- Remove the cotter pin from the castle nut with pliers
- Loosen the castle nut with a 13/16" wrench
- Thread the castle nut until its only on a couple of threads
- Strike the center link with a hammer to loosen the inner tie rod stud
- Place a pickle fork between the ball joint and the center link
- Tap the pickle for with a hammer to separate the tie rod stud from the center link
- If the stud will not come loose, thread the castle nut flush to the end of the stud
- Then strike the nut with a hammer
- If the stud still doesn't separate, heat the stud with a torch
- Then strike the nut with a hammer
- Hold the ball joint with locking pliers
- Remove the castle nut
- Separate the inner tie rod from the center link
- Twist the inner tie rod out of the adjuster sleeve, counting how many turns it takes to remove
- Twist the jam nut off the inner tie rod
-
step 3 :Installing the Inner Tie Rod
- Thread the jam nut onto the inner tie rod
- Twist the inner tie rod into the adjuster sleeve the same number of turns it took to remove
- Thread the jam nut until it reaches the adjuster sleeve
- Remove the castle nut from the tie rod ball joint
- Place the inner tie rod stud into the connector rod
- Thread the castle nut onto the tie rod stud
- Tighten the castle nut with a 3/4" wrench
- Line up the castle nut with the hole in the stud
- Feed the cotter pin through the hole
- Fold over the cotter pin with pliers
- Tighten the jam nut with a 27mm wrench
-
step 4 :Installing the Wheel
- Slide the wheel onto the hub
- Start the lug nuts
- Lower the vehicle to the ground
- Tighten the lug nuts to between 83 and 112 foot-pounds of torque in a star pattern
Tools needed
-
Torque Wrench
Blowtorch
Jack Stands
Complete Metric Wrench Set
Floor Jack
3/8 Inch Breaker Bar
Complete Metric Socket Set
Hi, I'm Mike from 1A Auto. We've been selling auto parts for over 30 years. We're dedicated to delivering quality auto parts, expert customer service, fast and free shipping, all backed by our 100% satisfaction guarantee. Visit us at 1AAuto.com, your trusted source for quality auto parts.
So in order to start this project you want to go ahead and loosen the wheel and the lug nuts here. We're going to use a breaker bar with a 19 millimeter socket. So next we're going to go ahead and raise and support your vehicle. You can use a jack and jack stands. In this case here we're using a lift to make it a little bit easier. Just go ahead and remove the lug nuts here just by using that socket because we've already loosened those. With the lug nuts removed we can now go ahead and remove the wheel and tire.
We're going to go ahead and replace this inner tir rod end here. We first have to start by loosening this jamb nut. Now, the jamb nut can vary in size, depending on your application. That's why we're choosing to use an adjustable wrench right here. We just want to loosen that. We don't want to crank it out so many threads, but just loosen that. All right.
The next step here, is we have to remove the cotter pin right here, that goes through the castle nut. We're going to start by getting some pliers in here. Pull that cotter pin right out. Next use your 13/16” and loosen that. Okay. I usually keep the castle nut on, just a few threads at this point.
You can try one of two methods. You can use a pickle fork to get between here and the center link and trying to pop that off, or, in your driveway, use the hammer, and you want to strike the end here. We're going to go ahead and try putting the pickle fork in here. In this case here, that didn't actually work, trying to use the pickle fork to remove this. What we're going to do is, I'm going to twist in on the castle nut, just so that the castle nut is flush with the top of the ball joint end here unit, on the inner tire rod.
We're going to try and hit this here, and push this out. All right. We tried the pickle fork. Didn't work. We tried leveling off the nut, and hitting this with the hammer, cause obviously this whole component's going to be replaced. In this case here, it looks like we're going to try some heat. Always be aware of your surroundings when using a torch. You want to make sure that you have fire extinguisher, or something to extinguish the fire, in case one should erupt. All right. We're going to try hitting this with the hammer. There we go.
We took advantage of this torn boot, and took some locking pliers here, put it right inside, and we crimp down right on that. We're finally able to get this nut to come off. All right. Now that this is free, go ahead and pull that out of the way.
Now in order to keep your base preliminary alignment, this here, the inner tire rod end, needs to thread in the same amount. What we're going to do is, we're going to take our new part, okay? We're going to unthread this here. We're going to count the amount of times that this threads out in a full revolution. Then when we're on the reassembly, we'll be able to get the same amount of count going in. All right. 26 full revolutions. Okay? Want to go ahead and unthread this here.
Here we have the old part. Here we have the new part from 1A Auto. It looks identical and identical installation. Now we want to go ahead and take our jam nut. We want to get this threaded on.
Now for the installation into the adjuster sleeve. All right. You want to go ahead and count the same amount of turns in, and then we'll go ahead and lock up the adjuster nut. Okay. So, you want to go ahead and bring this adjuster nut in. We're not going to lock that yet. We just want to snug it a little bit.
Bring this around. Obviously remove the castle nut. Now, you want to pay attention to this here on the installation, because you have a hole right here for your cotter pin to go back into, to anchor the castle nut. All right? We're going to spin this around. Get that lined up. Okay. So, on this nut, this is actually a ¾”. It may vary, depending on the application of vehicle. All right.
We'll go ahead and tighten this, and want to line up one of the grooves in the castle nut with the hole in the joint. Then we're going to go ahead and install the cotter pin. We'll go ahead and bend that over. This will pretty much lock that cotter pin. It'll lock that castle nut from coming back out. Just go ahead and bend this over here. Your final step is to go ahead and tighten up the adjuster sleeve anchoring nut.
All right, I'm going to go ahead and reinstall the tire. I'm going to go ahead and reinstall the lug nuts here. You want to get a few threads caught on all of these here. These lug nuts are 19 millimeters. So we're just going to snug these, bottom it out. Bottom the wheel out to the rotor. We're going to lower the vehicle down onto its own weight, and then do a final torque. With the vehicle on the ground, we're going to do a final torque of the wheel which is between 83 and 112 foot pounds. We're going to do it in a star pattern. All right, just double check the first one. She's all set.
Thanks for watching. Visit us at 1AAuto.com for quality auto parts, fast and free shipping, and the best customer service in the industry.
Shop Products
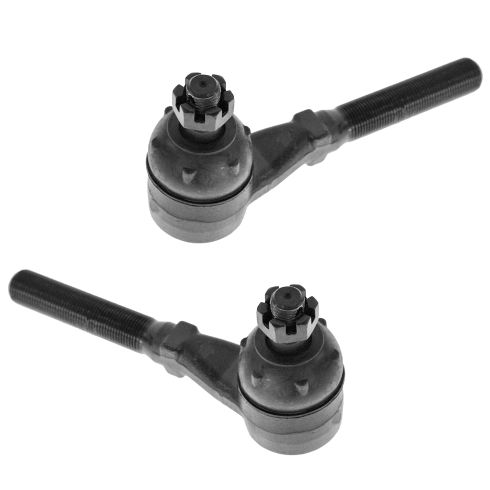
Ford Lincoln Front Driver & Passenger Side Inner 2 Piece Tie Rod Set TRQ PSA54822
- 2 Piece
- (1) Front Passenger Side Inner Tie Rod
- (1) Front Driver Side Inner Tie Rod

How to Replace Tie Rod Assembly 1998-2004 Nissan Frontier
If the tie rod needs to be replaced, this video will show how to remove it and prepare a new on one the 98-04 Nissan Frontier

