
How to Replace Front Window Regulator 1997-2005 Chevy Venture
Created on: 2011-02-14
Check out this video and learn how to replace the front window regulator on your 97-05 Chevy Venture or Pontiac Montana.
-
step 1 :Remove the door panel
- Pry up the switch plate and disconnect the power window switch from the wiring harness.
- Remove the two 10 mm bolts in the door pull.
- Unclip the door panel by working around the edges and pulling outward.
- Lift the door panel up and off.
- Carefully peel back the water shield
-
step 2 :Remove the window regulator
- Disconnect your window from the window regulator by pressing the tabs on the clips and unlatching them.
- Tape your window up out of the way.
- Use your pliers to release the balance spring and set it aside.
- Remove the window regulator.
- Uncrimp the window regulator with your pliers and slide it out of the window track.
-
step 3 :Install the new window regulator
- Slide the new regulator into the window track.
- Insert the assembly into the door.
- Mount the tracks back into place in the door.
- Replace the balancing spring and lock bolt.
- Plug the power window switch in to test the regulator.
- Unplug the power window switch after you have made any necessary adjustments
- Use your pliers to tighten the balancing spring back into place.
- Untape the window and slowly lower it back into the clips in the regulator.
-
step 4 :Reinstall the door panel
- Replace the water shield.
- Thread the wiring through the panel.
- Clip the door panel back onto the door.
- Replace the door handle bezel.
- Bolt the two 10 mm bolts back into the door panel.
- Connect the control switch panel and clip it back into the door pull.
Tools needed
-
10mm Socket
Channel-Lock Pliers
Flat Blade Screwdriver
Ratchet
Brought to you by 1AAuto.com, your source for quality replacement parts and the best service on the Internet. Hi, I'm Mike Green. I'm one of the owners of 1A Auto. I want to help you save time and money repairing and maintaining your vehicle. I'm going to use my 20+ years' experience restoring and repairing cars and trucks like this to show you the correct way to install parts from 1AAuto.com. The right parts, installed correctly. That's going to save you time and money. Thank you, and enjoy the video.
In this video, we're going to show you how to replace the driver's side window regulator, which is the same as the passenger side regulator on this '98 Venture, and that's basically the same as any '97-'05 Venture, Montana, Transport or Silhouette. Tools you'll need are a 10mm socket and ratchet, a flat-blade screwdriver, and a pair of large pliers. First, you're going to want to pry up this switch plate. Then actually unplug the 3 connectors. I find it easiest just to press on this black tab and then pry. Then this green one, the same thing. Use the screwdriver, press on that tab. Then this mirror switch; there's a little tab right here that you need to pry back with your fingernail or a screwdriver, then pull the connector out.
I've already done that before, so it looked kind of easy; that will require some force usually, the first time. Now, again with the screwdriver, I'm going to pry out this bezel here, got your door handle. Now there are two 10mm screws. One right in there, and one right down there. You need to remove those. We'll speed up removing those. I'm using a 10mm socket with a ratchet and extension. Those out, now there's just a series of pins around the outside perimeter and then 2 right in here that need pulled out. So you can use a putty knife or something to get underneath. I actually just worked my fingers right underneath up here. Then give a good tug. Work down further; give a good tug. Work my way right around the door panel, and then it comes off. Next you're going to want to remove your water shield carefully. Set it aside.
You want to unlock your window from your window track. Sounds a little weird but basically there's a couple tabs. One here, and then one here. You press those tabs; you press the tabs and at the same time - you see this is sliding - slide your window track back, and that unlocks the window. You can lift your window up. Now you can see I lifted the window up, and used some painter's tape just to secure it. With a nice big pair of pliers, to remove your window regulator, you're going to release this balance spring. This spring has a lot of tension on it, so when you get it off you want to be ready because it's going to want to turn your wrists. So grab hold of it. Bring it off and around. Take that right off. Turn this counterclockwise with the screwdriver while you hold onto the regulator, and then pull it out. That allows your regulator to come down. Right here, it's in another track. You just need to slide it back, and out of that track, and not get your hands pinched in there, and the regulator comes right out. Now what you want to do is take either your big pliers or needle-nose pliers, and the regulator has been crimped on the ends here, so you have to bend that back out. We'll try bigger pliers here.
So you release the crimp on that track; just keep in mind which way this is going. Slide your regulator out. Your regulator from 1A Auto, and just for comparison, you can see, it's just like the old one. Then what we'll do is I put a little bit of grease on my slider there. Slide that one in, then this little spacer goes in. Then that one slides in, so we're all set there again. Put it back in. First we'll get this in up here. You'll feel the end of this track here; get that in. The track kind of came apart a little bit; no big deal. Slide it in there. Lift it up into place. You have to have it kind of forward and slide it back to where the motor is. Put it in place here. Put that back on. Turn it to lock it in place. It's OK that it's in a different spot than where it was originally. What's easiest is to turn the key on, take your car window switch and run your regulator all the way up. We can take our pliers and crimp - I forgot to do this before, should have really done this before. Just crimp the end a little bit.
What we can do is you'll put this spring back on, and you want it down like that. Take your pliers, put them on nice and tight. Twist it around. Put it on. Regulator back down. Un-tape our window. Drop the window down slowly. There's clips that the window has to go into; it goes in between. You want to have this slid back. This slides forward, gets hooked on. Put the water shield back on. Re-install the door panel. Make sure you get all your harnesses up and through. I can look back here because it's easy to see this pin and guide it right in there. Then there's a pin in the front that just guides it. Put your bezel back in there. This screw I put into my extension socket first. You want to tighten up firm. You don't want it to be too tight because they just go into plastic so it could strip out. Switch panel. Mirror, lock, window, and you're all set.
We hope this helps you out. Brought to you by www.1AAuto.com, you're source for quality replacement parts and the best service on the Internet. Please feel free to call us, toll-free, 888-844-3393. We're the company that's here for you on the Internet and in person.
Shop Products


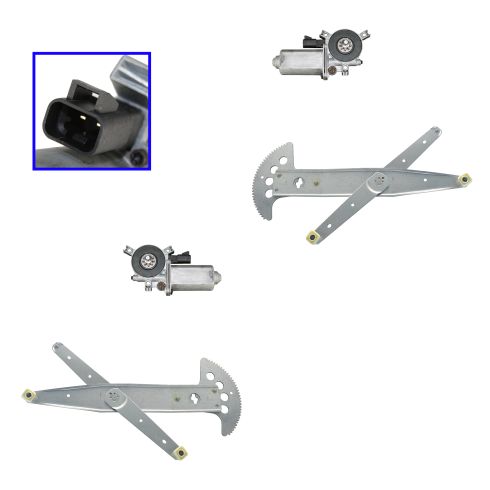
Front Power 4 Piece Window Regulator Set TRQ WRA50983
- Power
- (2) Front Power Window Motors
- (2) Front Window Regulators
- 4 Piece

How To Replace Manual Window Regulator 1980-96 Ford F150 F250 F350
Check out this video from 1A Auto to learn how you can replace the window regulator on your 80-96 Ford F-series truck.

