
How to Replace Heater Blower Motor 1992-96 Toyota Camry
Created on: 2011-01-14
If your 92-96 Toyota Camry is blowing weak or not at all, watch this video to learn how to replace the blower motor! 1A Auto experts will guide you
-
step 1 :Access the blower motor resistor
- Remove the lower vanity panel and set aside.
- Remove the two Phillips screws to remove the second piece of the vanity panel.
-
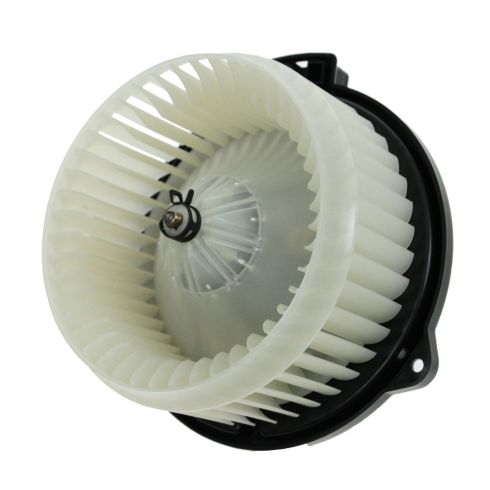
step 2 :Remove the Heater A/C blower motor
- Remove the wiring harness bracket by removing the screws with your screwdriver.
- Use your 8mm socket and driver to remove the two bolts around the motor.
- Pull the motor down.
- Unplug the wiring harness from the motor.
-
step 3 :Install the new Heater A/C blower motor
- Install the blower motor and plug everything back in.
- Bolt the motor back in with your 8mm socket and ratchet.
- Plug everything back in.
- Install the harness bracket with your screwdriver.
- Test and replace the vanity cover, screwing in the bolts with the screwdriver and click the second piece back in place.
Tools needed
-
Phillips Head Screwdriver
8mm Socket
Ratchet
Brought to you by 1A Auto.com-- your source for quality replacement parts and the best service on the internet.
Hi, I'm Mike Green. I'm one of the owners of 1A Auto. I want to help you save time and money repairing and maintaining your vehicle. I'm going to use my 20-something years experience restoring and repairing cars and trucks like this, to show you the correct way to install parts from 1AAuto.com. The right parts, installed correctly, that's going to save you time and money. Thank you, and enjoy the video.
In this video we'll be showing you how to replace the heater and AC fan on this 94 Camry, pretty much the same as any 92 - 96 Camry. The only tools you'll need are a Phillips screwdriver and an 8mm socket and driver.
First we're going to pull down on this panel right here. It pulls down and out. Next are two screws, one over here, and one over here. What you want to do is start on this side and pull it straight out. That comes down and off. Now, if you look underneath, you can see there's your motor there. There's this block of connections that needs to be moved and you can see actually one screw there, no there's two screws right there. You need to use a short, stubby screwdriver and remove those two screws. You'll want to use a short, stubby screwdriver like this to remove those two screws. Once you remove those screws, you can pull this out of the way, and you can see that the fan has three screws that hold it in. Here's your connection. You want to press the button right here and pull down.
I'm going to use an 8 mm socket and a driver to remove those three bolts. Once those bolts are out, the motor drops right down. Actually, you can see, with it came a little acorn which means mice or chipmunks have been throwing stuff in the vent and that's what can happen. They can get ruined by that. They can get jammed and then burn out, or they just wear out over time. They start making that groaning noise and eventually just stop working.
This is our original. This is a replacement from 1A Auto. You can see that they're all the same. They're going to mount in the same and hook up the same. Now we should re-install. The motor pushes up in there. Make sure all your harnesses are out of the way and it is shaped so it can only go in one way. There's a square area over there where that screw goes in. That goes toward the center of the vehicle. Now we'll start the screws and tighten them up.
Now that it's screwed in, reconnect your plug. Then you'll want to put this back and put your two screws back in. You'll want to put this piece of trim in. What you want to do is, you want to hook in this edge over here first. Press it in. Then install our two screws down low here. Lastly we want to put this trim panel back in. You can see this tab right here. It just goes back and rests in this hole here. So just put it up in like that. Push it up. Make sure our clips go in. Push each side up.
We hope this helps you out. Brought to you by www.1AAuto.com-- your source for quality replacement parts and the best service on the internet. Please feel free to call us toll-free, 888-844-3393. We're the company that is here for you on the internet and in person.
Shop Products

How to Replace Blower Motor with Fan Cage 1996-2013 GMC Savana
Follow along to learn how to replace the blower motor on your 96-13 GMC Savana or Chevy Express.

