How to Replace Idler Pulley 2005-10 Chrysler 300
Created on: 2017-01-18
How to repair, install, fix, change or replace a screeching, squeaking or worn engine idler pulley on 05, 06, 07, 08, 09, 10 Chrysler 300 3.5L V6
-
step 1 :Removing the Serpentine Belt
- Familiarize yourself with the serpentine belt with a belt diagram
- Place the 3/8 drive into the square drive at the bottom of the tensioner
- Rotate the tensioner clockwise
- Remove the serpentine belt
-
step 2 :Removing the Idler Pulley
- Pry off the idler pulley screw cover with a flat blade screwdriver
- Remove the T40 Torx screw from the idler pulley
- Pull off the idler pulley
-
step 3 :Installing the Idler Pulley
- Press the T40 screw and spring washer into the idler pulley
- Line up the idler pulley
- Tighten the T40 screw to 21 foot-pounds of torque
- Press on the screw cover
- Test that the pulley turns smoothly
-
step 4 :Installing the Serpentine Belt
- Have the ribs facing the engine, and slide the belt between the tensioner pulley and the engine
- Flip the belt so the smooth side is touching the tensioner pulley
- Loop the belt around the crank pulley
- Bring it around the A/C Compressor
- Bring it around the power steering pulley
- Bring it around the idler pulley
- Bring it around the belt tensioner
- Pull the tensioner clockwise with the 3/8 inch ratchet
- Bring it around the alternator
- Release the tensioner
Tools needed
-
Flat Blade Screwdriver
Torque Wrench
T40 Bit
1/2 Inch Breaker Bar
Hi, I'm Mike from 1A Auto. We've been selling auto parts for over 30 years. We're dedicated to delivering quality auto parts, expert customer service, fast and free shipping, all backed by our 100% satisfaction guarantee. Visit us at 1AAuto.com, your trusted source for quality auto parts.
In this video, we're going to be working with our 2006 Chrysler 300 3.5 liter V6. We're going to show you how to remove and replace the vehicle's idler pulley. If you like this video, please click subscribe. We have a ton more information on this and many other vehicles. If you need this part for your car, you can follow the link down in the description over to 1AAuto.com. Here are the items you'll need for this repair.
Before removing your serpentine belt, always be sure that you have a belt path diagram. Normally, there's one located on the radiator support, or on the bottom of the hood. However, if yours is missing, you can use a paint marker and simply draw up what you see on the belt path.
We'll start by drawing our pulleys. The first one I see here, is the power steering pulley at the top right. We'll put a P in there. Come across, and we have little one here. This is an idler, so we'll put an I in there. Come down to the bottom left corner, we have a little alternator pulley. Coming back, we have our tensioner, which I like to draw the pivot and a little arm with a little pulley on the end so we know that that's a tensioner. That loops around, and then right between the tensioner and the idler, we have our crank, which we'll draw much bigger, put a C on there. And then right about here, we have our A/C compressor. So now we'll just draw the belt along the outside of the pulleys, comes up, goes under the tensioner, around the crank, under the A/C, and around the power steering. I'm no artist, these are not great drawings by any means, however it follows the right path. I can see all the pulleys and they're marked, so it's all we need to make sure that everything goes back on correctly.
Using a 3/8 drive ratchet, place the square drive into the square 3/8 hole at the bottom of the tensioner and rotate it clockwise to release the pressure on the serpentine belt. Remove the belt from whatever pulley is easiest to reach. Remove your ratchet, and finish removing the belt from the pulleys.
Using a flat blade screwdriver, pop the cover off of the idler pulley so we can access the T40 Torx screw securing our pulley to the engine. With a T40 Torx bit and a ratchet, remove the center screw. The pulley will come off with it.
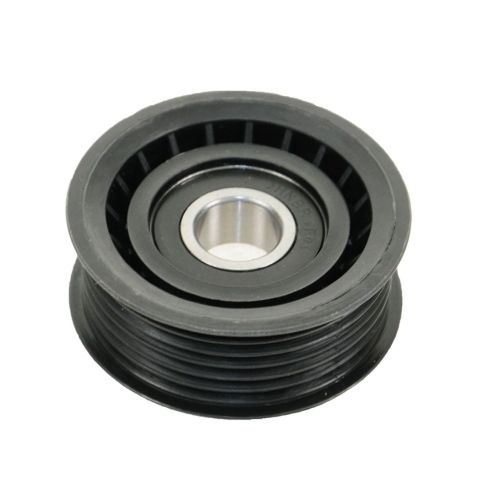
Here we have our old idler pulley that we removed from our vehicle and our new part from 1AAuto.com. As you can see, these parts are the same diameter and width. We have the same center hole and bearing, as well as the same width and number of grooves to make sure that our belt engages fully and properly. Your idler pulley is designed to pick up long gaps between parts. You can see in our vehicle that this pulley sits between the alternator and the power steering pump, which are actually on entirely opposite sides of the engine, and if just bridged normally would be a huge area to create slack and noise in your serpentine belt. With these are made out of plastic and contain a bearing, it is possible for these to crack, melt down a little bit if your belt's too tight and getting these really hot, or the bearing itself can seize and cause some issues. If you're having any of these problems, this new part from 1A Auto is going to go in direct fit just like your original equipment and fix you up right.
The idler screw bolt has a little spring washer around it, so you'll want to press it into the center of the pulley first. You'll see it won't come off easily then. We'll line it back up with the hole, get it in as tight as we can by hand, and then torque it to 21 foot-pounds. The actual torque spec is 250 inch-pounds, which works out to 20.8 foot-pounds. We'll just go for 21 to make things easier. Reinstall the plastic cap over the center. It just presses into place. Make sure that your pulley rolls smoothly and doesn't have any side-to-side play, and you can reinstall your belt.
Reinstall your serpentine belt. The best way to reinstall the belt is by flipping it with the ribs facing the engine, and sliding it between the tensioner pulley and the engine. Then flip it over so the smooth side is touching the tensioner pulley. Wrap it back under and over the crank, under the crank and around the A/C compressor. From there, go around the outside of the power steering pump. We'll go over the idler pulley. Ensure that your belt path is correct and that it isn't snagged or hung up anywhere. We'll keep the alternator part in hand, so when we crank our tensioner, we can slide it over the pulley. Double check that your belt path is correct and fully seated. Release the tensioner and remove your ratchet.
Thanks for watching. Visit us at 1AAuto.com for quality auto parts, fast and free shipping, and the best customer service in the industry.
Shop Products

How to Replace Idler Pulley 1991-99 Lincoln Town Car
Need to replace the idler pulley? Our experts in this video will show you how, including the sequence for removing and installing the serpentine belt

