
How to Replace Lower Control Arm 2000-06 Chevy Tahoe
Created on: 2020-06-18
Watch this video to learn how to install a new front lower control arm on your 2000-06 Chevy Tahoe.
Tools needed
-
24mm Socket
14mm Wrench
Torque Wrench
Hammer
14mm Socket
15mm Socket
18mm Socket
Safety Glasses
Pliers
Gloves
Wheel Chocks
Center Punch
Floor Jack
36mm Socket
22mm Socket
Marker / Writing Utensil
So before you do this job, you wanna keep in mind that after you're done, you're gonna have to go to an alignment shop and have the vehicle aligned so you don't burn out your tires and have premature tire wear.
Now, I'm gonna remove the wheel. Use a 22-millimeter socket. Take off the lug nuts. Take the wheel off. I'm gonna take the sway bar link out. Now this link's been replaced before. If you had the OEM link, you're gonna need to use some pliers at the top of this. For this one, I'm going to use a 14-millimeter wrench and a 14-millimeter socket on the bottom. And just take this out. If it's still good, you can reuse it.
All right, I'm gonna take these axle bolts out. Before I take this out, I just wanna mark the flange just so when I put it back together, it goes together the same way it came apart. Just use some paint or a marker. Now, I'm gonna use a 15-millimeter socket to take these bolts out. Now I can separate this and just slide this down out of the way. Now, I'll take a 36-millimeter socket and take the axle nut off, and take this washer off as well. There we go. Now, if the axle is stuck in there, you're gonna wanna use a punch and a hammer and tap it out that way. If it's not stuck, then you can just grab the axle and just slide it out.
Now we need to take the torsion bar keyways out. When we take this bolt out, you can take a tape measure and just measure where the bolt was. So a little more than half an inch, almost three quarters of an inch right there, so you can put it back to where it was. Or you can put a line on your socket and just count the threads when you take it out.
I'm using a 18-millimeter socket. Now, next I need to take this bracket out, but because the keyway is putting pressure on it, I can't take it out. So you need a special tool like this specifically made for this. There's a little nub on the top. There's a hole in this bracket right here. You just slide this through here over the cross-member as you tighten the keyway up. Once there's an air gap on top of that, you can take that bracket out.
Just try to slide this out. Watch your fingers. Once you get that out, you can take the tool off. All right. Now, I'm gonna use a punch and a big hammer and just tap. You wanna tap the torsion bar straight forward. And when it starts moving, just be careful of the keyway because the keyway could just fall. If that doesn't work, I'm gonna use an air chisel and try to slide that forward. There we go. Starting to get movement. You can take a little rust penetrant and spray down the cam and you can also spray down the lower control arm.
There we go. All right. So that popped out. And there's the keyway. All right. So there's no tension from the torsion bar on the lower control arm, but I'm gonna take a screw jack and just support the lower control arm, just about that much. And then I'm gonna take the shock bolt out. Use a 21-millimeter socket and a 21-millimeter wrench.
I'm gonna take that bolt out. Now, I can lower the screw jack. Now, the upper control arm is eventually gonna get supported by that ear right there. So once we take the control arm out, the knuckle is gonna fall a little bit, but it'll be supported right there, or even by the tension on the upper control arm bushings. I'm gonna take a 24-millimeter socket and loosen up this nut. We don't have to take it off completely. You can leave a couple threads on there. And then we're gonna separate the ball joint from the knuckle.
All right. I'm gonna use a pickle fork to separate this. There is other tools you could use that actually grab on here and just push it through. Use whatever works for you. There we go. And now I'm gonna take the control arm bushing bolts out. I'm gonna use a 15/16 wrench or a 24-millimeter wrench on the nut and then use an 18-millimeter socket on the bolt.
And I'm not gonna take the bolt out yet. I'm gonna get the other one off first. Now, there is a washer. Also, take those washers off. Now, try to slide those bolts out. You can tap them out with a hammer and use a pry bar. Just pry this out. I'll just slide the torsion bar straight forward, and then we can slide it back and just slide it out. Now we're gonna take this nut off and slide the control arm up.
When you take the torsion bar out, you wanna keep in mind which direction it came out. And if you mark it with the...which end is the back and which end is the front. Just take the grease fitting, get the grease fitting started and take a 7-millimeter wrench and just snug it up. That's good. All right. Now we'll just put this in the same way it came out. Start with the ball joint and put the nut on. Now, I'll just slide the torsion bar back in position. Remember the back goes towards the back of the vehicle. Slide this through the front, and go through the crossmember over here, and towards the back of the vehicle. All right.
All right. Now, just line the control arm up. Just be careful, watch your fingers. You can use a pry bar if you have to. Get them between here and take the bolt. Slide the bolt in. Make sure you put those little washers on, and same with this one. Now we're gonna tighten up the lower ball joint nut. Snug that up first. And then we're gonna torque it. And then torque this nut to 74 foot pounds.
So now we wanna tighten these two bolts. Now, when you tighten these down because of the bushings there, you want this lower control arm as close to ride height as possible. So I'm gonna use a screw jack and raise this up to how it would be for ride height, as close as possible. Ideally, you wanna put this all back together and torque these bolts on the ground, but it's kind of hard to access these bolts while the vehicle is on the ground. So we'll do it now. That looks good. I'm just gonna snug these up first.
Now with my 15/16 wrench and 18-millimeter socket, I will torque these to 129 foot pounds. There we go. Now, I can lower this down. As I lower this down, I'll get the shock bolt, line that up. I'll snug this up first, then I'll torque the lower shock bolt to 59 foot pounds. That's good. Now I can lower the screw jack, put it out of the way. Now, we're gonna slide the axle back in the CV shaft, and just line this up with the mark that you made. That's good right there. And get these bolts started.
Now, I'm just gonna snug these up first. Now, I'm gonna torque these bolts to 58 foot pounds. And to prevent the axle from spinning, I can use a pry bar and just hold the lug nuts, go in between the lug nuts, and just go around one at a time. I made it all the way around them. Now I'll put the washer back on and then the nut. Snug this down first. Now you can lower the vehicle down to the ground, and just use a pry bar to prevent this from spinning, or you can just torque it like this, and torque this nut to 177 foot pounds.
All right. Now, you can always take a wire brush and just clean some of the rust out of the keyway and same with the torsion bar, and just slide the keyway back in position. And slide the torsion bar in, just like that. Try to get it as close as it was when you took it apart. That looks pretty good. And you can always compare it to the other side.
Now, we'll take the tool. Tighten this back up. All right, now, we'll tighten this up. I'm gonna take that bracket and slide it through. Now the round part goes on the bottom. Just keep your fingers out of there. That's good. And loosen up on the tool. Get the bolt, get the bolt started. And when you put this back in, you can always count the turns. Going back in, put it back where it was.
You wanna take your tape measure and just double check. A little bit looser than... I love that. That looks good. You can always check your ride height adjustment afterwards at the tires and adjust accordingly. Put the sway bar link back in. There we go. And get the nuts started on top. Pick my wrench, snug this up. And then we're gonna torque this to 89 inch pounds. Make sure you're on inch pounds, not on foot pounds.
And then reinstall the wheel and then put the lug nuts on. Now, I'm gonna torque these lug nuts to 140 foot pounds in a cross pattern to tighten the wheel down evenly. I'll just go around again and double check.
Shop Products


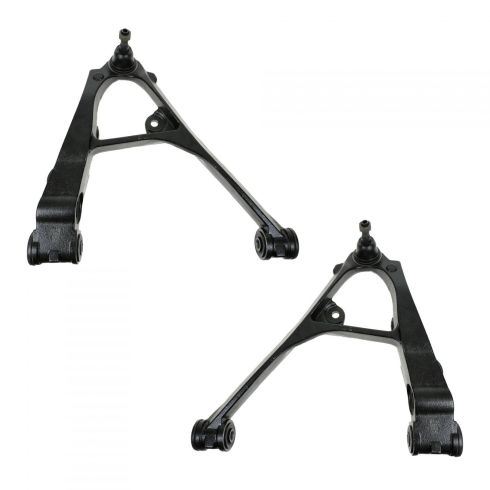
Chevrolet GMC Cadillac Front Driver & Passenger Side Lower 2 Piece Control Arm with Ball Joint Set TRQ PSA62243
- 2 Piece
- (1) Front Driver Side Lower Control Arm with Ball Joint
- (1) Front Passenger Side Lower Control Arm with Ball Joint

How to Replace Upper Control Arm 1998-2011 Ford Ranger
Check out this video and our experts will show how to replace the upper control arm with ball joint yourself

