
How to Replace Outer Tie Rods 2007-10 Hyundai Elantra
Created on: 2019-06-25
Check out this 1A Auto instructional video, and learn how you can replace the tie rod on your 07-10 Hyundai Elantra! Do it yourself, and save some money!
-
step 1 :Removing the Wheel
- Raise the vehicle with minimal weight on the tire
- Loosen the five 21 mm lug nuts
- Raise and support the vehicle
- Remove the five lug nuts
- Remove the hubcap
- Remove the wheel
-
step 2 :Removing the Outer Tie Rod
- Remove the two 14 mm brake caliper slider bolts
- Remove and secure the brake caliper
- Loosen the 22 mm jam nut
- Remove the tie rod ball joint cotter pin
- Remove the 17 mm tie rod castle nut
- Hammer on the knuckle to loosen the outer tie rod ball joint, or separate it with a pickle fork
- Remove the outer tie rod end
- To assist in re-installing the tie rod, count the turns it takes to remove it, or don't move the knuckle
-
step 3 :Installing the Outer Tie Rod
- Install the jam nut on the inner tie rod threads
- Thread the outer tie rod onto the inner tie rod, and tighten it to the proper length
- Insert the outer tie rod ball joint into the knuckle
- Install the 16 mm castle nut onto the tie rod end
- Torque the castle nut to 25 ft-lb
- Tighten the castle nut further to align the cotter pin hole, if necessary
- Insert the cotter pin and peen it over the nut
- Tighten the 21 jam nut onto the outer tie rod
- Place the brake caliper into position
- Secure the brake caliper with the two 14 mm caliper slider bolts
- Torque the 14 mm caliper slider bolts to 23 ft-lb
-
step 4 :Installing the Wheel
- Slide the wheel onto the wheel studs
- Replace the hubcap
- Replace and tighten the 21 mm lug nuts by hand
- Lower the vehicle with minimal weight on the wheel
- Torque the lug nuts to 80 ft-lb in a star pattern
- Lower the vehicle completely
Tools needed
-
Socket Extensions
Torque Wrench
14mm Socket
Hammer
Rust Penetrant
Pry Bar
17mm Socket
21mm Socket
Pickle Fork
Large Locking Pliers
22mm Wrench
Anti-Seize Grease
Ratchet
1/2 Inch Breaker Bar
Hey friends, it's Len here from 1A Auto. Today I'm working on a 2007 Hyundai Elantra. I'm going to show you how to do an outer tie rod end. It's going to be a very simple job. I want to be the guy that shows you how to do it. If you need this or any other part, you can always check us out at 1AAuto.com. Thanks.
Okay, so we're going to take off our five lug nuts here with a 21 millimeter socket. There we are. Now we're going to continue taking off the other four. Leave this on here. Take off our last lug nut. Hub cap. So right here we have our outer tie rod end. We have our knuckle right here, and we have the outer tire rod nut. The stud for the tie rod comes up through the knuckle just like this, and then the nut holds it on. So we're going to have to remove this nut. It's going to be your prerogative, if you want to try to wrench this off with a wrench, just boop, boop, boop, take it off, or you can just take off this bolt right here, one up there, pop this caliper out of the way, and then you could use something like a socket and whatever you have to remove it, a ratchet or an air gun, whatever you need to do.
So it's up to you. Bolt, bolt, calipers, gone. Easy peasy. Or try to wrench it, take some time. Whatever you want to do. Located on the other end of the tie rod, there's a jam nut. You're going to want to break this free before you go ahead and do this. Unless of course you're doing the outer tie rod and the inner tie rod at the same time. Well actually, I take that back, you should remove this anyway. Break it free, because you're going to have to get this boot off of here, in which case you'll have to slide it off. So disregard what I said about not having to do that. You do have to do that.
Pop that free right now. And then come over here, remove this nut right here, and then once we do that, we'll get this off. So here we go. We've got our 14 millimeter. We're going to remove this, I'm going to remove this right here, and then we'll move along. There's one, we'll do the same to the top one. Let's start this back in real quick just so the caliber can't flop around just in case. Bolt number two, perfect. Now we're clear to start getting this caliper off of here.
So I opened this up just to make sure that it opens up. Now I'm going to remove this. Grab my small pry bar. All right, I got my small pry bar, just going to see about getting that out of there. We're going to take off our tire rod end nut in one second. First, we're going to break this free. This right here is a 22 millimeter, or you could use the 7/8 if you have that. Or if you have access to something that looks like this, I would go with these personally, so I'm just going to get it on there.
Then all I'm going to do, I'm going to break it free. Ready? There we are. That's spinning. Going to hit it with a little bit of a penetrant. That's going to help me get it off down the line here. Just try to work it in while I get my pliers on there. Feels decent. I noticed that the inner tie rod end was spinning at the same time, so to get that off we'll have to hold these with some pliers, and we'll zip that nut off. But if you're just doing the outer tie rod end, you don't necessarily need to worry about that.
Time to remove our nut up here, 17 millimeter. When we remove this, there is a possibility that the tire rod will swing down, so you want to make sure you don't have your face under there. Super important. Safety first. Wear some safety glasses. Remove this with your 17 whether you're using a ratchet or an air gun, it's the same size nut. There we are. That off there. It's a castle nut, slotted. We'll set that aside.
Now we need to get our outer tie rod end to come down through this knuckle. You could take your big fabulous hammer, whack on the knuckle right there. It might break free. You could use a pickle fork, something along the lines of this. Stick it in there. That might break it free. It's multiple options here. Trying to hit this with a hammer without hitting this, might be a little bit of an issue. So let's go with the tool for the job, I'm going to use a pickle fork. Or I guess you could call it a tie rod separator or call it whatever you want really. There we are.
So this is your outer tie rod end. We're just going to see if we can get into break free now. It doesn't. I'm going to take some locking pliers, put it on the inner tire rod end, and then I'm going to try to turn this off. I got my locking pliers on here. I brought them right around, they're resting up against our stabilizer. That's the stabilizer bar. I'm just going to take my pliers, whatever you happen to have, I'm just going to try to turn this outer tie rod end. Yours might turn easier or harder than this, I don't know, but basically turn it to the left, counterclockwise, and get it to come off.
Once you get it off. Well you're in a better position than me. See if I can get it to break free. Maybe I can get it by hand now. Yeah. For a second, almost there. There we go. Now we've removed our left front outer tie rod end. Here we have our original outer tire rod end from our 2007 Hyundai Elantra. As you can tell, it's a little bent, supposed to be. Over here, we have our brand new quality 1A Auto part. It's got the same exact bend in it, so that's always good. It comes with a brand new nut, super important, and also our brand new boot. This helps keep the grease in there and keeps the moisture out. Super important.
Like I said, as you can tell, they get the same bend, both sealed. That's the way they come. Some people like grease-able, some people like sealed. If it comes sealed, well, it's good forever that way. So there you are. As you could tell this as a quality part and matches up exactly with the original. I don't see any reason why this wouldn't be a great part to install into this vehicle. So I'm going to go ahead and do it. If you need this part or any other part, you can always check us out at 1AAuto.com. Thanks.
We have our brand new jam nut. Just going to put it on here quite a bit, and then we can bring it back to meet up with a tie rod once we get it lined up to where we need it. I'm just going to turn this on. If you happen to have counted when you took it off, that's awesome. If you didn't, and you just want to kind of try to eyeball it. Basically, if you didn't move your knuckle at all when you were moving things around here, it should line up with that hole right there. We remember the outer tie rod end stud faced up, it went up through the knuckle. So that's the way I'm going to put it back in. There it is.
We have our nut. Just going to put this right on here. All right, now we'll tighten that up so it's nice and snug, then we'll torque it down, and we'll put our cotter pin through. So I'm going to go ahead and torque this down. My new nut is a 16 millimeter. I'm going to go 25 foot pounds with my torque wrench. There we are. Just going to hit it one more time. That feels great. Now I'm going to put the cotter pin through. That's just going to ensure that this nut can't loosen up and come off. We don't want that coming off obviously.
So I got a brand new cotter pin, comes with the outer tie rod end by the way, sure you saw it in your packaging. Now I'm just going to try to peen that up. I can grab my, oh whatever you want really, even use your fingers if you're strong enough, and all I'm going to do is just try to bend it. Here we are. Give it a couple bonks. There we are. That cotter pin will not come out, and therefore this nut will not come off. So now it's time to snug up this jam nut right here. What this does is that it basically ensures that the inner tire rod can't spin and completely loosen up as you're turning and hitting bumps and stuff. And then of course your outer tire rod end would come and screwed from that.
So what it does is it jams it in, jam nut. I'm just going to bottom it out, just like that. For this application, I'm going to use a 21 millimeter. It's a little smaller than the original. That doesn't matter. Give it a little tweak. Now I'm just going to go ahead and straighten out the outer tire rod end so it's sitting pretty much straight up and down. And there we go.
Now we can go ahead and we'll get our caliper back on. We'll get this all situated and off we go. Slide that right on there. We've got our two caliper, two bracket bolts. You could use Threadlocker if you'd like. It's your prerogative. Just don't use, Never Seize please. Get that started in, get this one started in. Once they're both started, we'll go ahead and tighten them up. There is a torque specifications, so all I'm going to do is bottom it out. There we are. Let's grab the torque spec. So now it's time to go ahead and torque these down. I just want to let you know that the caliper slider heads themselves is a 17. So if you find it that the caliper slider is spinning when you're trying to torque or tighten it down, you can just go ahead and use the 17, and it should be fine.
Drop it on the floor, it likes it there. And one more time. Sometimes your ranch might be a little bit thick like mine. So if that's the case, well, you're going to have to figure it out. Could also try to use some locking pliers in there if they're a little thinner for you. Going to hit it one more time here. There we are. So 23, 23. Time to get the wheel back up on here. I'm just going to go ahead and lift it up. Center cover, hubcap, whatever you want to call it.
We're just going to bottom these out with our 21 millimeter socket and our long ratchet. Once they're all bottomed out, we'll bring it down on the ground and torque them up. So now we're going to go ahead and torque these down with our 21 millimeter to 80 foot pounds. We're going to do a star pattern. One here, here, here, here, here. I'm just going to go around. There we go.
Thanks for watching. Visit 1AAuto.com for quality auto parts shipped to your door, the place for DIY auto repair. And if you enjoyed this video, please click the subscribe button.
Shop Products


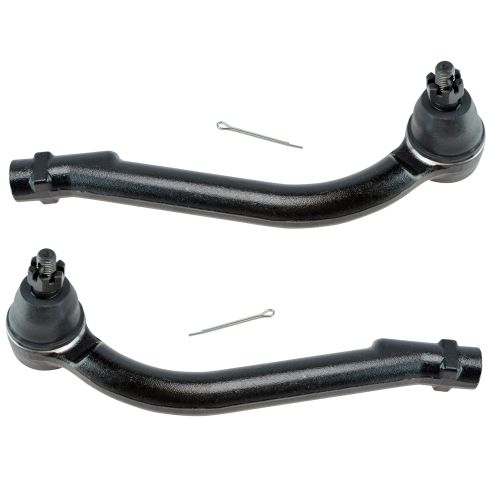
Hyundai Kia Front Driver & Passenger Side Outer 2 Piece Tie Rod Set TRQ PSA55348
- 2 Piece
- (1) Front Driver Side Outer Tie Rod
- (1) Front Passenger Side Outer Tie Rod

How to Replace Tie Rod Assembly 1998-2004 Nissan Frontier
If the tie rod needs to be replaced, this video will show how to remove it and prepare a new on one the 98-04 Nissan Frontier

