How to Replace Radiator 1999-2013 Chevy Silverado 1500
Created on: 2019-02-15
How to repair, install, fix, change or replace a broken, damaged, or leaking radiator on 99, 00, 01, 02, 03, 04, 05, 06, 07, 08, 09, 10, 11, 12, 13 Chevy Silverado 1500
Tools needed
-
12mm Socket
13mm Socket
Funnel
Socket Extensions
Pry Bar
Anti-Freeze
Pick
Fuel Line Disconnect Tool
Flat Blade Screwdriver
10mm Socket
Drain Pan
Ratchet
Needle nose pliers
11mm Socket
Hi, I'm Mike from 1A Auto. We've been selling auto parts for over 30 years.
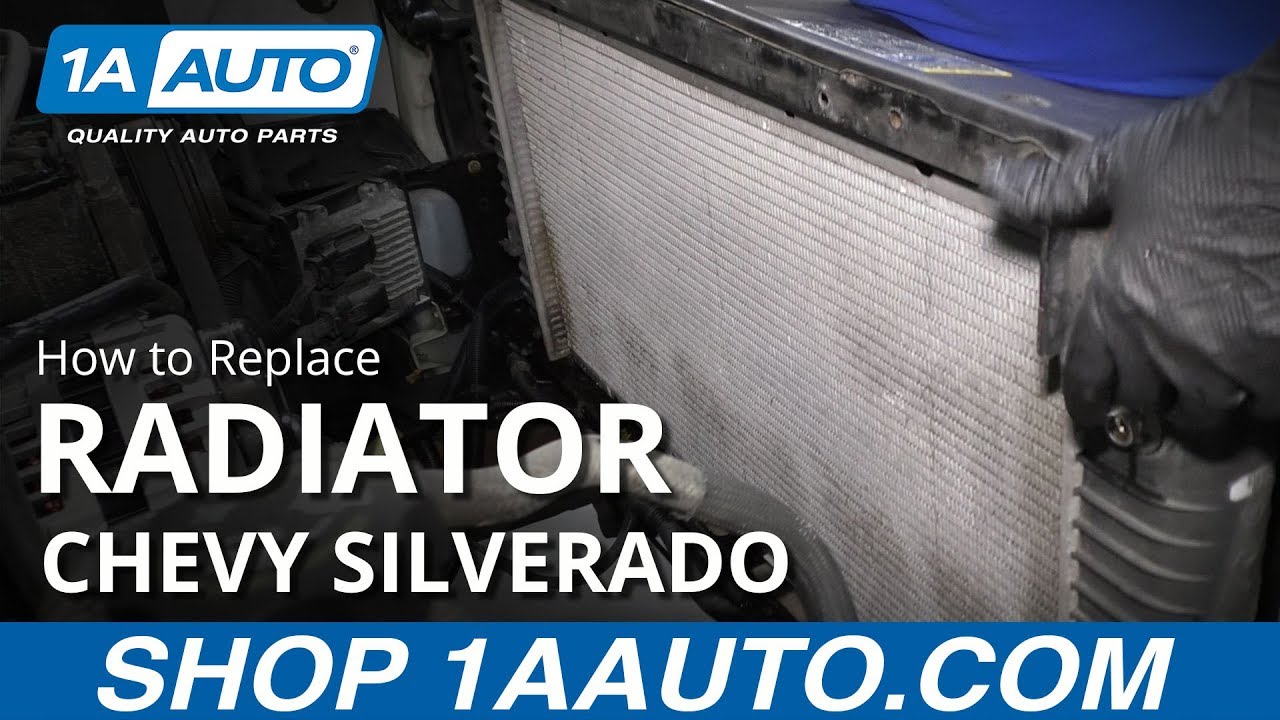
What's up guys? My name's Andy from 1A Auto. In this video I'm going to be removing and reinstalling a radiator in this 2008 Chevy Silverado work truck. If you need this part or other parts for your vehicle, click the link in the description and head over to 1AAuto.com.
Disconnect this mass airflow sensor connector. Just push down on the lock. Pull the connector off, and we'll loosen up this worm clamp right here. Just use a straight blade screwdriver. Loosen that up. You can take this snorkel off here, slide it off. We're going to do the same on this side. There's a worm clamp over here on the throttle body, right there, loosened that up. Slide this off. There's a little hose right here that just connects to the valve cover on the passenger side. Take that hose off and then set this aside.
I'm just going to grab the front side of the mass airflow sensor, or the front side of the air box and just slide up. Oops. Just grab the whole air box, slide it out of your way. There's some tabs on the bottom that lock into a grommet, and then this actually, we're going to have to move this. Just slide this off there. Have to reinstall that, right here. Because when it goes together, it's got to push down. We'll just take that, just take a straight blade screwdriver, just push this in here.
It's kind of difficult sometimes. Might be easier with a smaller like pocket screwdriver. And make sure that's all the way down. So that's good. Set that aside. Alright, next I'm going to take these two 10 millimeter bolts out. These hold the transmission cooler lens on. Take those two out, use a 10 millimeter socket and a ratchet. And normally these are caged so you can just slide them out of the way. What that means is that the bolt's not going to come off of that bracket. It'll just stay on there, because the little thing on there. Then we'll do the same for the bottom one.
Now we're going to disconnect these electrical connectors. There's two of them. Just push down on the tab, then wiggle the connector down just like that. We'll do the same for the other side. Sometimes these connectors get a little stuck. Take a little screwdriver, and pry against the lock. And then push it down, and you'll be able to get it out. Just like that. Wiggle it out. Now we're going to take these two bolts out, this one here, one over here, going to use a 13 millimeter socket and a ratchet.
Take those bolts out. Now we're going to grab the fan shroud, and we're going to just lift up. There's some clips right here on this side where this clips into the radiator. You got to get it out of the way of the coolant upper radiator hose. I'm actually going to shift this way. So I'll slide this side up first. Get this out, and pull that straight out just like that. So there's no drain on this radiator. So I'm going to have to release this clamp and take this hose off and that's how we're going to drain the radiator. To get this clamp off, I'm actually going to use this tool.
We sell this tool at 1AAuto.com. It will go onto the clamp right here, and then when I tighten this up, it's going to tighten up on this cable and that will open up the clamp so that we can release it. So I want to make sure I have a bucket underneath to drain the coolant, and then I'm going to tighten up on this clamp. And because this clamp is really rusty, I think it actually just broke on me. Just going to use a pry bar and be careful if you're reusing your radiator, not to ruin the fins or anything on the radiator.
There we go, start my drain. Take this tool off, release that, set that aside. And here is the clamp and as you can see it broke right there. There's the other part of the clamp. This would go on like this and that's what puts pressure on the coolant hose to secure it to the lower radiator. And it looks like this broke because it's rusted right there. This broke before, you can see that broke off. And then it wasn't able to clamp the radiator good enough. So that's why we're getting a coolant leak. And then when I tried to compress this, this side broke, because you can see it's a little shinier right there.
Now we're going to take this upper radiator hose off. I'm going to use some hose clamp pliers, just release this hose clamp. Just work it back and forth. Get the hose clamp off this area, then we can grab the hose and just rock back and forth. Twist it, pull the hose off. I'm going to remove this hose. This hose goes to the coolant reservoir. I'm just going to take this hose clamp off, my hose clamp pliers don't fit in there, so I'm just going to use some needle-nose pliers. Squeeze those, pull that hose off.
Alright. Next we're going to take off these transmission cooler lines. There's a little cap on the line, slide the cap off. So there's a little lock ring in here, kind of like a snap ring. They make special tools, this is one of the plastic ones. Generally the plastic ones don't work. I just have not had any luck with them. You slide the tool on, and then you twist it, and it's supposed to spread the fingers and then you grabbed the line, slide it out, and it came out at that time. But normally they're pretty difficult to take out that way.
But what you can do, you can take a pick as well. And just grab, you need to find the side that's open, just slide underneath the clip, just using a 90 degree pick, and then slide the little clip out. Then once the clip's off, then you can just grab the line, pull it out. Okay, so to reinstall the clip, if you're going to reuse the radiator or you're going to have to reuse this, you're going to slide one side of the clip in, while the line is out, and then you're going to just rock the clip all the way around, and then it'll lock in place.
So when you disconnect these lines, you're going to want a different drain bucket, because it's going to leak transmission fluid, and you don't want that leaking into your coolant bucket. So we're going to take these two bolts out. Use a 13 millimeter socket and a ratchet. Take that one out. Alright, now we're going to grab the radiator. I'm just going to slide it up, tip it back a little bit, and then we can pull it right out.
When you're putting a new radiator in, you're going to want to make sure you take these rubber grommets off the base and swap them over to the new one. They just normally come right off, just like that. Same with the other side. Put those back on, and then same with the top. These rubber grommets come off as well. You can take this center pin out first, slide this out, and transfer it over to your new one. Then just slide it in, and slide this little center thing in. Just like that.
Now, we're going to take this radiator, slide it back into position. You want to line up those two grommets on the lower part, and it looks pretty good. That's good over there. We're going to take these two bolts, get these started. And same with the other one. Take my 13 millimeter socket and ratchet, tighten these down. Snug that one down, then I'm going to do the same for the other side. Snug that one down.
Now, I'm going to replace this hose clamp that was broken before, so I'll just take this. Make sure you find one that fits the hose properly. Slide the hose back on. Now you want the hose clamp to go as close to the bump. You can feel where the radiator actually is, there's a little bump there. And then we'll take a screwdriver and just tighten this hose clamp up. You don't want to tighten it too tight because the radiator is plastic and you'll crack it. Snug, twist it a little bit, see if it's tight enough. Tighten it a little bit more.
Alright, that should be good. You can always tighten it up more if it's leaking. I'm going to reattach this transmission cooler line. Lock that on and then put the little retainer over that. Just holds the clip in there. Do the same for the top one. Then I'll reinstall this hose that goes to the coolant reservoir. Just take my needle-nose pliers, press this on and then line this clamp up where it went before. Just like that.
Now we'll reinstall this upper radiator hose, slide it in position. We'll take some hose clamp pliers and move this hose clamp. If this is worn out like the other one, then you'd want to replace this one as well. Ours is still pretty good. Just like that, nice and tight. All right, now we're going to take this cooling fans, just going to slide it, generally the same way we pulled it out. That in there. It is slightly easier, if you have the coolant hose off, you have a little bit more room, but it's not impossible to do it without it.
Get those lined up. Now we'll take these bolts, get these bolts started, same with this one. And I'm going to take my 13 millimeter socket and ratchet, tighten these bolts down. Snug that down. You want to do the same with the other side. Then we're going to connect the electrical connectors. Just get this lined up. Lock it down. Same with this one. We're going to install this bracket bolts that go to the cooler lines, the transmission cooler lines. Get those lined up. I'll take my 10 millimeter socket and ratchet, and tighten them down. Alright, and just snug that down. We'll do the same with this one.
Alright, now we're going to reinstall the air box. If you have trouble installing this, you could separate it and install the base first, but what we want to do is this little piece is going to go in this groove here and these two ears are going to go into those grommets down there. So slide that in position, like this. And once you have it in position, you just push down on the air box. Now we want to line this snorkel up. We're going to line this up over the throttle body, and then keep in mind this hose, we're going to have to attach that hose as well.
Slide that on. Slide that on. Then we'll slide this in position as well, on the mass airflow sensor. Now I can take my straight blade screwdriver, tighten this worm clamp up here, just snug, and then, same on the throttle body. Make sure this is all the way down. Just push it down if you have to. And just snug that up as well. Make sure it's nice and tight. I'll take this connector, connect the mass airflow sensor, lock it in place. Right, now I'm going to add coolant to the system. I'm going to use this funnel. We actually sell this funnel 1AAauto.com. There's a different adapters you can use. This will fit right on the coolant reservoir.
Now in this vehicle, you don't add the coolant through the radiator, there's no radiator cap on this vehicle. You do it all through the coolant reservoir. And you're going to want to make sure you add the appropriate coolant. You want to check the owner's manual and use a 50/50 mix of coolant and water. Okay, so we're going to add the coolant level up to the line right here. That's where the coolant level should be. And we're going to run the vehicle and we're going to constantly monitor the coolant level while the engine is running.
I can leave this funnel on here. Sometimes the fluid level will come up here and then a lot of times there'll be an air bubble in the engine and it'll burp. It'll once the thermostat opens up, it will let the air bubble through and that'll cause the coolant to go back down. So you want to monitor that, make sure that you add coolant when it goes down. And after about 10 minutes, that should be good. Then you can come over here and carefully check the hose, the upper radiator hose, and make sure this is hot. Be careful, it should be hot.
And once that's hot, that means your thermostat is open and all the coolant's cycling through. And then you can shut the vehicle off. Let it cool down, recheck your levels. And when it's cooled down, take it for a test drive, drive it again and recheck your level one more time, and you should be good to go.
Thanks for watching. Visit us 1AAauto.com for quality auto parts, fast and free shipping, and the best customer service in the industry.


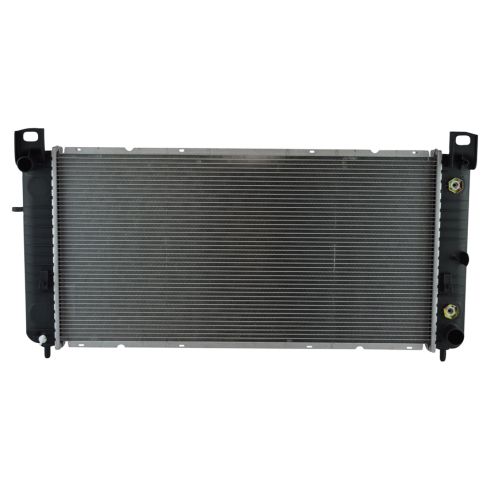
Chevrolet GMC Cadillac Hummer Radiator TRQ RDA82669
- Left & Right
- No
- Yes
- Plastic
- Plated
- Yes
- Female
- Aluminum
- 6
- Cross Flow
- 1
- No
- Bottom Right
- Top Left
- No
- 17.25 in
- 34 in
- 1.56 in
- 1.31 in
- 1 in

How to Replace Radiator 2004-08 Dodge Ram
Check out this video on how to replace the radiator on your 04-08 Dodge Ram.

