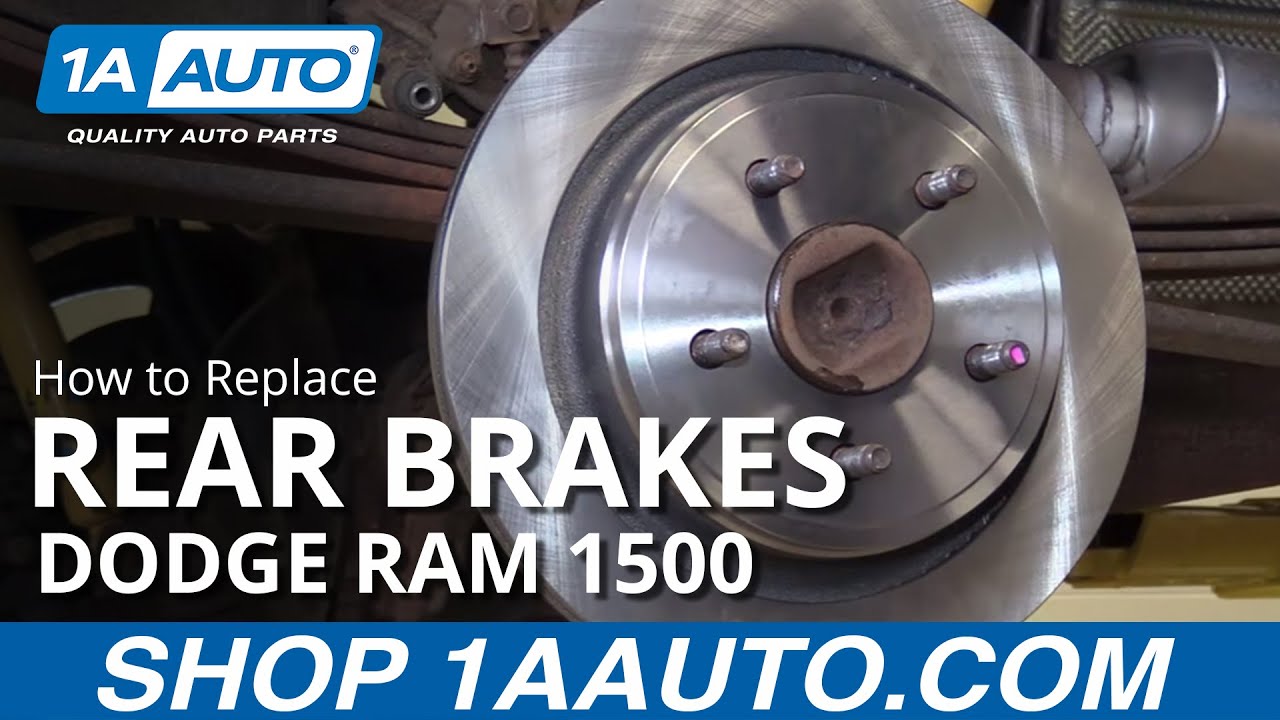
How to Replace Rear Brakes 2002-10 Dodge Ram 1500
Created on: 2016-07-28
Watch this video to learn how to fix squeaky or fading rear brakes. The experts at 1A Auto show you how to replace the brake pads and rotors on your 02-10 Dodge Ram.
-
step 1 :Removing the Wheel
- Loosen the 22mm lug nuts with the vehicle on the ground
- Raise the vehicle with a floor jack
- Secure the vehicle on jack stands
- Remove the lug nuts
- Pull off the wheel
-
step 2 :Removing the Brake Pads
- Remove the 10mm bolts from the brake caliper slides
- Pry the caliper out of the bracket from the bottom with a pry bar
- Remove the two 21mm bolts securing the caliper bracket
- Remove the caliper and brake pads
- If only changing the pads, continue to Step 5
-
step 3 :Removing the Brake Rotor
- Hit the rotor with a hammer without damaging the studs
- Remove the rotor
-
step 4 :Preparing the New Brake Pads and Rotors
- Remove surface rust or scaling from the hub with a wire brush
- Apply brake grease to the hub without touching the studs
- Insert the rotor into place
- Remove the brake pad clips
- Clean the surface on the caliper and the brake pad clips with a steel wire brush
- Apply brakes parts cleaner to the rotor
- Clean the brake pad slides with a wire brush
- Apply grease to the caliper slides
-
step 5 :Reinstalling the Brake Caliper
- Insert the two 21mm bolts into the caliper
- Torque the 21mm bolts to 100 foot-pounds
- Apply grease to the brake pad tabs
- Insert the brake pads into the caliper bracket
- Apply brake grease to the back of the pads
- Push the slides out of the caliper with vise grips if needed
- Apply brake grease to the slides
- Insert the slides into the caliper
- Slowly compress the piston into the caliper to prevent forcing fluid or blowing a seal with vise grip pliers
- Insert the caliper onto the bracket
- Insert and tighten the 10mm bolts
- Torque the caliper bolts to 22 foot-pounds
-
step 6 :Reattaching the Wheel
- Slide the wheel into place
- Start the lug nuts by hand
- Tighten the lug nuts preliminarily
- Lower the vehicle to the ground
- Tighten the lug nuts to 100 foot-pounds in a crossing or star pattern
Tools needed
-
Socket Extensions
Torque Wrench
Hammer
Jack Stands
Brake Parts Cleaner
21mm Socket
Flat Blade Screwdriver
Anti-Seize Grease
10mm Socket
Ratchet
Wire Brush
Floor Jack
1/2 Inch Breaker Bar
22mm Socket
Brought to you by 1AAuto.com, your source for quality replacement parts and the best service on the Internet.
Hi, I'm Mike from 1A Auto. I hope this how-to video helps you out, and next time you need parts for your vehicle, think of 1AAuto.com. Thanks.
In this video, we're going to show you how to replace the rear brake pads and rotors in this 2008 Dodge Ram. This procedure is similar for Dodge Ram 1500s from 2002 to 2010, excluding Mega Cabs.
You'll need new pads and rotors from 1AAuto.com, 10-22 millimeter sockets with a ratchet and extensions, a breaker bar, pry bar or large flat-blade screwdriver, a hammer, wire brush, brake cleaner, brake grease, vise grip pliers, a torque wrench, and jack and jack stands.
With the vehicle on the ground, using the 22-millimeter socket and a breaker bar, break the lug nuts for your wheel loose. These chrome lug nuts tend to be swollen, so make sure your socket's on there good. Once your lug nuts are loose, raise and support the vehicle with the jack and jack stands. This wheel and tire assembly, being a big off-road tire and 20-inch wheel, it's going to be real heavy, so we're only going to bring it up a little bit when we take it off. Remove the wheel and tire from the hub.
Remove the two 10 millimeter bolts for the caliper slides. Using the small pry-bar or a large flat-blade screwdriver, pry the caliper out of the bracket and off of the pads. You'll have to start on the bottom, as there's a retainer hook on the top side of the caliper that you'll have to pivot the bottom out, pull down, and then pry the top out to remove. Rest that up on the leaf spring while we finish removing our brake components.
Using the 21 millimeter socket and ratchet, remove the two bolts securing the caliper bracket to the rear axle. Our rear rotor is frozen onto the hub in the rear axle. You'll want to make sure that your e-brake shoes are spun down if they're contacting the inside of the rotor. In this case, ours aren't touching, so we're going to hit the sides to free the inner brake shoes from the hat of the rotor, as well as the front to free it from the hub, being careful not to hit and damage the studs. While hitting it head on may seem counterproductive, the shock will break all the rust loose around the center and the wheel studs.
Here we have our old rotor and pads that we removed from the rear of our truck, as well as our new Nakamoto replacement parts available exclusively at 1AAuto.com. Our new parts are made to strict OEM specifications using the same types of casting materials as the original equipment manufacturer does. They're built to the exact same specifications. They're a very high quality part and a great value replacement for your vehicle.
Using a small steel wire brush, remove any surface rust and scaling from the hub and the hub center before reinstalling your rotor to make sure that it sits on there flat and doesn't rust back onto the hub. Install your rotor onto the hub backwards, and spray it down with some brake parts cleaner. This will remove the cosmoline coating that's put on brake rotors at the factory to keep them from rusting in storage.
Put some brake grease onto the tip of your finger, and coat the contact surface of the hub. Be sure to keep this grease off of the threads on your studs. Otherwise, it can affect your wheel torque when we reinstall the wheel. Just a thin coating is fine. This is just to keep corrosion from building up to make sure that our brake rotor comes off easily next time we have to replace our brakes.
Carefully install your rotor. Clean that surface down with some more brake parts cleaner. Carefully remove the brake caliper slide hardware from the caliper carrier. Clean the contact surface with the steel brush. Now you don't have to make this spotlessly clean, but you do want to remove most of the heavy buildup, corrosion, and scaling to ensure that that hardware, whether you'll be cleaning it up or replacing it, sits nice and flat. Once you get the majority of the scaling off, repeat this process on the opposite end. Depending on how badly corroded your brake slides are, you can either buy new ones or you can clean them up with a wire brush.
Clean up all the contact points on both sides. Snap them back on. Grease the contact points on the pad where it's going to touch into the caliper bracket. After greasing your brake pad, install it into the caliper bracket on the back side because you can't do this on the vehicle. Make sure it's as far out as you can get it. Install the caliper bracket back onto the truck. Install your two 21 millimeter bolts. Tighten them down with a 21 millimeter socket and ratchet, then torque to 100 foot-pounds.
Apply grease to the same contact points on your outside pad. Install this into the carrier. Apply a thin coat of grease to the shim on the back side of each pad. This is to keep the contact points where the caliper's going to compress the pads together from making noise or developing corrosion, and possibly seizing onto each other. We're going to push the slides out of the caliper all the way one way, pop the boot off. Go ahead and push them right through there. You may need a pair of Groove Lock or slip-jaw pliers. Finish removing that. Apply a thin coat of brake grease to these slides as well. This will keep them from seizing in the bore, moving smoothly and making sure our caliper rides where we want it to be. Work it back into the boot. Press it through. Make sure the boot clips back onto the grooves in the end. Repeat this step for the other pin.
Using a pair of Groove Lock pliers, carefully compress the piston back into the caliper. We want to do this slowly to make sure that we don't force any fluid in, or possibly blow a seal. It shouldn't take much pressure. If it does or it won't move, your piston is likely seized. You'll have to replace the caliper as well. Reinstall the caliper onto the carrier bracket.
Reinstall your two 10 millimeter bolts. Tighten these bolts with a 10 millimeter socket and ratchet. Torque to 22 foot-pounds.
Start your lug nuts by hand. Tighten the lugs as far as you can. Remember to bring the wheel down evenly, and always tighten in a cross pattern. Once the lugs are as tight as you can get them with the tire in the air, put partial weight of the vehicle on the ground by lowering it off your jack stands. Torque your lug nuts to 135 foot-pounds in a cross pattern.
Thanks for tuning in. We hope this video helped you out. Next time you need parts for your car, please visit 1AAuto.com. Also check out our other helpful how-to and diagnosis videos.
Shop Products


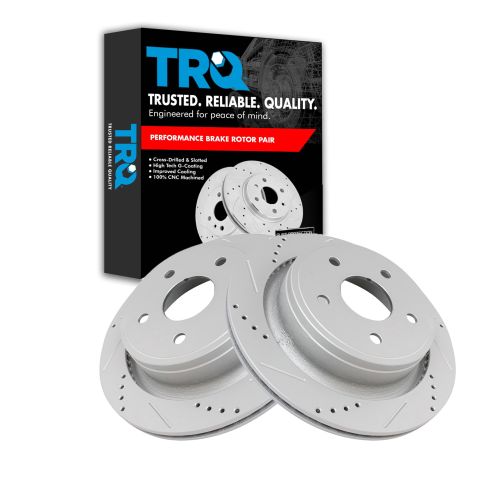
Dodge Ram Chrysler Rear Driver & Passenger Side Performance 2 Piece Brake Rotor Set TRQ Performance BRA74637
- Performance
- Premium G-Coated
- 2 Piece
- Drum-In-Hat
- 5
- 13.86 in
- Vented
- 352 mm
- 20.4 mm
- Cast Iron
- Slotted X Drilled
- 5.5 in
- 140 mm
- 71 mm
- 22 mm
- Yes
- 17.1 mm
- 2.8 in
- 0.87 in
- 0.67 in
- Performance
- 0.8 in
- (1) Rear Driver Side Performance Brake Rotor
- (1) Rear Passenger Side Performance Brake Rotor
- Cross Drilled & Slotted

How to Replace Rear Brakes 2007-11 Honda CR-V
How to repair, install, fix, change or replace your own worn, squeaky, fading old brakes on 09 Honda CRV

