
How to Replace Rear Brakes 2013-17 Honda Accord
Created on: 2020-04-08
Watch this video to learn how to install new engineered to fit TRQ rear brake rotors and pads on your 2013-17 Honda Accord.
Tools needed
-
Hammer
Pry Bar
Pocket Screwdriver
Pick
Rubber Mallet
Drain Pan
Swivel
12mm Socket
Torque Wrench
17mm Wrench
Rust Penetrant
17mm Socket
19mm Socket
Liquid Thread Locker
Brake Parts Cleaner
Safety Glasses
Impact Screwdriver
Gloves
Copper Anti-Seize
Center Punch
sanding disc
Brake Caliper Compressor Tool. Single Piston. Screw Style.
Brake Grease
Wire Brush
Cloth Rags
1/2 Inch Impact Gun
One of the first things we need to do is get the wheel off of here. We're going to remove all five of these 19-millimeter lug nuts. Remove your wheel. The next thing we're going to do is spray down this area. This white area around here is corrosion. We also want you to make sure you spray around this screw right here because we need to remove that to get the rotor off. Now, if you look along the front side of the knuckle area, you're gonna see your emergency brake cable and a mounting bolt, remove that 12-millimeter bolt. The next thing we're going to do is move along to these 12-millimeter headed bolts that hold the caliper to the bracket. Remove them both.
Once those are off, you can wiggle this around. You might need a pry bar to get it off. Well, this is off. Take a peek at your caliper boot right here, make sure you don't see any fluid leaking out. If you do, you need yourself a caliper. The next thing we want to do is carefully take a pic, just go right along the piston and the boot, and just try to make sure you can go right around, and it's not going to bind up because what we're going to have to do after that is push this back. And to push it back, you need to actually rotate it clockwise as you push in. Nice. I like to use a tool that looks like this. It's a multitool, has all different sizes. That's the notches that I'm going to use. I need to go right in the middle of the X here, and I need to press it up against these arms back here and twist at the same time. This part is going to be fairly hard. Make sure you get this in as far as you can. And then also, make sure that if you were to look at this hole and the bottom, this line is as straight as possible with that, and this line would, of course, go from ear to ear. That looks good. The next thing we're gonna do is get this out of here. You want to make sure that you remember that it goes on the bottom side here. Let's try to get the pads out. If your pads are frozen in like this, you know, you had a braking issue. If your pads can't move in and out, more than likely you're going to be using more of your front brakes to stop the vehicle, and you're probably going to have overheat conditions in the rear. Let's get this out of here.
That was really in there. Something to pay attention to is the inward pad has this brake wear indicator. You want to make sure that that's in the same position as when you removed it. So, this inner pad has it facing. The next thing we want to do is remove the caliper bracket two knuckle bolts, which is this right here and right there using a 17-millimeter. What you might notice with this one is it might be hard to get a socket on there because of the upper ball joint. If that's the case, just use a wrench, put it on there, and give it a light bonk with a rubber mallet. Let's set the bracket aside. The next thing we need to do is remove this Phillips head screw. To get this out using a regular screwdriver just isn't going to work. You need something that looks a little bit more like this, which is an impact driver with, of course, the Phillips head screwdriver bit on there. Put it on, give it a twist to the left, and them give it a couple bonks. It should want to break free. Next, use one of your lug nuts, start it on one of your lugs, and then we're going to bonk right here with our hammer. If, of course, you're disposing off the rotor and you know you're all done with it you can hit out here. That way there, you don't have to necessarily worry about these. It looks pretty great. There it is.
The next thing we need to do is clean up this hub area, which is the mating surface where the rotor's going to ride. It needs to be smooth as possible. Let's clean this down. We've got our collection receptacle. Nice and clean. The next thing we're gonna do is clean the rotor braking surfaces. Make sure you get that backside as well. Beautiful. Next thing we're going to do is we're going to put on some copper never-seize around this area right here of the hub. The next thing we're gonna do is get the rotor on here. We want to pay attention to these little inverted holes right here. Those need to line up with the screw holes that are on the hub itself. So, pick one that you want it to line up with. Now, if I was to look, I can see that I have this hole and then the small inverted hole. For this right here, it's obviously backwards. So, I would have to turn it to try to line that up. That looks good. I can see a hole through there, hole through there. Pick when you want. I like to go with the one that already had the screw in it because odds are it's less rusted. Grab my tool. Now, when you put this in, you don't need to bonk it a whole bunch of times, just a couple. Give it a twist to the right, and that's it. That locks it in, and next time you can remove it fairly easily. So, we made our way over to the bench so we can finish working on this caliper bracket. What we need to do now is strip it down. What I mean by that is go ahead and take a pocket screwdriver and get rid of these tins.
Okay. Those come off fairly easily. Now, you have your caliper sliders and you have the boot that attaches to them. You just need to go around that edge with your screwdriver and break it free. Once it's broken free, you can pull out that slider easy-peasy. I'm going to set this on the side that I got it from so I can remember because it has this little rubber bushing. That's very important that you don't mix it up. At this point, if you wanted to, you can continue by taking out the boots. Just give it a little squeeze. Should roll right out of there. Same thing with this one. The next thing we're gonna do is clean up these slider pins and take a good hard look at them. You want to make sure up along this area right here is as clean as possible. If you have any buildup or rust or rot, you need to make sure it's clean because you have to have a nice seat for where that boot's gonna ride on. If you don't, water will get in. Make sure that this boot isn't swollen and it's not torn. It looks good. Do the same to both. The next thing we're going to do is clean out these boots right here. First, of course, you'd take it, give it a little squeeze, roll it around. Make sure it's not torn or broken in any way. That looks great. I'm just gonna take this rag, twist it, put it right through, just like that. Now, I'm gonna open up that slider boot and just roll it around on the rag. That gets out all the crud and it looks pretty darn good afterward. Do the same to both. The next thing we're gonna do is clean out these ports for the sliders. You want your collection bucket. We're going to be using a chemical here. So, you have to have eye protection and hand protection. Put some of that part cleaner in there, get a little bore brush. Dump it out. It looks like mud. And do it again. That looks nice in there. Do the same to the other side.
Now that both of those look great. Let's move along to cleaning up this area, which is where the tins are gonna ride. If this isn't cleaned up well enough, the tins are gonna sit too high and the pads are going to be frozen in the bracket. You could try to scrape it with a screwdriver. You can see all large chunks coming off. You could try with one of these little brushes, get off as much as possible that way. Or, of course, you can use something that looks a little bit more like this, a little sanding disc on there, and then just try to...That looks pretty great. I'm just going to feel for any raised edges. No, that feels really good. The only thing with using the sanding discs is you don't want to go in too deep, and, you know, if you take away too much of the metal, you don't want to take away any metal. You just want to get the rust. You could cause issues with the brake pads. That looks good. Let's do the same to all four corners. So, the next thing we need to do is apply a coating of Moly Grease right along these areas here that we just cleaned up. That way there, we can get these tins on here. Your kit came with a little thing of grease. It's great to use that. Make sure you save a little bit because you're going to need to use it on your slider pins as well. I'll set that aside. I've got a nice big jar with a nice brush. I like my brush, just a little bit. The reason for adding this in here is gonna help with vibration dampening, noise reduction, and, of course, keeping moisture away from those freshly sanded areas to help avoid it from rotting and building up underneath the tins.
Grab your tin and slide the ears right in there like that. At this point, don't think that you're done yet because you actually have to push down on this centerpiece as well. Right here, push that down right up against the caliper bracket. If you can't get your fingers in there, use a screwdriver or whatever you have to do. If you leave this up, the tin could come off and it could hit up against the rotor as it comes around.
That looks great. The next thing we're gonna do is get the boots on here. So, to do that, I'm going to continue on with a little bit of my grease. I'm gonna go right inside this hole, just like that. That's gonna prime that hole. Do the same to the other side, of course. All right. Take your boot. You've got the one with a little lip on it, and then the other side, use the lip and then put it inside here. You should be able to just kind of squeeze it in with your fingers. Give it a twist. If it pops back out, it wasn't seated properly. So, the twist is kind of important. I'm twisting it, it's not popping out. That looks good. Same to this side. Now, we're going to lube up those slider pins. Do the shaft area that goes in and out of the caliper bracket itself. And then you need to make sure you work your way all the way up to this edge that's very close to where my fingers are at least in one area. Get a nice little glob of grease up on there. That's super important because when we put this in that grease is going to go up along the lip of the boot where it connects to the slider, and then I'm going to twist it like this, and I'm going to work that grease around that whole lip. That's going to keep the moisture out 100%. This looks great, do the same to the other side. Make sure you clean up all that excess grease that might be hanging around. So, now, it's time to get the bracket back on the vehicle. Make sure that you have your caliper mounting bolts. And if you want to use some thread locker, we'll call it your prerogative. Go ahead and put both bolts in before you start...
Go ahead and get both bolts in and start them before you tighten either of them up. I'll just bottom these out real quick. Go ahead and torque these bolts to 76 foot-pounds. Torqued. So, we matched over our pads with the ones that we took out. We know that we had the wear indicator on the same side and that was facing down on the inward pad. Go ahead and put those into the bracket. That looks great. Now, we're going to take this little piece right here. It's got two little years. They're going to go into the holes in the bottom of the pad. This goes on the bottom side. That looks good. Next, we're going to take the caliper and we're going to add a little bit of that same Moly Grease lubricant on the piston itself, and then on the backside of these two ears as well. Once again, this is going to help with vibration dampening and noise reduction. Carefully slide it up and over these pads and then pushing your sliders as needed so you can get the caliper over them. This is looking great. Next, we're going to take our caliper to bracket bolts, tiny bit of thread locker, your prerogative. Bottom both of these out. Bottom them out. Torque these to 24 foot-pounds. Torqued. Let's get this bracket for the e-brake cable back on here. It's got a little ear, should fall into the hole. Grab your bolt, go ahead and bottom that out, snug it up. Tight. At this point, we're going to get the wheel on here. We're going to put all these lug nuts on and bottom them out and then we'll put the wheels onto the ground and torque them to manufacturer specification. The next thing we're gonna do is torque these five lug nuts to 80 foot-pounds. Torqued.
Once your wheels are torqued, you're gonna get inside of your vehicle and slowly pump up your brake pedal till it's firm. The next thing you want to do is under the hood. You're gonna come over to your master cylinder. You can open it up and take a peek inside. Once you can see where the level is, take a look from the side and you'll see a maximum line. You want it to be just about right there. Once you're sure that it's full, make sure that you close it back up there. There it is. Close the hood and take it for a road test.
Shop Products


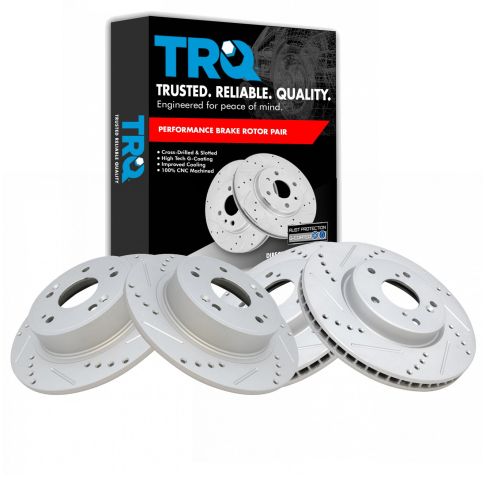
Honda Accord HR-V Front & Rear Performance 4 Piece Brake Rotor Set TRQ Performance BRA15086
- Performance
- Premium G-Coated
- 4 Piece
- Vented
- Cross Drilled & Slotted
- Solid
- 11.10 in. (282mm)
- 5 Lug
- 11.54 in. (293mm)
- (2) Front G-Coated Performance Brake Rotors
- (2) Rear G-Coated Performance Brake Rotors

How to Replace Front Brakes 2001-06 BMW 325Ci
How to repair, install, fix, change or replace your own worn, squeaky, fading old brakes on 06 BMW 325Ci

