
How to Replace Starter 2007-11 Honda CR-V
Created on: 2018-08-31
If your starter has gone bad, check out this video to learn how to replace it! 1A Auto shows you how with the 07-11 Honda CR-V.
-
step 1 :Disconnecting the Battery
- Disconnect the negative terminal with a 10mm wrench
- Set the terminal aside
-
step 2 :Removing the Splash Guard
- Jack up and secure the vehicle on jack stands
- Pry out the push clips from the wheel well liner with a trim tool
- Pry out the push clips on the splash shield with a trim tool
- Remove the 10mm bolt from the splash shield
- Remove the splash shield
-
step 3 :Removing the Starter
- Remove the 12mm bolts from the bracket
- Remove the bracket
- Remove the bottom 17mm mounting bolt from the starter
- Pry up the wiring case mounted to the transmission
- Remove the rear mounting bolt with a 14mm socket and ratchet
- If the starter won't release, spray rust penetrant where the starter meets the transmission
- Tap the housing with a brass pole and hammer to prevent it from cracking
- Once separated, pull the starter out
- Disconnect the solenoid wiring harness
- Disconnect the rubber boot from the positive wire
- Remove the starter down
- Remove the 12mm bolt from the positive wire
- Remove the starter
-
step 4 :Installing the Starter
- Connect the positive wire to the starter
- Tighten the 12mm bolt to the starter
- Replace the rubber boot to the starter
- Connect the solenoid wiring harness
- Insert the starter into place
- Insert the front 17mm bolt and center the starter
- Tighten the 17mm mounting bolt
- Tighten the rear mounting bolt with a 14mm socket and ratchet
- Clip the wire case to the starter
- Insert the bracket
- Tighten the 12mm bolts to the bracket
-
step 5 :Installing the Splash Guard
- Insert the splash guard into place
- Tighten the 10mm bolts to the splash guard
- Tighten the push clips to the splash guard
- Tighten the push clips to the wheel well liner
-
step 6 :Connect the Battery
- Tighten the negative battery cable with a 10mm wrench
Tools needed
-
12mm Socket
Hammer
Socket Extensions
Flat Blade Screwdriver
Torque Wrench
14mm Socket
Jack Stands
Center Punch
10mm Wrench
Ratchet
Floor Jack
1/2 Inch Breaker Bar
Hi, I’m Mike from 1A Auto. We’ve been selling auto parts for over 30 years!
So today we're going to remove the starter from our 09 Honda CRV, and the first step in anything electrical is to disconnect the negative battery cable and set it aside. You don't want it to retouch that battery terminal so you have a complete circuit when you're working electrical, so we're going to take it off and move it aside. And this is a 10mm wrench, and that's what the positive and negative bolts are. Sorry. These are 10mm. Once you have it set aside, you can jack it up, put it on jack stands, or use a two post lift.
So, we're going to remove the lower splash guards on this 09 CR-V. It's missing all the push pins in the front. If we had them, I'd remove them, but I'm going to go in the other sequence of how to remove the rest of it. There's two clamps up here in the fender well. There's one here—a push pin. And one here.
So I'm going to use my body clip tool and I'm going to just pry them out. There's one. And there's two. So, these other push pins I'm noticing are broken. Someone broke the head off of them, so obviously that's going to be really impossible to grab. So this one was accessible from up below, and I just pushed down hard with my tool like that and it came right out. There's another one in here that the heads broken on it. I don't think I'm going to be able to get to it to push the pin out, so I'm going to grab like a pair of needle nose. Whatever works for you. Got to just really use your ingenuity. There we go.
There's also a 10mm head bolt that goes through the plastic. Now, it's not uncommon for these for the clamp to spin on the other side, which this one is doing. I can feel it. I just lucked out. I got it with my hand. You might have to put a pair of pliers up in there, but I got it. See the clamp was broken? The plastic broke right off, so I got to hold that enough to spin it out. And now we're just going to repeat the same exact locations on the passenger side. So once you remove that last bolt, you can pull down your undercarriage shield and set it aside.
So once you have your car jacked up and jack stands supporting it, we're going to find the locations of the starter which is right here in the front of the engine block. We have to remove this bracket, and these are going to be a 12mm socket. And I'm going to spray a little rust prohibitor so I can make sure that that's going to come out.
So 12mm socket and we can remove those two bolts from the bracket. Now we're going to remove the bottom bolt from the bracket. Top one is a nut and the bottom one is a bolt. Once you have that bracket out of the way you can start by removing the bottom starter bolt, and that's a 17mm socket. I'll get that so you can see it. We'll remove this one first—it’s 17mm. And break it free.
So now I'm going to remove the bottom bolt that I've loosened up. Take the rest of the way out with my fingers. And to get to the back starter bolt, you're going to need possibly a swivel socket and extension. I'll tell you the size as soon as I get my tool in there and figure out what we need to get it out.
Now that I've removed the lower bolt of the starter, I'm going to remove the harness that is mounted to the transmission to see if I can get a better angle. There's a clip right here. You can press this little lock pin right in here and then pull the harness towards you. In this case it's pretty rusty in there. There we go. So that one, and then we're going to have a body clip on the end of the bracket of the actual starter. You can see it right here. We'll just squeeze those tabs and push it down. It's a tight fit. There we go.
Now hopefully with that out of the way, we might have a little bit more room to get our hand back there. So now with the harness out of the way. I'm going to put my 14mm socket on that bolt on the back. You just got to work your hand around the back there. Now, we've got a pretty good shot of, well you can see the head of it. So now I'm going to put my 14mm socket on, and you really got to be careful because you don't want to strip that head.
And you know, mine is kind of rusty. I'm going to give it my stuff right here. So I've broken that top mounting bolt free with a little effort, or a lot of effort, and now I just have a 14mm socket on the end. I'm just backing it out all the way so that I can remove the starter, lower it enough to disconnect the power source. So now I'm loosening that top mounting bolt with my finger, and it's coming out right now. You'll see the design of this bolt. Honda puts on this starter for a reason. Try to make it a little easy for you. Because if you think that was hard, it would've been a lot harder if they didn't make an extended bolt.
See how they make that design? Imagine if the head of the bolt was back here. We would have to clear all of that without being able to see it. So now with the mounting bolts undone, I'm going to wiggle the starter free from the transmission. So our starter is oxidized to the aluminum transmission, so I'm going to give a good whack with a brass punch. See if I can jolt it.
Even if you're replacing this starter, you don't want to hit the housing, because there is a core around starters. So you don't want to lose your money on that. So, I'm going to spray where the starter meets the transmission to see if I can get in there and loosen that up. So, I'm using a brass punch because if you use steel, which is a harder metal, it can crack an aluminum housing, and I really don't want to crack the aluminum housing.
So brass is softer, so it bounces off of it, but it still gives it the vibration that I need. Seems like its breaking free. Let's see if I can get up in that. She's in there. See it starting to separate? See the separation line? Okay. Now with that starter dismounted, I'm going to turn it. And the solenoid wire right here, this is going to clip right up in here. And I'm trying not to get in your way. I'm going to push down on that clip up in here. You can see the tab sticking out.
I'm going to just give that... There we go. Just needed a little persuasion. That is the starter solenoid wire that comes from the ignition. And then on top of that is the positive wire, that comes from the battery. Disconnecting the rubber boot that covers that, so that it doesn't ground out on anything when you're negative is connected to your battery. And this full power. That's a tight fit. Now to get up in there, you can use a wrench or a shallow 1/4" drive socket. Okay. I'm going to see if I can get my hand up in there. To make it easier for me, I'm going to disconnect. Looks like it could be a in the back here. I'm just going to take that wire off so that the backslide of the starter clears it a little bit better. You can see that back there.
And hopefully I can get this started at an angle. So to get the starter down, you keep the nose of the starter in the transmission side and pull the back side out first. Now, you can access that positive cable a lot easier. I'm going to turn it here so we can see. There we go. We're going to put our 12mm socket on that starter bolt, and we're going to break it free, and we'll be able to pull that starter right out.
Pull the wire off, or the cable off. I like to, even those the battery is disconnected, I always put the boot back over it. I think it's just good practice. And now, I'm going to remove the starter. Looks like we can get it coming from this angle. So you're going to go over that transmission hose and pull it right out.
So we're going to reinstall the old starter, because this was for demonstration video. So you can see how to remove and replace a starter. If you do need a starter, go to 1AAuto.com, and you can find the link under the description. So, we're going to reverse procedure of the way it came out, so we're going to go nose first. Try to clear everything.
Now I'm going to put the cable on here. Get that down. Pull that boot back. There we go. So, I've got that cable on. I'm going to start the nut that's on. Then I'll get my 1/4" drive ratchet, or 3/8ths, whichever you have at home. 12mm socket again. I'm going to snug that up. When tightening a solenoid wire like this, remember that that threaded part of the solenoid is copper, so if you rank on that, you could snap that and then you're out of starter. You got to go purchase another starter. Because they do not, I believe, sell the solenoid separate.
I have it snug down. I can show you. Put that boot on. Let's see if I can get an angle for you here. So now, I'm going to put that boot back on. That's really important. You don't want any metals hitting that once that starter is installed. I'm going to take advantage of it right here. Reconnect my solenoid wire. The lock clip was at the top. Push it on til it snaps like this. There we go.
And now, we're going to put the nose it. I'll make sure this harness goes down behind the thermostat housing. There we go. Now to make things easier here, as easy as it can be, I'm going to install the front bolt that I took out first. I'm not going to tighten it down. I'm at least going to snug it so that way I have a better chance of starting that back bolt by hand unseen, because you can't see back there. But if you don't center this one, the back one might not be centered. So now, I'm going to bring in this front mounting bolt, and you can see it's not at the angle. I'm definitely not centered. So it's a good idea to do that first.
Might want to rock that starter back and forth. Here we go. Now that's definitely centered. Can you see that? I'm just going to, like I said, I'm going to bring it down. If I have to get a ratchet, I'll bring it down flush to help that starter from moving around and hopefully assure me that the back bolt will start with limited problems. So now, I have that just finger snug. Enough that I can move the starter around if I need to, but I'm pretty sure that's going to assure me that I'm going to be centered on that line up here.
So now, we're going to reinstall the back bolt, which is a 14mm head. So now that's I've gotten that back there and I started it, it's really a tough situation here. So I could get my arm up over the harness, and I can put my little finger right on the mounting bolt hole, and I guided the bolt in. So, that would be the only tip I could give you.
So the torque for these starting mounter bolts, the lower bolt, the one closest to you that has the 17mm head, is a 47 foot pound. And the lovely one in the back here that's hiding is 33 foot pounds. Now, I'd love to say to you, "You're going to get a torque wrench in here," but I think we all know the answer to that one. So I would have to say obviously if you are doing this job, you'll know, you got to make sure it's tight. Use the longest ratchet you have and really bolt that down in there. But 33 foot-pounds is really not all that strong. Okay, now that I have the top mounting bolt snug, I'm going to snug this one up, and then I'm going to get my long 3/8th ratchet and tighten them in there. Now that I have my 3/8th ratchet that's a little longer, I'm going to snug this top mounting bolt up.
Now, I get the top one as snug as I'm going to get it, and I'm tightening the lower one. Now, I'm going to reassemble the harness. Then I've got to put my bracket back in. So up here, the harness has this body clip on it that I'm going to attach back to the little ear bracket. Don't forget to plug in your sensor in the back here that we unplugged. There we go. That one, pushed up in.
Now I'm going to put this lock harness on that bracket in. Push that tab up. There we go, that's locked in. Then we have this bracket last. And that's going to be the 12mm nut, and a little short 12mm head bolt. Okay. Now we're going to line up that stud up in the mounting hole. I'm going to put this bolt on. Get an extension, and I can guide that bolt up in there. Now I'm just going to tighten it down. Now I'm going to snug the top one on that nut.
So, we're going to reinstall our under frontage shroud. So this goes under this front plastic. When I received it, it wasn't in the proper place. There are little eyelets that go in place here, and they snap in. I see a lot of these hanging down on people on their cars and stuff. I mean, it's plastic, and you know. We get our great roads of New England with pot holes that are wicked on the cars. I'm going to try to use some of our salvaged plastic push pins, at least hold it up in place. There. Now it's held in place.
And I'll just use plastic ties and see if I can maneuver, fit them there. Or I can go buy some push pins. If it's broken like this ones broken, but what I'm going to do is I'm going to get a flat head screwdriver, and I'm going to try to pry it open. Get the plastic piece that's broken out of there. I just want to salvage this, enough so that it will try to keep it up. There's three plastic ends here, so I'm going to slide it right through one of them here and see if I can get it to stay so we can try to keep the edge up here. It's going to be easier than fishing a plastic tie through. Because careful not to pinch your fingers. You have to go with the vehicle here.
And now that our starter is installed, and all the electrical connectors are tight, we're going to install our negative battery cable last. Any battery cable you ever install, you want to make sure that it's all the way down. Some people tighten them here. That's wrong. You want to get that all the way down so you see part of that battery terminal sticking up above that connector. You never want to leave yourself stranded on these what could be very cold New England mornings. And this is only a 6mm stud, so you know, you want to make sure it's tight. But not over tight. You want to make sure that that terminal doesn't spin. Then you're done.
Ready to start your car. I'm going to start her up.
Thanks for watching. Visit us at 1AAuto.com for quality auto parts, fast and free shipping, and the best customer service in the industry.
Shop Products
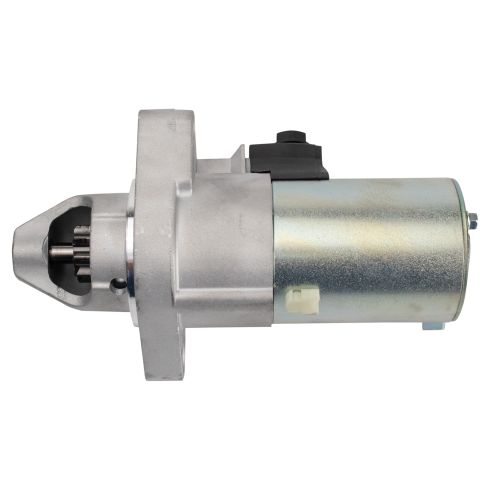
Honda Acura Starter TRQ STA03090
- 9
- 12 VDC
- 1.6 KW
- Permanent Magnet Gear Reduction
- 5.67:1
- MITSUBA
- Clockwise (Right)
- No
- No
- Aluminum
- Yes
- No

How to Replace Trunk Latch 2006-11 Toyota Camry
In this video How to remove, install, replace a trunk lid latch on 09 Toyota Camry

