How To Replace Thermostat Housing 2002-13 Jeep Liberty
Created on: 2014-01-24
Watch this video to learn how to fix an engine that's overheating or won't reach operating temperature. The experts at 1A Auto show you how to replace the engine thermostat and housing on your 02-13 Jeep Liberty.
-
step 1 :Removing the Serpentine Belt
- Attach a 15mm socket and ratchet to the serpentine belt tensioner
- Turn the tensioner counterclockwise to loosen the serpentine belt
- Pull the belt off the alternator
- Release the tensioner
- Pull the belt off by hand
-
step 2 :Removing the Tensioner
- Remove the 13mm bolt from the tensioner
- Pull out the tensioner
-
step 3 :Draining the Coolant
- Remove the cap from the coolant bottle
- Have a drain pan ready
- Loosen the drain plug with a 16mm wrench
- Allow the coolant to drain
-
step 4 :Removing the Thermostat
- Remove the two 8mm bolts from the thermostat
- Have a drain pan ready
- Pull the hose off of the thermostat
- Pull out the thermostat
-
step 5 :Installing the New Thermostat
- Put the new thermostat into place with the vent facing up
- Push the hose into place
- Insert the two 8mm bolts into the thermostat
-
step 6 :Reinstalling the Tensioner
- Put the tensioner into place, lining up the indent with the bolt
- Insert the 13mm bolt into the tensioner
-
step 7 :Reinstalling the Serpentine Belt
- Familiarize yourself with the belt routing diagram
- Loop the belt around the crankshaft pulley
- Position the belt onto each pulley except the alternator, following the belt diagram
- Attach a 15mm socket and ratchet to the serpentine belt tensioner
- Turn the tensioner counterclockwise to loosen the serpentine belt
- Pull the belt onto the alternator
- Release the tensioner
-
step 8 :Refilling the Coolant
- Tighten the drain plug
- Remove the coolant bottle cap
- Add coolant to the coolant bottle
- Twist on the coolant bottle cap
- Run the engine
- Loosen the bleeder valve with an 8mm Allen bit to bleed any air from the coolant
Tools needed
-
Funnel
13mm Socket
16mm Wrench
8mm Allen Wrench
15mm Socket
8mm Socket
Drain Pan
Ratchet
Brought to you by 1AAuto.com, your source for quality replacement parts and the best service on the Internet.
Hi, I'm Don from 1A Auto. I hope this how-to video helps you out, and next time you need parts for your vehicle, think of 1AAuto.com. Thanks.
In this video, we're going to show you how to replace the thermostat on this 2006 Jeep Liberty with a 3.7L V6 engine and it's the same part and process on these Liberties from 2002 to 2012. The items you'll need for this is a new thermostat from 1AAuto.com, an 8mm, 13mm and 15mm socket and ratchet, a 16mm wrench, a drip pan, a funnel with a screen and an 8mm Allen bit.
Your belt is located right at the front of the engine and the tensioner is right here. You just want to put a 15mm socket and ratchet on that tensioner and pull back on it and that will loosen up the slack on the belt and allow you to pull the belt off each of those pulleys.
On your tensioner, you want to remove this 13mm bolt right here and you can see Don uses a piece of pipe for some added leverage here to help break it free. We'll just fast forward as he removes that bolt. Once the bolt comes out, the tensioner will pull right off.
Remove the cap to your coolant reservoir. Your drain plug is located right here under the bumper. Using a 16mm wrench, just loosen that up and make sure you have a drip pan underneath to collect the coolant.
The thermostat is inside here and it's held in with this 8mm bolt and another 8mm bolt underneath it. We'll just fast forward as Don removes those two bolts. Put your drip pan beneath it and pull the hose free. Now pull the thermostat out.
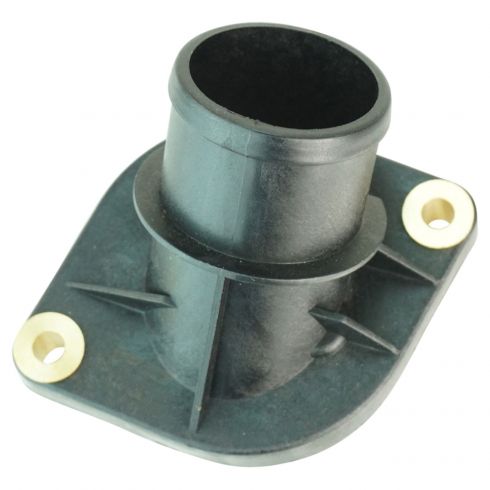
On the right is the old thermostat. On the left is the new one from 1A Auto. They'll mount exactly the same. Take your new thermostat and you want the vent, which is that little circular part, facing up and then you want to push it into place. Then push that hose into place and then twist in by hand the two 8-mm bolts. We'll fast forward as Don tightens those up. You want to tighten those up between 8 and 11 foot-pounds.
You want to line up this indent with this bolt right here. Once you have the tensioner in place, replace that 13mm bolt. We'll just fast forward as Don tightens that up.
When you go to put your belt back on, you're going to need this belt-routing diagram that shows you exactly how the belt should look. You just want to follow this and make sure that your belt, once you get it back on all the pulleys, looks just like this. So just use this as a reference.It's hard to show it, but you can see Don's going to feed the belt down into place and put it on to each of those pulleys. Once you only have one pulley left to put the belt onto, get your ratchet and put that 15mm socket and ratchet on the tensioner, pull it back, put the belt down on the last pulley and then use the tensioner still to make sure that your belt is on each of the pulleys all the way, and that there's no chance of them slipping off, and that everything's in place. Once you know everything's in place, just carefully remove the socket and ratchet.
Use your 16mm wrench to tighten up the coolant drain plug. Refill your coolant bottle. Use clean, fresh coolant and you'll refill the bottle and this will be draining down into the engine as well so it should take quite a bit of coolant. Replace your cap. Now you want to run your engine so the coolant goes down through the engine and then using your 8mm Allen bit, you want to just loosen up this bleeder valve. It's basically a matter of loosening that bleeder valve and just see some of the coolant and air come out. Make sure you keep checking your coolant and topping off the tank. Check the coolant and loosen the valve as we get all the air out.
We hope this video helps you out. Brought to you by www.1AAuto.com, your source for quality replacement parts and the best service on the Internet. Please feel free to call us toll-free, 888-844-3393. We're the company that's here for you on the Internet and in person.


How to Replace Thermostat with Housing Assembly 2011-13 Chrysler 200
The thermostat controls the flow of coolant in your vehicle’s engine. When a thermostat fails, it can lead to overheating, which will damage the engine. One sign of a faulty thermostat is a cool upper radiator hose when the engine is at full operating temperature. It’s important to replace the thermostat immediately if you suspect it is failing. How to install a new TRQ thermostat with housing in your 2011-14 Chrysler 200.

