How To Replace Trunk Weatherstrip Pontiac Ventura
Created on: 2015-12-23
New Trunk Weatherstrip Seal from 1AAuto.com How to repair, install, fix, change or replace a weather strip that is falling down, coming apart, or the adhesive is failing on 66 Pontiac Ventura and many GM models from the 50s, 60s, and 70s, including the Chevelle, Camaro, GTO, Firebird, Catalina, Caprice, Skylark, Malibu, and more
-
step 1 :Dry Fitting the Trunk Weatherstrip
- Remove the trunk adhesive
- Remove any rust or scale
- Insert the weatherstrip with the thicker side down in
- Push the lip so it sits on the top of the trunk, then push the lip down in
- Use a plastic spoon or trim tool to keep from scratching
- Repeat this process as you fit the weatherstrip around
- Cut a quarter inch beyond where the seam is with a razor blade to match the weatherstrip
- Close the trunk to check the weatherstrip placement
-
step 2 :Installing the Weatherstrip
- Pop open the trunk
- Loosen the striker or latch bolts and slide the striker or latch up or down to adjust the trunk
- If the weatherstrip keeps the trunk from closing, adjust the trunk so it sits on the weatherstrip
- After the weatherstrip has pressed down, adjust the striker or latch back in place
- Remove the weatherstrip
- Line the outside of the trunk channel with painter's tape
- Place adhesive inside the line of the trunk channel near the tape
- Place adhesive on the side of the weatherstrip that will touch down in the channel
- Insert the weatherstrip into place
- Repeat the process for the rest of the weatherstrip
- Trim off any excess near the end
- Remove the painter's tape
Tools needed
-
Razor Blade / Gasket Scraper
Heat Gun
Plastic Spoon
Painter's Tape
Wire Brush
Brought to you by 1AAuto.com, your source for quality replacement parts and the best service on the Internet.
Hi, I'm Mike from 1A Auto. I hope this how-to video helps you out, and next time you need parts for your vehicle, think of 1AAuto.com. Thanks.
In this video, we're going to show you a trunk weatherstrip replacement. We're going to be doing this on a '66 Pontiac Ventura, which is basically the same as a Catalina, but this procedure is pretty much the same for most GM cars from the '50s to the '70s. You'll need some items to remove the old weatherstrip, and clean and recondition the channel.
In this video, you'll see this car has been repainted so the channel is very clean, but you'll need wire brushes or possibly paint stripper, maybe even sandblasting to clean out the channel. Then you'll need a new weatherstrip from 1AAuto.com. Weatherstrip adhesive also can be found at 1AAuto.com, some painters' tape, a razor blade, and a plastic trim tool, or I just use a plastic spoon.
First, you'll want to remove the trunk weatherstrip and clean it all out. I actually removed mine with a heat gun, which separated the adhesive, and then my guys that did the body work and paint on the car really cleaned it out well. You need to remove any rust or scale, you basically, when you put the new weatherstrip in, you want to be able to do it so it sits down in the channel well and you can seal the outside of the weatherstrip.
You can see the weatherstrip goes in with that top flap, kind of facing toward the outside of the car, and you put the outside down in first, and then you can push the lip underneath the inside metal channel there. You see, I just pushed the outside down some, and that outer lip stays on top of the outside of the car, and then you push the weatherstrip down, and I'm just going to dry-fit it for now.
You can see that I pushed the weatherstrip down in, and then I use just a plastic spoon, and that just makes sure that I don't scratch the newly painted channel and the car. I just push down about a foot of the outside, and then I lock the inside of the channel down in.
I'm just going to fast-forward, and, like I said, I'm just dry-fitting this for now, just to make sure it does the job I want it to do. I'll test shut the trunk, make sure that the trunk still shuts well. Obviously, this is going to be a little bit taller or puffier than your old weatherstrip that was mashed down and dried out, so the first couple times you put the trunk down, you'll probably notice that you'll have to use a little more force, but that's only natural. You can see I just fast-forward as I fit the whole trunk weatherstrip around.
You have to put it around the hinges, obviously. If you have the correct trim tool to do this, you can use it, obviously, but, as you can see, a plastic spoon works quite well. I rough fit it for a couple of reasons. One, again, is just to make sure that the profile of the weatherstrip works for the car, and it doesn't prevent the trunk from closing, and then also I'm going to just rough cut it to length. The second time I put it on, when I go to put it on with the glue, I'll just pull on the weatherstrip a little bit to make sure that I have the length when I finish, and we'll show you that all in a little bit.
To cut the weatherstrip, you want to cut it a little bit beyond, you can always kind of squish it together, but line it up, and cut it a little bit beyond, about 1/4 inch beyond where the seam is. Just use a nice, sharp razor blade and cut through slowly because you want to make a nice straight cut. You don't want it to be at an angle or be jagged. Then you kind of smush the weatherstrip a little bit and put it down in, begin using the spoon, force the weatherstrip into the channel.
Once I have it rough installed, or dry installed, I'm going to shut the trunk, but then I'm going to go to glue it in. The glue, obviously it serves two purposes. One purpose is to keep it in place, the other purpose is to seal the weatherstrip from getting moisture and debris into the channel that might rust the channel out. Here I've gotten the weatherstrip back in, and I'll talk a little bit more about that later.
Now I'm just going to close the trunk, and you'll see it actually is kind of up a little bit on this passenger side that you can see here. That's more because of the trunk bumper that I have. It actually just needs to be cut down a little bit, but the weatherstrip is nice, it actually allows me to just push the trunk down with just a little bit of force, into the right place, which is what I want.
What I don't show is after I installed it, I let it sit for one night, overnight, and then I was able to open the trunk and close it just like I did before.
The weatherstrip is the right profile and it fits well. I'll open up the trunk again and just check it. Make sure that the corners didn't fold in or anything, make sure it all goes good. If you needed to adjust your trunk, either up or down, you would loosen either the striker bolts or the latch bolts, and you can slide the latch or striker up and down. This is something, if you find that the trunk weatherstrip makes it hard to close your trunk, you could actually adjust it to keep the trunk open just a little bit more than normal. Let it press the trunk weatherstrip down over some time and then adjust it back down, so that the trunk closes the way it always had.
Now I'm just going to remove the weatherstrip and prepare to install it with glue. Something to note is that there's a little lip that overlaps, and that comes into play a little bit later. It overlaps all the way around. I'm going to pull the weatherstrip the rest of the way out, and I'm actually going to line the outside of the channel with painters' tape. This is basically so that that lip can cover up any adhesive that may squirt out from the trunk weatherstrip.
The tape will keep it from getting onto the paint, and it'll give it a nice, clean edge. I just put the painters' tape all the way around the outside edge. Now, here you can see the side profile. The inside goes underneath and that goes over, so what I'm going to do is put adhesive on the outer part of the channel, the outer side of the channel, and I'm going to put adhesive on the outer part of the weatherstrip. This will seal the weatherstrip to the side of the channel so that basically water and debris can't get from the outside of the vehicle and down in, underneath the weatherstrip.
You see, I put a small bead on the outside of the channel, and I'm just doing a small piece to show you. I'll do the whole entire weatherstrip afterwards, but this is just as an example. Then I put a bead on the outside of the weatherstrip and put the outside down in first so that you get the weatherstrip to seal, and then push the inner lip under to lock it in place.
Now, from the outside, you can see that some of the glue has kind of folded over, and it looks a little messy on the tape, but once you pull the tape off, the glue comes with the tape and you get a nice clean edge between the weatherstrip and the paint. That's what we're looking for.
If you do get some weatherstrip adhesive on your paint, it's not that big of a deal, it comes off fairly easy, but doing it this way with the painters' tape makes it a whole lot easier for the cleanup.
Now I retape that area, and I'm just going to fast forward as I work my way around. Again, you're putting the adhesive on the outside of the weatherstrip channel and on the outside of the weatherstrip. Put the outside down in and then lock the inside in place with your trim tool or the plastic spoon.
One other important note, this is usually anywhere from 10 to 18 feet of weatherstrip, so you want to just pull a little bit, just to make sure that you have enough. You don't want to get around to the end and be short because you may have compacted it a little bit, so just on the straight areas, I just pull a little bit on the weatherstrip as I'm putting it down in, and I actually come up about an inch to an inch and a half longer, which is fine. I can always trim the weatherstrip again, and that's also a note, if you find that the weatherstrip you may have received is just a little bit short, you can just pull it a little bit to get it to go around.
Here you can see, at the end, I just trim off a little bit of the extra, and put a little bit of weatherstrip adhesive on the end, and that helps to glue them together and seal them. Once I'm done with the adhesive I can pull the tape off and I'll be all set.
Then you can see here, after it's set for a couple days, open up the trunk, and you got a pretty nice line all the way around. Maybe a little bit of cleanup will do, a couple little spots where the adhesive poked out a little bit. Then there's a good seal in between the weatherstrip and the body.
Thanks for tuning in. We hope this video helped you out. Next time you need parts for your car, please visit 1AAuto.com. Also check out our other helpful how-to and diagnosis videos.
Shop Products


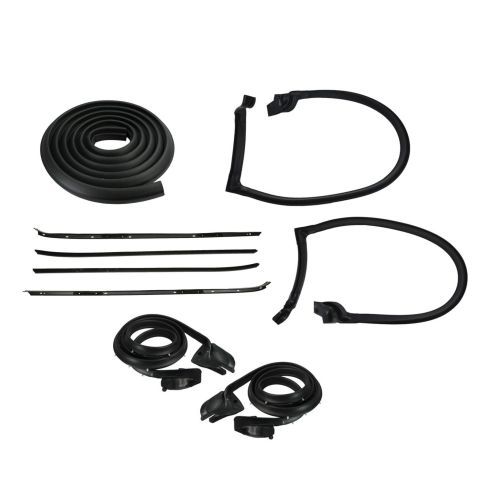
1970-81 Chevrolet Camaro Pontiac Firebird Complete Weatherstrip Seal Kit DIY Solutions WSS00671
- (1) Trunk Weatherstrip Seal
- (1) Roofrail Weatherstrip Seal
- (1) Door Weatherstrip Seal
- (1) Window Sweep

How to Replace T-Top Roof Weatherstrip Channels 1982-92 Chevy Camaro IROC-Z
This video will show how to remove the T-top, windshield, and B pillar weatherstripping if it is loose or needs to be replaced

