Brought to you by 1AAuto.com, your source for quality replacement parts and the best service on the Internet.
Hi, I'm Mike from 1A Auto. I hope this how-to video helps you out, and next time you need parts for your vehicle, think of 1AAuto.com. Thanks.
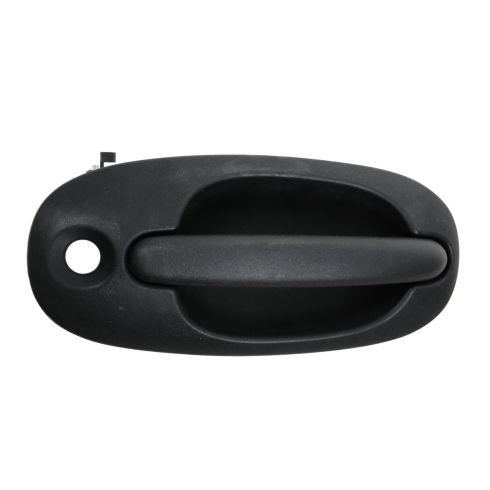
In this video, we're going to show you how to replace an outside door handle on this '98 Dodge Caravan, same as any '96 to 2000. This vehicle does have the manual windows, so that part of the repair could be a little different if you have power windows. Tools you'll need for the job are a window crank removal tool that's available on our website, Phillips screwdriver, small flat blade screwdriver, door panel clip tool also available at 1AAuto.com, and a 10mm socket with a ratchet and extension.
First thing you're going to do is remove your manual window crank. Best tool for it is the actual tool that you use. You can do it a couple of different ways, but this tool only costs a few dollars. We do sell them on 1AAuto.com. It's easy enough: you slide it in between here, just be careful because the clip can fly out sometimes, it just went into my floor so I can see it; that kind of just goes in, pushes the clip off, and just make sure you keep the washer here with it.
Now you're going to remove a few screws. There's one right there next to your door pull, there's one right in behind your door handle, small screwdriver, pry this little trapdoor open, and you'll find another screw, and then there's also one right up in here. Using a short screwdriver, this one up here is easiest. I'm just going to kind of speed it up. I actually think all you need to take out is the screw next to the door pull and the one that you can see that's in behind your door handle. I don't think you need to take this top one off or the one behind the little trapdoor but I did it anyways.
You need a door panel clip tool, also a putty knife works. I actually use the putty knife first, kind of get it in there, you slide it down, you find the clip, and then use your door panel clip tool get right around the clip. Once you start it going you just pull and lift it up and off. Your lock rod's in behind, just flip that off and pull it down. Here you can see the clips, I'm not sure why they didn't want to come out, just basically go right around them with your clip tool and pop then out. Even though I do use fast-forward here, you want to slowly and carefully remove your water shield. You want to avoid ripping as much as possible so you can reuse it.
To remove your outside door handle, inside your door there are two rods. You see a white clip there and a green clip. Now the rod in the white clip, you basically get your hand, your finger in behind, and pull it towards the front of the car. Then the green clip is going to be hard to video here, you just get a finger or a thumb on it and you flip it over to the side like that. That rod just pulls right out. You do have to have your window all the way up. There are three nuts right through these holes: one there, there, and there. I'll speed it up here as I use a 10mm socket with a ratchet and extension and remove those three nuts that hold the door handle. Once you remove those and then the handle just comes right out.
As you can see my handle is fine shape, so I'm not going to replace it, but I'll just show you what you do need to do. You would take this rod off, just like before the clip pulls up and then pull the rod out. Then you would want to pull your lock assembly out, there's a clip over here on the side, pry out on the clip and your lock assembly comes out. On your new handle, the clip will already be installed probably correctly here. You would just take your lock assembly push it right in and it locks in.
Now this rod goes back in, it curls out away from the handle, put that clip on and put your assembly right down into your door, make sure the rods doesn't get hung up on anything. I'd advise reaching up by hand starting your nuts on. We'll speed up here. I did start that first nut by hand, but then the other two you really can't reach by hand so I basically put the nut into the 10mm socket with the extension and just start them like that. Then tighten up them up nice and firm, don't over-tighten them though. Now we'll put our rods back in place. I'll get this one, let's see, start that one in, put it in and clip up, snap it on. This one you might need to move the arm down a little bit. Snap the rod in and then push it in place.
Carefully put the water shield back on. The latch rod goes through the slit, the lock goes through up there, and then stick it on as best you can. Once you pop them out, put them back into your door panel. Pull your lock rod over, put it up into this clip, and then flip the clip over. Then find your lock here and force it through. Put your panel up in there, peek back in here, get your pins to line up. I'll speed up here as I just put those four screws back and that little trapdoor back on. Then I'll get into replacing the window crank. Take our little clip and usually put it back in, use a screwdriver and carefully push it back on. This little indent in the washer goes on top of there like that, and then you can just put this on in any position, make sure it latches on.
We hope this video helps you out. Brought to you by www.1AAuto.com, your source for quality replacement parts and the best service on the Internet. Please feel free to call us toll-free, 888-844-3393. We're the company that's here for you on the Internet and in person.