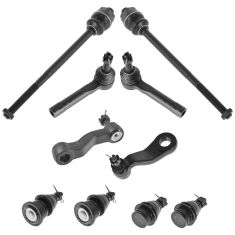
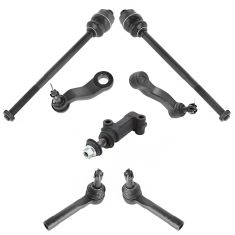
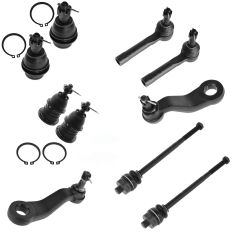
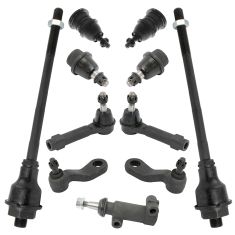
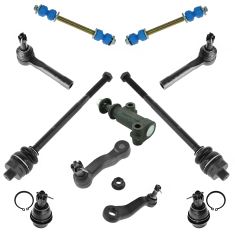
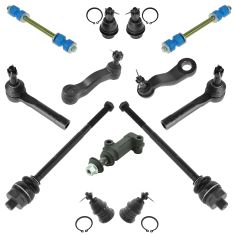
/2002 Chevrolet Avalanche 1500 with Cast Iron Lower Control Arms without Aluminum Steering Knuckles Front 10 Piece Steering & Suspension Kit TRQ PSA58924
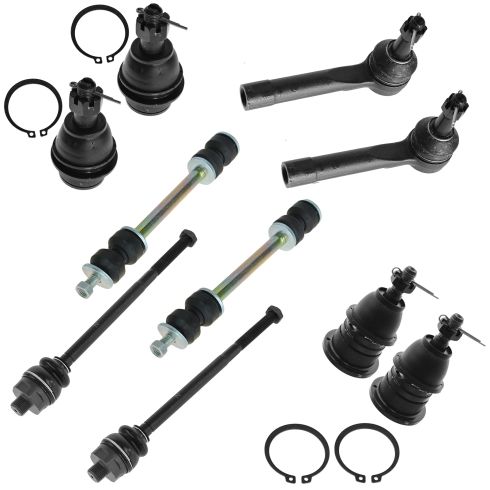
2002 Chevrolet Avalanche 1500 with Cast Iron Lower Control Arms without Aluminum Steering Knuckles Front 10 Piece Steering & Suspension Kit TRQ PSA58924
Kit Includes: (2) Front Lower Ball Joints (2) Front Outer Tie Rods (2) Front Sway Bar Links (2) Front Upper Ball Joints (2) Front Inner Tie Rods
Quantity: 10 Piece
Specification
Steering / Suspension Option
without Aluminum Steering Knuckles
with Cast Iron Lower Control Arms
Location
Front
TRQ suspension kits are manufactured using premium raw materials and coatings for extended service life. Each TRQ suspension component is designed to be a direct, maintenance-free replacement to the stock unit. To extend the life of your steering and suspension components, TRQ recommends replacing components in pairs, sets, or kits. All products are fit and road-tested in our Massachusetts R&D facility to ensure we deliver on our promise of Trusted Reliable Quality.
Product Features
Application Specific Design: No modifications necessary
Anti-Corrosion Coated: Enhanced surface life
Pre-greased: No additional maintenance required
Kitted for Restored Performance: Improved road-feel and handling
Install Tip: When replacing steering components, have a professional alignment performed afterwards. This ensures proper tracking and even tire wear.
Our steering and suspension components are pre-greased and sealed for long life and do not require the extra maintenance typically required by greaseable versions.
Item Condition:New
Attention California Customers:
WARNING: This product can expose you to chemicals including Lead and Lead Compounds, which are known to the State of California to cause cancer, and birth defects or other reproductive harm. For more information, go to www.P65Warnings.ca.gov.
Lifetime Warranty
This item is backed by our limited lifetime warranty. In the event that this item should fail due to manufacturing defects during intended use, we will replace the part free of charge. This warranty covers the cost of the part only.
FREE Shipping is standard on orders shipped to the lower 48 States (Contiguous United States). Standard shipping charges apply to Hawaii and Alaska.
Shipping is not available to a P.O. Box, APO/FPO/DPO addresses, US Territories, or Canada for this item.
Expedited is available on checkout to the United States, excluding Alaska, Hawaii.
Final shipping costs are available at checkout.
How to Replace Outer Tie Rod 1999-2006 Chevy Silverado
How To Replace Inner Tie Rods 2001-10 GMC Sierra 2500 HD
How to Replace Tie Rods 2001-10 GMC Sierra 2500 HD Truck
How to Replace Sway Bar Link 2000-06 Chevy Suburban
Created on:
Tools used
Adjustable Wrench
Bearing Grease
Hammer
Flat Blade Screwdriver
Torque Wrench
Ratchet
Needle nose pliers
Grease Gun
1. Removing the Wheel
Loosen the lug nut covers with a 22mm socket
Pry off the center cap by hand
Loosen the lug nuts with the vehicle on the ground
Raise the vehicle with a floor jack
Secure the vehicle on jack stands
Remove the lug nuts
Pull off the wheel
2. Removing the Outer Tie Rod
Measure the distance from the boot of the inner tie rod to the edge of the outer tie rod
Make note of this measurement
Loosen the nut that holds the outer tie rod to the inner tie rod with an adjustable wrench
Remove the 18mm nut from the outer tie rod end
Strike the steering knuckle with a hammer to loosen the outer tie rod
Pull the outer tie rod out of the steering knuckle
Hold the nut that holds the outer tie rod to the inner tie rod with an adjustable wrench
Twist off the outer tie rod by hand
3. Installing the New Outer Tie Rod
Attach the grease fitting to the new outer tie rod
Tighten the grease fitting with a 7mm socket and ratchet
Twist the new outer tie rod onto the inner tie rod
Push the outer tie rod into the steering knuckle
Fasten the 18mm castle nut onto the outer tie rod
Push the cotter pin through the castle nut
Twist the cotter pin into place with needle nose pliers
Fill the tie rod with grease, using a grease gun
Measure the distance from the boot of the inner tie rod to the edge of the outer tie rod
This should be the same as the measurement noted in Step 2
Tighten the nut that holds the outer tie rod to the inner tie rod with an adjustable wrench
4. Reattaching the Wheel
Slide the wheel into place
Start the lug nuts by hand
Tighten the lug nuts preliminarily
Lower the vehicle to the ground
Tighten the lug nuts to 100 foot-pounds in a crossing or star pattern
Reattach the center cap
Tighten the lug nut covers with a 22mm socket
Brought to you by 1AAuto.com, your source for quality replacement parts and the best service on the Internet.
Hi, I'm Don from 1A Auto. I hope this how-to video helps you out, and next time you need parts for your vehicle, think of 1AAuto.com. Thanks.
In this video, we're going to show how to replace an outer tie rod on this 2002 Chevy Suburban, and it's the same part and similar process on these Suburbans from 2001 to 2006. We show you on the passenger side, but the driver side is the same procedure. The items you'll need for this are a new outer tie rod from 1AAuto.com; 7mm, 13mm, 18mm and 22mm socket and ratchet; flat-blade screwdriver; adjustable wrench; tape measure; pliers; hammer; and a grease gun.
You want to just loosen up these 22mm caps, and then pull the hubcap free. Then, you want to loosen these lug nuts while the vehicle is on the ground, then raise the vehicle and remove them the rest of the way, unless you have air-powered tools. Then, you can do it while it's in the air.
Now you want to measure from the boot on your inner tie rod to the edge of your outer tie rod and just remember that measurement. Now, using your adjustable wrench, loosen up this nut right here, and then you want to remove this 18mm nut down here. Now just hit on your knuckle with a hammer and this is going to break up that outer tie rod and make it easier to pull out. Now just hold this nut with the adjustable wrench, pull the outer tie rod off and just twist it until it comes free. We'll fast forward as Don does this. You want to make sure that the inner tie rod doesn't spin while you're removing the outer tie rod.
Now, put the grease fitting into your new outer tie rod and just tighten that 7mm grease fitting up. Then twist the outer tie rod back onto your inner tie rod and push it down into place. Now, replace the castle nut and just tighten that up. Then push the cotter pin through and, using your pliers, just bend the ends of it. Now, using your grease gun, fill the tie rod with grease. Measure, and you should get about the same distance. That's a good preliminary alignment. You should have your car aligned after this. Tighten up the lock nut to hold it in place.
Now replace your wheel and then replace those lug nuts and tighten them preliminarily. Lower the vehicle and tighten them the rest of the way. Now torque the lug nuts in a crossing pattern to 100 foot-pounds. Replace the hubcap and tighten up those caps.
We hope this video helps you out. Brought to you by www.1AAuto.com, your source for quality replacement parts and the best service on the Internet. Please feel free to call us toll-free, 888-844-3393. We're the company that's here for you on the Internet and in person.
Tools used
Adjustable Wrench
Bearing Grease
Torque Wrench
Paper Towels
Jack Stands
Floor Jack
Grease Gun
Liquid Thread Locker
1. Removing the Inner Tie Rod
Raise and secure the vehicle
Measure the length of the inner tie rod to the outer tie rod with a tape measure
Measure this length at extension and in compression
Note those measurements
Clean grease from the inner tie rod fitting
Loosen the inner tie rod from the steering rack with an adjustable wrench
Hold the outer tie rod in place with a wrench
Loosen the inner tie rod from the outer tie rod with the adjustable wrench
Remove the tie rod at the steering rack
Turn the inner tie rod counterclockwise to remove it from the outer tie rod
2. Installing the New Inner Tie Rod
Apply thread lock to the threads on the steering rack side of the inner tie rod
Use a floor jack to keep the stabilizer link above the working area
Thread the inner tie rod on to the steering rack
Tighten the inner tie rod to between 70 – 80 foot-pounds of torque
Twist the nut onto the outer end of the inner tie rod by hand
Turn the tire in to push the inner tie rod into the outer tie rod
3. Adjusting the Inner Tie Rod
Measure the length of the inner tie rod to the outer tie rod with a tape measure
Turn the inner tie rod with the adjustable wrench until its length is the noted length from Step 1
4. Greasing the Fittings
Use a grease gun to add grease to the inner tie rod fitting
Add grease until the tie rod boot starts to change shape
Add grease to other fittings as necessary
Brought to you by 1AAuto.com, your source for quality replacement parts and the best service on the Internet.
Hi, I'm Mike from 1A Auto. I hope this how-to video helps you out, and next time you need parts for your vehicle, think of 1AAuto.com. Thanks.
In this video, I'm going to replace an inner tie rod on this 2002 GMC Sierra. This procedure is the same for millions of GMC Sierra, Chevy Silverado, 1500 and 2500, 3500, pretty much all the same basic procedure. You'll need a couple of large adjustable wrenches. I found those work fine. You don't really need the exact size. Two large adjustable wrenches will work.You'll also need a tape measure and you'll need a grease gun with grease, and we do recommend that you have your vehicle aligned after a repair like this.
Here you can see, I have the vehicle up on a lift. Here is my inner tie rod running from here to here. This is the outer tie rod. You could see, I pull this boot down and I pull and what I'm looking at is basically the relationship of here to here and I can see some movement in here. I want to replace this. What I'm going to do is, I'm going to pull out, then I'm going to measure from there to there. Just a shade under ten inches, 9 and 15/16"?. Now, I'm going to pull it back in, and check here. It's about 9 and 7/8"?. When I put this back together, I'm going to set this right between 9 and 7/8"? and 9 and 15/16"?. I'm going to pull it apart. I'm just going to clean this off.
Take a nice big adjustable wrench. I'm loosening that up. On this end, I'm going to put a wrench on my outer tie rod just to hold it in place. We'll get that loosened up. I'm just going to speed up here. We loosened up the nut that's close to the center steering rack and then we loosened up the tie rod where it connects the outer tie rod. Take that nut off for the center steering first and then just turn the whole entire inner tie rod counter clockwise and take it out of the outer tie rod.
Here's a new tie rod from 1A Auto. It's always a good idea to put some thread lock on the inside. If you have your vehicle up on a lift, or a jack, you'll want to jack it up just to get, make sure your stabilizer bars up and out of the way. Thread it in and then use a wrench and tighten this. This should be tightened to 74 foot-pounds. Anywhere between 70 and 80 foot-pounds. In this shot, what I didn't explain very clearly, you can see where that red arrow is. I have a jack underneath the suspension. It just helps lift it up so that the stabilizer bar isn't in the way when you start the tie rod into the center steering link. With this wrench, just pull it nice and tight. Now I'm going to assemble the outer end. I'm going to put this nut on. Then to bring this down on my tire and in. Make sure it's going together straight. If you remember our measurement, basically, we want to be right at 9 and 31/32, so we've got a long way to go. I'm going to speed it up here as I keep using the wrench to turn the tie rod end into the outer tie rod end. I measured a couple of times just to see where I'm at. That is, it's just a little bit further than we want. Knock it off, right there. We've got our one wrench on here and then to tighten, hold on to the outer tie rod, taking that up nice and secure. Now make sure we grease the fitting. What I'm watching, I'm watching this boot here. Once that boot starts changing shape a little bit, I know the grease is in there. Then, while on here. I'm going to hit all my other grease spots as well.
We hope this helps you out. Brought to you by www.1AAuto.com, your source for quality replacement parts and the best service on the Internet. Please feel free to call us toll-free, 888-844-3393. We're the company that's here for you on the Internet and in person.
Tools used
Adjustable Wrench
35mm Socket
Torque Wrench
Tie Rod Fork
Jack Stands
Grease Gun
Rubber Mallet
Tie Rod Puller
7mm Socket
Lug Wrench
Ratchet
Floor Jack
Needle nose pliers
1. Remove the wheel
Loosen the lug nuts.
Raise and secure the vehicle.
Remove the wheel.
2. Remove the tie rod assembly
Remove the tie rod bolt.
Use a pickle fork and hammer to separate it.
Use an adjustable wrench and a fitted wrench to remove the tie rod assembly.
3. Install the new tie rod assembly
Adjust your new tie rod assembly to match the old one for a preliminary alignment.
Mount the new tie rod assembly and tighten it in with a wrench.
Tighten the nut on the tie rod stud to 65 ft lbs.
Install the cotter pin.
Use a 7 mm wrench to install the grease fitting
With a grease gun, grease the inner and outer joints.
4. Put the wheel back on
Preliminarily tighten the lug nuts.
Lower the car and torque the lug nuts to 120 ft lbs using a star pattern.
Brought to you by 1A Auto.com, your source for quality replacement parts and the best service on the internet. Hi, I'm Mike Green. I'm one of the owners of 1A Auto. I want to help you save time and money repairing and maintaining your vehicle. I'm going to use my 20-something years experience restoring and repairing cars and trucks like this, to show you the correct way to install parts from 1A Auto.com. The right parts, installed correctly, that's going to save you time and money. Thank you, and enjoy the video.
In this video I'm going to show you inner and outer tie rod replacement. This truck actually just needed the inner, but if you're replacing the inner, you might as well replace the outer as well. These tie rods fit this whole generation of GM trucks and SUV's - trucks from 98 - 06 and SUV's from 99 - 07. The tools you'll need are a jack and jack stands, a 22 mm lug wrench or socket and ratchet. You'll need either a 35 mm wrench or a 12 inch adjustable wrench that can go to 35 mm and then you'll need a second adjustable wrench as well, a tie rod removal tool, a grease gun, torque wrench, and pliers. The clunking noise was the inner tie rod. You can see here, when I shake the tire back and forth you'll see the inner tie rod move but that steering arm inside doesn't move, so you know there's play in there and it needs to be replaced.
Start out by raising and securing the vehicle on a jack stand and then remove your cap and wheel. We're going to remove this bolt. We've got a ratchet. If you don't have a breaker bar, use a ratchet and a piece of pipe. The bolt should come off pretty easily. Take the bolts off most of the way. I'm planning on replacing the outer tie rod as well, so I'm going to use a pickle fork to separate it. The best way to go about this is to get the wrench on it from underneath and push. That should break her free. I'm just going to speed up as I pull that out. You want to make sure that your outer tie rod spins with the wrench so the whole assembly spins and you don't shorten or lengthen the tie rod -- the inner and outer tie rod assembly.
There's your whole assembly out. If you can see here, I've got my old assembly, inner tie rod and outer tie rod, and I want to measure right from the edge of this surface here right to the end. I'm taking my new inner tie rod and outer tie rod and I put them together, just to compare. This will give you a good preliminary alignment. We'll put this nut a little closer. We can put it together now. It will be a good preliminary alignment until you can get your vehicle to a shop where you can get a real alignment.
I'm just leaving my nut right there and spinning my outer tie rod off. The nut marks the place where your tie rod was and then taking off that outer tie rod just makes it easier to get the inner one on. That allows me put my inner tie rod on. Speed it up here as I use the wrench to tighten the tie rod up. Then I can put my outer tie rod right back on and go right up to the nut. Then I'll just fast-forward here as I put that outer tie rod back on the inner tie rod. Now I'm just taking the nut or just getting the outer tie rod in place. Take the nut off the new tie rod, and I'm just going to get some of the debris off the steering knuckle there, and then you can push on the stud on the tie rod and get it lined up with the steering knuckle, and then push it up and in, and start your nut back on.
We'll tighten this up to 65 foot-pounds. Pull a little tighter here and we can get this cotter pin through. We'll fast-forward here as we install the cotter pin and bend the end over and then use a 7 mm wrench and install our grease fitting. We'll take a wrench screw up here. The other one holds the outer tie rod and just tighten up the block nut. Now you want to use a grease gun and grease both the joint for the outer tie rod and the inner tie rod.
Use some more fast-forward here. As you put the wheel and tire back on, start all the lug nuts one by one by hand first, then use your wrench to preliminary tighten them, then you can lower the vehicle back down on the ground, torque the lug nuts to 120 foot-pounds. I'm using a crossing pattern and then I do it one more time, go around all eight and make sure they're tight. Then you can put your center cap back on and you should be all set.
We hope this helps you out. Brought to you by www.1AAuto.com, your source for quality replacement parts and the best service on the internet. Please feel free to call us toll-free, 888-844-3393. We're the company that's here for you on the internet and in person.
Tools used
Reciprocating Saw
Hammer
Torque Wrench
14mm Socket
Jack Stands
Ratchet
22mm Socket
1. Removing the Wheel
Remove the hub cap by loosening the lug nuts
Remove the lug nuts and tire
2. Removing the Stabilizer Link
Using locking pliers to clip onto the top of the stabilizer link
Then remove 14mm bolt from bottom of the stabilizer link
Remove the stabilizer link with a hammer or reciprocating saw
3. Replacing the Stabilizer Link
Put the stabilizer piece back into place
Use four washers, four grommets, and a tube
Use a jack stand to help push it through till it appears through the top
Tighten the 14mm bolt on the stabilizer link
4. Replacing the Wheel
Put the tire in place
Replace and tighten each lug nut
Torque each lug nut in a crossing pattern to 100 ft/lbs
Torque the center hub nut to 160 ft/lbs
Replace the hub cap and tighten the lug nut caps
Brought to you by 1AAuto.com, your source for quality replacement parts and the best service on the Internet.
Hi, I'm Don from 1A Auto. I hope this how-to video helps you out, and the next time you need a part for your vehicle, think of 1AAuto.com. Thanks.
In this video, we're going to show you how to replace a sway bar link on this 2002 Chevy Suburban, and it's the same part and similar process on these Suburbans from 2000 and 2006. We show you on the passenger's side, but on the driver's side it's the same procedure. The items you need for this include a new sway bar link from 1AAuto.com, a 14mm and 22mm socket and ratchet, locking pliers, a hammer, and a reciprocating saw depending on the condition of your vehicle.
Remove your hubcap by loosening up these lug nut caps and pulling the hub cap. Now, you want to remove the lug nuts. If you don't have air powered tools, you want to do this while the vehicle is on the ground. You can loosen them preliminarily, raise the vehicle and remove the lug nuts the rest of the way, and pull the wheel out. Using locking pliers, clip on to the top of your stabilizer link, and then remove this 14mm bolt. We'll just fast forward as Mike does this.
Now, you want to just hammer the link through. If the link doesn't move, you may have to use a reciprocating saw and cut it. Up top is the old part; below is the new part from 1A Auto. You can see they're identical, and they'll fit exactly the same. You want to put your stabilizer link back into place, starting with a washer and a grommet, then through the hole, then another grommet, then a washer, then the tube; then, before going through the next hole, another washer and grommet; then, on the top another grommet and another washer, then the nut.
Here, we just put the jack underneath the link. That's just to push it up through and compress the washers a little bit so that you can get the nut on the other end. Once I get another nut on, you'll see I just release the jack. You want to obviously be supporting the vehicle with jack stands, and then use your jack to push the bolt of the link up through. Then, you want to tighten up the sway bar link, and you basically want to tighten it up until the rubber bushings are compressed enough so that they're the same diameter as the washers.
Put the wheel back in place, then replace each of your lug nuts and tighten them up. You want to tighten them preliminarily, lower the vehicle, then tighten them the rest of the way. Torque each lug nut in a crossing pattern to 100 foot-pounds. Replace the hubcap, and just tighten up those lug nut caps.
We hope this video helps you out. Brought to you by www.1AAuto.com, your source for quality replacement parts and the best service on the Internet. Please feel free to call us toll-free, 888-844-3393. We're the company that's here for you on the Internet and in person.
PSA58924
In Stock
Product Reviews
Loading reviews
4.17/ 5.012
12 reviews
5 Stars
4 Stars
3 Stars
2 Stars
1 Star
7
2
2
0
1
David
March 17, 2017
Grease zerKS broke on 2 ball joints didn't hardly even tighten them down. Not impressed
Kenneth
June 22, 2018
Very good quality product. Reasonably priced and great warranty and fast reliable shipping.
Felipe
October 16, 2018
Great parts. Fast delivery and great customer service. Parts where easy to install. Upper ball joints were damaged during delivery, contacted customer service and two more were sent overnight. Will be buy more parts from a1 auto.
FRONT END PARTS
D
October 30, 2018
I RECEIVED MY PARTS IN THE TIME THAT WAS PROMISED AND WITH FREE SHIPPING,ALL THE PARTS FIT PERFECTLY WITH NO TROUBLE INSTALLING THEM THE PRICE WAS VERY GOOD AND I WILL DEFINETLY ORDER PARTS AGAIN FROM a-1. Thanks for the great service. Ed
Worth it !!
R
February 27, 2019
The product came in quick with all the right parts at a great price . All the parts fit on my 2001 Chevy suburban 1500 4x4 .. Have no complaints. Thanks for the service.
Disappointed
dBilly
July 22, 2019
Nothing had a grease fitting,1 of the tie rods was bent.
Joseph
April 2, 2020
Really good kit oem quality would buy in a heart beat cant beat the price on 1aauto!
Steering an suspension kit
E
August 12, 2020
Came with everything i needed at a fair price.
Good parts, always fast shipping
John
March 24, 2021
The only reason it's not a 5 star rating is bc the only flaw with this is there aren't any grease fittings. But it's a simple fix. You can buy the needle for your grease gun to stick in the boot and pump with grease. Other than that the parts are good quality and oem fitment. 1aauto has never done me wrong and I will continue to order from here.
Cheap Parts
C
April 2, 2021
Horrible quality. Put them on my truck less than 6 months ago. Had the truck aligned. Parts are now worn out again. Yes they have a lifetime warranty but Im not interested in replacing my front end every couple of months. Will be buying Moog.
Good price, quality parts , safety you
Jose
August 14, 2023
I've been buying parts from 1Aauto in the last 7 years , I really like the high quality of the parts , they have good price , you can choose kits and have a better price , I've never received a defective part , and parts arrive never late , always on time, they have good trustable shipping, if your parts for any reason don't arrive or get lost , you can contact costumer service , and they replace your order with no extra cost , it happened to me , I ordered , driveshaft, exhaust pipe , muffler , 2 front axles , and after 8 business day never arrived, i contacted costumer service with my order # and they replaced my order , and no extra cost , 1Aauto my Mobil auto parts ,
Runs way smoother !
Salvadore
May 6, 2024
Installed on 05 tahoe can feel a big difference I do recommend these parts
Customer Q&A
Just want to make sure that this will fit my 2005 Chevy Silverado 1500 4wheel drive Z71 crew cab 5.3l?August 21, 2016
MelongoPeter M
10
I own a 2002 Chevy Avalanche 4x4 Z71 and this set worked great
August 24, 2016
GABRIEL G
10
I own a 2006 GMC sierra 1500 and the parts fits perfectly
August 5, 2020
Herminio C
Do the outer tie rods in the kit need greased? If so how? There isn't a zero port on them.May 19, 2017
Nic P
10
Yes, there is a grease zerk on the bottom of it
May 19, 2017
Robert K
10
I have the same question.
May 19, 2017
Charles E
10
We have multiple manufacturers make these parts for us, and typically they are sealed units with no zerks.
May 21, 2017
Tim K
The ball joints in this set do not have grease zerts. Do I have to take things apart periodicly to keep them greased up good? I find it odd they dont have zerts. I will pack grease in the boots when I install them. Just dont like the idea of having tMay 1, 2020
Bryson K
10
If you find that the parts have lost grease, you can contact us and we can send a replacement out under the lifetime warranty. Please do not hesitate to contact us with any further questions.
May 1, 2020
Emma F
Will this kit work in a 1999 Silverado with a 3 inch lift?March 23, 2021
Jonas K
10
We do not recommend our parts for vehicles having lift kits.
March 23, 2021
Cristina P
Will this fit my 07 Silverado classic Rwd?September 29, 2021
Daniel M
10
This kit will only work for 4WD models.
September 29, 2021
T I
Customer service
877-844-3393
Monday - Friday 8:00am - 9:30pm ET Saturday - Sunday 8:00am - 4:30pm ET
Chevrolet is a registered trademark of General Motors Company. 1A Auto is not affiliated with or sponsored by Chevrolet or General Motors Company.See all trademarks.
Enter Vehicle Year Make Model
Specify your vehicle's year, make and model to guarantee fit.
Year
Make
Model
Options
Drivetrain
This part doesn’t fit a . Select from parts that fit.