Brought to you by 1AAuto.com, your source for quality replacement parts and the best service on the internet.
Hi, I'm Mike Green. I'm one of the owners of 1A Auto. I want to help you save time and money repairing and maintaining your vehicle. I'm going to use my 20 plus years experience restoring and repairing cars and trucks like this to show you the correct way to install parts from 1AAuto.com. The right parts installed correctly, that's going to save you time and money. Thank you and enjoy the video.
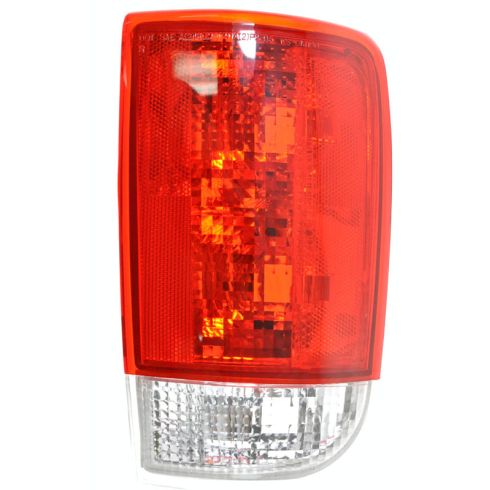
This video we'll be showing you how to replace the taillight, both the bulbs and the whole assembly if you break your taillight on this 2000 S10 Blazer, same as any S10 Blazer or S15 Jimmy of this era. The only tool you'll need is a Phillips head screwdriver.
Okay, to remove the taillight there's two screws on the inside of the rear hatch opening here. Phillips head, you want to remove those. Okay, we'll use a little bit of fast forward here so you don't have to watch me just taking these screws out. Okay, now the taillight comes right out. Okay, if you're just looking to change bulbs, these have little tabs that you press right here. Then they twist, come out, and then after that the bulbs just pull out and push back in. Okay, and if you're changing the whole assembly, you'll want to pull the little clip right here, clipping the harness in. Necessary to use your screwdriver just to push on the teeth a little bit and the other thing you could do here is use a pair of pliers to squeeze the teeth together. I didn't think of that while I was shooting it.
Once you get one side, push on the other side. That's the hardest part of the whole thing. Okay, when it comes out, you'll want to take this little rubber guide, twist it off. Here's my new light from 1A Auto. You can see it's the exact same, just quite a bit brighter and shinier. Okay, put that guide on. Now the gray one goes down on the bottom. Looks like that one's missing a, there should be a rubber. This one's, for some reason it's missing its rubber washer. Check the film and see where that went.
And after checking the film, it turns out that the rubber washer was never there in the first place. And put that pin back in. Now just like the original, make sure this pin gets lined up with that hole right there. Use the same screws. Harness is kind of getting in the way a little bit, just going to kind of push it in. There's my screw. Okay and we'll fast forward again as I tighten up those screws and then I walk to the front for what I hope to be a successful test. And it does appear successful.
We hope this helps you out. Brought you to by www.1AAuto.com, your source for quality replacement parts and the best service on the internet. Please feel free to call us toll free, 888-844-3393. We're the company that's here for you on the internet and in person.