

How To Replace Alternator 2003-09 GMC Savana 5-3L 6-0L
Created on: 2013-09-17
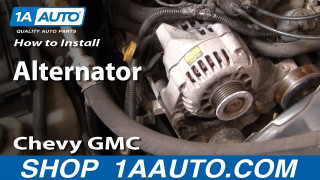
Learn how to replace the alternator on your 03-09 GMC Savana 5.3L/6.0L with expert knowledge and instructions in this 1A Auto video.
-
step 1 :Disconnecting the Battery
- Disconnect the negative battery cable with a 10mm wrench
-
step 2 :Removing the Air Intake
- Remove the two 10mm bolt from the air intake box
- Disconnect the air intake sensor
- Loosen the hose clamp with a flat blade screwdriver
- Lift the air intake box up and out
- Loosen the hose clamp on the end of the air intake hose with a flat blade screwdriver
- Remove the air intake hose
-
step 3 :Removing the Coolant Bottle
- Remove the 10mm bolt from the coolant bottle
- Remove the coolant bottle
-
step 4 :Removing the Serpentine Belt
- Insert the 15mm socket and ratchet into the tensioner
- Turn the tensioner clockwise to loosen the belt
- Pull the belt off the alternator
- Release the tensioner
- Pull the belt off by hand
-
step 5 :Removing the Alternator
- Remove the two 15mm bolts on the front of the alternator
- Pry the alternator out with a pry bar
- Pull up the alternator
- Remove the 10mm bolt under the rubber boot
- Disconnect the alternator wiring harness
- Remove the alternator
-
step 6 :Installing the Alternator
- Tighten the 10mm nut onto the alternator
- Replace the rubber boot
- Connect the alternator wiring harness
- Insert the alternator into place
- Insert and tighten the two 15mm bolts on the front of the alternator
-
step 7 :Reinstalling the Serpentine Belt
- Familiarize yourself with the route of the serpentine belt
- Insert the belt into place by following the diagram
- Pull the tensioner clockwise with the 15mm sock and ratchet
- Pull the belt over the alternator
- Release the tensioner
-
step 8 :Installing the Air Intake
- Insert the air intake hose into the throttle body
- Tighten the hose clamp with a flat blade screwdriver
- Insert the air intake box into place
- Insert the air intake hose into the air box
- Tighten the hose clamp with a flat blade screwdriver
- Tighten the two 10mm bolts to the air intake box
-
step 9 :Reinstalling the Coolant Bottle
- Insert the coolant bottle into place
- Tighten the 10mm bolt to the coolant bottle
-
step 10 :Connecting the Battery
- Connect the negative battery cable with a 10mm wrench
Tools needed
-
Flat Blade Screwdriver
15mm Socket
Pry Bar
10mm Socket
Ratchet
Brought to you by 1AAuto.com, your source for quality replacement parts and the best service on the Internet.
Hi, I'm Mike from 1A Auto. I hope this how-to video helps you out, and next time you need parts for your vehicle, think of 1AAuto.com. Thanks.
In this video, we're going to show you how to replace the alternator in this 2005 GMC Savana 2500 with the 6-liter V8 engine. The tools you're going to need for this are a 10mm and a 15mm socket and ratchet, a flat blade screwdriver, and a pry bar.
The first thing that you're going to want to do is remove your negative cable from the battery. Use a 10mm socket and ratchet to loosen up that bolt and pull the cable off the battery.
Now you want to remove these two 10mm bolts that secure the air intake box, and we'll fast-forward as he does this. Now disconnect the harness to the air intake box and set it aside. Then you want to use a flat blade screwdriver to loosen up this clamp. With the clamp loosened up, you should be able to lift and pull out your air intake box. Now, using a flat blade screwdriver, loosen up the clamp on this part of the air intake. Once that's loosened up, you should be able to pull that up and out.
Now you want to remove your radiator overflow bottle. Just remove the 10mm bolt that holds it in place, and then it will lift up and pull out, and you want to just set that aside. Now that you can see the serpentine belt, you want to use a 15mm socket and ratchet and place in on the tensioner pulley. You want to push that down and loosen up the belt. You'll be able to pull it off the alternator.
There are two 15mm bolts on the front of the alternator and you want to remove those. We'll fast-forward as he does that. Now to get the alternator out (it is in there pretty good), you want to use a pry bar. Pry up underneath it and eventually it will break free from there. See, he's got that side; walk around to the other side. Pry up that side. Once it's up and out of there, pull it out, and then on the back you'll see that there is a little rubber cover. What you want to do is you want to pull back that cover, and there's a 10mm bolt under there, as you can see right there. We'll fast-forward as he removes that.
Now you want to lift that wire up and off of your alternator, and then pry up that harness right there. You want to start by putting that wire back on, so pull back the rubber cap there and replace the wire, replace that nut, and we'll fast-forward as he tightens that up.
Next thing you want to do, you want to take the harness and plug it back into place on the alternator. To put your alternator into position, you want to push down one end and then try to swing and hit the other end down in. To help out, you can see he's using a flat blade screwdriver in the hole to try and pry it downwards a little bit. With enough moving around, eventually you will get it into a spot where you can actually get a bolt in there. It does take a little bit of time, but it will go.
Once you get one bolt in there, you can now pry from that side and it will line up the hole on the other side so you can push that bolt in as well. We'll fast-forward as he tightens those bolts up. Here's the belt diagram for the van. I included this just in case, if for some reason the belt slips off one of these pulleys, you know what order it goes in. You know if it goes above it or below it. It kind of helps out. You can use this as a reference point if you need it.
Now, with the belt in place, you want to put that 15mm socket on the tensioner. You want to push down on that, and that will allow you to align the belt on all of the pulleys. Make sure you have it place, and then you want to tighten the tensioner back up. Now take that part of your intake and put it back down. Put it into position and use a flat blade screwdriver to tighten up the clamp.
Now you can reinstall your air intake box. You can see there are two holes there. They line up with the two pegs on the van and you want to feed that down in there. Get it into position, and then, using a flat blade screwdriver you want to tighten up that clamp where it connects. You can see there he actually loosened the part of the intake he put in before this.
He loosened it up so he could angle it and push this part down. Then you want to tighten both those clamps back up if you have to do that. We'll fast-forward here. You want to put in those 10mm bolts that secure the air intake box and reconnect the harness. Then you want to realign your radiator overflow bottle. Put it into position and replace the 10mm bolt in that. Now you can reconnect your negative cable back to your battery.
We hope this video helps you out. Brought to you by www.1AAuto.com, your source for quality replacement parts and the best service on the Internet. Please feel free to call us toll-free, 888-844-3393. We're the company that's here for you on the Internet and in person.
How to Replace Alternator 1998-2000 Chevy Blazer S10
In this video, 1A Auto shows you how to replace a broken or bad alternator in a 98-00 Chevy Blazer S10.
