
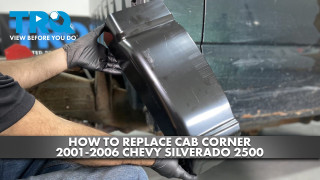
How to Replace Cab Corner 2001-2006 Chevrolet Silverado 2500
Created on: 2022-12-01
This video shows you how to install a cab corner on your 2001-2006 Chevrolet Silverado 2500.
Tools needed
-
Hammer
Trim Tool Set
Safety Glasses
Welder
Sanding Block
Pick
Spray Primer
Grinder
1/8 Inch Drill Bit
Sandpaper
Cutoff Wheel
Locking Pliers
Gloves
Flat Blade Screwdriver
Welding Helmet
Surface Prep Discs
Paper Towels
Glass Cleaner
Painter's Tape
Wire Brush
Cloth Rags
Marker / Writing Utensil
In this video we're going to be replacing the cab corner on this 2006 Chevy 2500.
First thing we're going to do is just clean the surface. Wait, if we need to make any marks or sand anything, our marks will stick and or our sandpaper will last longer. We're not grinding dirt, we're not working against the dirt.
Before you start this project you want to take your parts out of the box and physically make sure that they line up and they are exactly what you need before you start cutting and removing pieces of your body. So we've aligned ours, we can set it aside and move forward.
So now we're going to do is we're going to take our new cap corner, we're going to put it up into place. Easiest thing to do with this is line up your body line, if you're deciding to go that far, line up your body line here and just press it into place the best you can. It will not go over a hundred percent flush. What we're looking to do is just get our height lined up so we can put down a piece of tape so we know where our cut line will be. So this is just going to be a guide, there's one there.
Now we're going to do take another piece of tape, take our corner right off. Foreign butt this one up right to it, all the way into the seam in the back. Now we can take the top piece off.
Now when we put our corner back on, there a little note we should mention, you have this entire new cab corner piece. Our cab corner is only rotted down here. We do have a dent here in our factory piece, but the rot is only down here.
If you didn't have a dent and didn't feel like metal working this out and you only wanted to replace the rotted section, all you need to do is grind up and find out where the rot and the rust stops. In this case, go about an inch past that and cut your panel down to size. You don't have to replace the whole piece.
In this case what we're going to do is we're going to go up to the body line and a little pass to show you what you would do if you had a little bit more of an involved repair.
So on the inside, on our factory piece, we have spot welds. If you look down this panel here, you can see little spots that are indented. We're going to take our little belt sander here, we're going to grind away those welds from this panel and not the inside panel.
Hey guys.
Thank you. And if we follow this up, you can see by the spacing they're equally spaced. Spaced follow this up, we can't find one right here, so it may be underneath the tape, so when we cut our line down we may have to do one more underneath the tape.
What we're doing here is just getting behind it with a pry tool. We're not looking for this to pop off, everything else is still connected. All we're looking to do is just make sure we got enough of that spot weld so that the panel will move. You can see here it's cracking, which means we have a little bit more of that spot weld lower than we actually hit.
We're just checking to make sure this inside flange here, this inside edge, is free. That is free, there, here, and all the way down, you can see it moving all the way down here. So we're done with the spot welds here, there might be one more here. Now we can move on to the back side.
All right, so we're going to take what we call a cookie wheel, or a abrasive disc, we're just going to clean out this that you can feel. It's called seam sealer, it's kind of a rubbery texture covering up the two seams of the vehicle, not letting any moisture in there. We're going to clean it up just to show you where the spot welds are here. This will be a little bit different, this is much more of a glob of seam sealer. So once we get behind here, we'll show you where all the spot welds are, and then we'll remove those.
All right, so now that we've gotten rid of this seam sealer, you can see the white and a couple of black dots are where our spot welds are. So the white that you're seeing here is just a seam sealer sitting in that valley where the spot weld is. So we'll do the same process here, just grind out those spot welts all the way down.
All right, so again, we're just going to check between our spot welds with the little pry tool, just to make sure that we're free. Foreign. Here isn't to pop the panel off, it will not move, again, still connected top and bottom. We're just trying to see how much more grinding we have to do.
Now at this point, because this isn't in the door jamb, it's okay to leave these folded back, just be very careful, it'll be sharp. Foreign. Looks like we're pretty clear all the way up.
Good, now we can move on to the bottom, because this is rotted away. What you can do is just take a wizard wheel or a cut off wheel and just slice it here, slice it here, pull this piece out, and then work off the rest.
What I'm going to try and do here is do my best with whatever's left to show you where the welds would be if they were still there. Again, you have some seam sealer in this gap here underneath. It looks like we have three spot welds here, and again there was a little body filler and a few extra coats of paint, so this may have been worked on. There may be more than these or there's just maybe dense, so we'll go ahead and grind these three out.
And we also took out some of the seam sealer here, which acts like a little bit of a glue to hold this in place also, so we'll remove these three and see what kind of movement we get on the bottom of that panel.
So in our case we have access right here to do what we're about to do. If you don't, come in from the back side and do exactly what we're going to do, but for ease of showing you we're going to go just like this. I'm going to hit it with a hammer and try and separate the welds in the back. And again, you can see that our tool came through the metal a little bit before where it should have, which is fine, we can come back and clean all that up. We're just trying to get off as much of the old metal as we can down here.
All right, and down the bottom here it's okay because it's all rusted already and missing. It's okay if you get a little excited and pull some pieces off, just be careful, it is very sharp.
So now that we have the spot welds along the back, along the bottom, and along the inside door jamb pretty well ground out, the whole bottom piece feels loose enough that we're just connected across the top here.
We're going to do one last time, let's measure three times and cut once. We'll be cutting probably about five times though, again, into place the best we can. Easiest thing to do, like I said, is just line up your body line here.
And now we're looking to do is just make sure our top of our tape line is lower than the top of this piece, and we'll trim the actual vehicle side even lower than that, because once you remove it it's very hard to put it back. So we'll take it off in sections until we meet up flush with this piece. So everything looks pretty good.
Tape line is lower than our new piece, so we know if we go just below that will still be down here instead of cutting way up here. So we'll remove this, and we'll probably cut somewhere along here all the way around. Take this right off.
All right, so we're just going to make ourselves the starting point of where to cut, and we'll probably cut just on the bottom side of this line. So with our cutoff wheel we can now start to remove the factory cab corner.
We'll start back here. So back here you have a couple of areas to work with, or work towards. You have this lip here, and then this area here. This area here is very difficult to do with a cut off tool, so save this area for last. You can cut through your corner, but try not to cut this flange, because that's right up against the other factory piece, the back of your cab.
So we'll cut, same thing, we'll just kind of lightly touch on this side and we'll come around. We can sink the wheel in a little ways here, you don't want to go that far in, so we can sink the wheel in a little here. We come around, we'll stop here, and then we'll work off this flange very last.
At this point we can remove our tape, and part of the reason for doing that is we were pretty sure we had at least one more spot weld right here, and we do. So we'll go ahead and work on that spot weld now.
All right, so now we can see we just have a little bit here, and that'll break this whole side free.
All right, so we're free here, and if we pry, still feels pretty stuck inside here. There's a lip from your door jamb, it's like an L shape. On this side of that L shape, behind here, is some foam, some factory foam glue slash insulation. So even though this whole side's loose, it's not really moving easily, because that foam needs to be broken free.
Foreign still hung up somewhere back here, and it's right here.
Foreign so now what we'll do is pull outward just a little bit, to pry that up just a little bit, and we'll take our tool and just lightly score that, and with the small hammer we can just tap this back down.
Foreign not done with that, but we do want it out of our way for a little while. So now what we can do is just come in here and clean up all these surfaces that our spot welds are on, and get rid of any residual rust or corrosion that remains. That way, we put our new piece on, we're not locking in any old rust or corrosion.
Usually at this step, unless you have some really sharp pieces of metal hanging or some some bits of metal left on here, there's no reason to come back and remove metal. So just a scuffing step to clean the metal and get it to clean, shiny metal which we can weld to is the best step. Up along this inside lip here, do your best to get rid of as much of that seam sealer as you can. When we tack welds are spot weld in our new panel, that stuff's going to start to rust and bubble and smoke, so just on here, get rid of as much as that as you can.
All right, so now on the inside here, and we'll go along here and get rid of as much foam as we can. We're just cleaning now. We're going to be welding in our new panel, so the idea with welding is your welding two very clean pieces of metal together. So we will continue the process of cleaning the metal.
All right, now we'll remove this foam as well. Ideally you want to put some replacement foam in here, but during this process it's going to be very hard to replace this, but to make sure our panel fits nice and snug in the way it should and there's nothing in the way, we'll remove this also. If you can see, there has been some corrosion on the back side of the metal which has gotten into this foam, so we don't want to leave that in there and let that corrosion continue, so we'll remove that now.
Down the bottom is where our biggest offender is of corrosion and rust, so down there we may end up actually taking an 80 grit or a 50 grit sandpaper to get rid of the majority of that quickly, but anywhere else you see signs of corrosion, go ahead and remove it. And the key to the removing it is the protection after the fact. You want to put some kind of direct to metal primer or some kind of etch prime or something over the bare metal, but don't put it on the area we're going to weld.
All right, so we've switched over to a 50 grit, and we're just, we're not going to take off a bunch of metal, we're just going to get the corrosion and the rust gone as much as we can.
At every step of this process you want to keep fitting and test fitting, because you'll learn new things about both the vehicle side and your replacement panel side. So in this step we know we need to be up here. We're going to set it in right here and just see how things look so far.
What you ideally want to do is creep up into position rather than just take out a whole bunch of metal and hope that it fits, and if it doesn't, try and fix it.
All right, so the the corner radius looks pretty good, the width here looks pretty good, the back side also looks pretty good. That flange we were dealing with looks like it's going to sit in this channel really well. If we follow the inside, we look like our body line area is going to line up really well. All of this flange looks like it's going to line up well. We can see down the bottom we are obviously off, but we know now that everything looks pretty good, nothing looks way out of line or like we'll have to trim the piece itself to match, so looks like we're pretty good.
The bottom feels pretty good, like it's long enough to sit in place, so now we'll just keep moving up.
At this point, if you wanted to, you can take some off of your patch panel so you can trim the top down if you wanted to, or we can trim the vehicle up. In our case, it's probably easier to trim our patch panel down, because we have these flanges, or these door jamb pieces, on this side and the back side, which was a little bit difficult for us to cut.
So the piece it's easier to cut is your trim panel, because you can take it right off, put a piece of tape across here for your straight line, and it's easy to trim these here off the vehicle than it is to trim these on the vehicle.
Because we're done inside where our patch panel is going to go, we're going to put a little bit of primer inside here where we broke open some bare metal.
We're going to do is just put a little piece of masking tape down the edge for two reasons, one we don't want it to get where we're welding, and two, and try and block off a little of that overspray into the vehicle the best we can.
All right, so we're doing this now so that way this can dry as we're working on the rest of it.
So for this step, we're just going to use some etch primer, which is just going to protect the bare metal, and that's inside. All we're looking to do a couple light coats, and we didn't mask up up here because we will be grinding this and welding this area, so we're not too worried. Just don't go spraying far beyond where you're at.
Primer is on, you can go ahead and pull your tape now. We can continue fitting our patch panel.
All right, so we know that we need to be really close to that line for our panel to fit in where it needs to be, and again, what we're doing, because we've removed the factory body line here, what we're doing here to make sure we are close and in line the bottom corner of this rocker panel. You can see that we're off just a little bit here, so as we trim our patch panel to match up to the cut that we left, we'll keep checking it down here to make sure that we're in position.
So we'll put a mark on our patch panel and trim that down. You're going to trim this panel down to match up to the cut that we made here. So we had a piece of tape on here earlier, it was about this width. We took that piece of tape off, we kept it, and we're going to use that as a guide on our new piece. We're going to mark this, the bottom line here, and we're going to cut on the top of that bottom line, again taking off a little bit at a time.
Foreign. This up a little bit better, top of our tape with the top of our panel, and we'll mark this, and then we'll cut that little piece off, and we'll just keep test fitting.
So we're going to do Mark that line, and we're just using a little soapstone. You can use whatever you want to mark your line, you can score a line. What I like to do here, let's mark that line, take off this tape, and then come back with another piece of tape underneath the line we just made, so we know now we're going to cut on the top of this tape.
And this part here doesn't have to be exact, you're probably not going to get it the first try as far as fitting perfectly. This is where we can just keep coming back, trim it to fit.
All right, so we have our tape and our guide in place, we'll take our cutoff wheel, trim this piece right off. What I like to do here, just because we're handling it, it's very sharp, it's just a quick clean on the inside to get rid of the burrs.
Foreign, now we can bring it up to the vehicle and just keep test fitting. Remember that we're now test fitting the bottom.
So we're still off a little bit, which means we have to go higher, and we have couple of angles to deal with, mainly the back side here, in the inside here. These two angles don't match, you can see, left a little bit extra, and this side is that angle that we're dealing with.
Foreign so now what we do is just slowly take a little bit off, test fit, take a little bit off, test fit. We know we have to work this angle pretty good, so we'll work here a little bit on the back here.
Foreign so what I'm doing here is meeting this seam the best I can, to see where it's off. Just a little gap between them, which is okay, no more than an eighth inch gap. Still have a little bit to deal with right here. Let's see if we push this into position, I have a little overlap here.
So one thing that's stopping our patch panel from meeting up in here and helping us align things is this old glob of seam sealer here. So this was put on after the patch, or after the original panel was on, and squeezed into place. So we're just going to remove most of this, will help align our panel a little better. This is something that you should try and put back if you can when you're done, so help moisture from getting in between the two panels.
Now we're allowed to move the bottom of our panel just a little bit more. Before, we were forced to only move it as much as that seam sealer would allow us, which, again, different panel than the factory, different seam sealer location then this one here. So cutting there.
So now we can take our tape off. We know we're very close, and what we're actually going to do is we are going to use a tool to help us keep part or all of the panel, however you decide to use it, in place. We're going to use it in the door jamb here.
So we're going to do is get it as close as we can, mark for a 1/8 inch hole, drill a hole, and then use a panel clip.
All right, so we're going to concentrate up in this area here for a minute. What we have is our two panels very closely aligned. This is going to be a little bit tricky. What you want to do is get them as close as you can, almost like you're going to start welding it in place. Take a 1/8 inch drill, pop a little hole between the two. These are called clecos, it's basically a removable rivet.
So we're going to squeeze that through the eighth inch hole and release what that's going to do. Let's hold our panel in place. So now we know we have this side pretty well lined up and it's not going to move, we can work around and get everything else lined up and put in place.
If we follow this corner and we try and get this lined up, we have a small issue in the back here. All right, so everything's just out way too far, plus this angle, this bend, this flange here is a little bit further out because the bend isn't a clean 90.
So what we're going to have to do is get everything lined up and ready to be welded, and then we may have to tack weld our way into this and press this into place, and then tack weld that in place. But for right now we need to make these two pieces meet, and we have a little bit more material on the vehicle side underneath our new cab corner here. We'll just have to trim down our cab corner to fit in place there once it's ready.
So we have a little bit of trimming to do, probably from about here to here. Go ahead and do that now. Foreign. Take off a little bit, keep test fitting, you don't want to go too far.
So right now we've got the corner looking pretty good, but we have a little bit of a material in the back side right here, underneath this material right here. Thank you. Okay, we're getting very close.
So the reason we're doing this to this side is it's very difficult to get a tool in here to clean this up. If you have the right tools, you can clean that up and make it flat and straight even better. Foreign.
So what I'm trying to do is press these two pieces with a little bit of pressure on the vehicle, a little bit of pressure on the cab corner, my fingers between them, trying to hold this corner in place, press this in, see where we are. I think where we're there.
So what we're also going to do on the back side here is we're going to use another one of those clecos. Take our eighth inch drill. Foreign.
Place from the top. All right, so now that we're pretty much locked in up top, we have the gap that we like between the two panels. We can see that the top panel is a little bit out, it's a little bit proud of our patch panel, which is okay for right now. What you're mainly looking for is that your contours and your body line is in the right place, your contours are correct, and you have the right gap between the panels, which is about an eighth inch or less.
All right, so we're looking good here. We can continue down and make sure that the bottom of our panel isn't too far out, too far left, right. Just make sure now that our bottom of the panel is in position to where it needs to be, but it's very tough to do that with one of these inside the door jamb, because you can't close your door and see if your body lines and your door gaps are correct.
So what we're going to do is ultimately take this one out by putting a few more back here. All right, so to start we're just going to take this out, sacrifice a little bit of movement to be able to line up our door and our body line. So be careful when you're shutting your door, this has shifted a little bit, you don't want to just throw that door shut.
Okay, now what we see is that when we put this back up into position that we're very far out here. Okay, so we know we have some work to do bringing that panel in and down, but only are in our position, body line looks pretty good.
Foreign, just pull our door closed as much as we can. Now working back and down, we know we have a few spots, we can see our old spot welds, so we know we have a little work to do about getting the panel sucked in. And if we also look on the inside, we can see that we're pretty far away in here, there's a gap I can get my finger in, which means we have to close that gap also.
All right, so we are going to just work on getting that panel to sit somewhere in there. Now, if you remember, the original didn't sit flush with the rocker, this cab corner came out just a touch. Okay, so we can put our panel mostly in place.
When I get it as lined up the best you can, I'm just going to take a pair of locking pliers and lock that panel into place. This is just a temporary hold. I'm just going to use another pair of locking pliers just to hold our panel in place. What we're going to do is put another one of those clips back here.
And when we move on to the welding stage, we'll plug weld these holes closed as we remove Cleco clips. The goal here is to take that one out of the front door jamb once we have everything here lined up, and that doesn't move when we remove the clip, and we know we're just about ready to start welding.
So we're going to have to put a couple attack welds up top to hold this panel in place. To do that, we're going to have to make a bare metal spot on our new patch panel, and ideally we make it here where it touches both panels. We're going to clean out some of this, this primer, also where we're going to weld, which will be this entire seam. We're going to have to clean back to bare metal as well.
All right, all right, all right, all right. Now again, the cleaner this metal is, the easier and the better your welding is going to be.
All right, so we can take our ground clamp for our welder, put that right in place there, a nice clean metal that we made, and what we're going to do here is start to tack weld just in a couple of spots. Now I want to pick the corner because right here seems to be the place where it's lined up the best, and the corner will also allow you to rotate and pivot just a little bit, but this right here, this transition feels really good to me. So we're going to put a weld right there.
All right, so we're going to shoot right here for one tack weld. What I'm going to do is go for this spot where it's closer together than here. What that'll do is it'll allow us to get our screwdriver, a flat head or a pick, in there for when we have to move the top to the bottom or whatever we need to do. We'll get right there.
Foreign. Now we have one pivot point right here, which will allow us to move and shift if we need to, to get the rest of it to line up. So what we're going to do here is we're going to work across here, but just to make sure things line up, we're just going to pry this back and forward just to make sure nothing shifts too much out of place.
All right, I think we're okay there. I'm going to try and put some upward pressure on this panel to close that gap just a little bit while I weld.
All right, so just come back and clean that up a little bit.
All right, with these two tacks, allow us to do is basically replace these pins. I needed this one in the door jamb to be replaced so I could check the fitment and the gap to the door. So now that we have that pinned in place and the gap up here is pretty good and our body line is pretty good, we can remove the locking pliers at the bottom because we know our bottom gap is a little tight down here, we can close our door.
Foreign if you follow that gap down, we're pretty good here and it gets really tight down here, so we know we have to move the bottom of the door, the bottom of the corner, out a little bit. So now we can just work on swinging the bottom out a bit.
So continuing to work on that gap, we know the bottom is now loose, so we can do is take a small panel tool or a clip tool and just try and pry the bottom corner of this to open up that door gap a little bit.
Okay, once we have it, well, we're pretty happy with it. We also have to take into account on this vehicle there's some damage on the door. All right, so we have a couple of dents and wrinkles in this door, so this this contour here might not be correct, which is actually pushed in pretty well at the bottom. So we're going to get this the best that we can to match up for what should have been there and lock it into position.
All right, so our gap is pretty good across the top. We're going to do now is just stitch in a couple of spot welds and our panels are really close to being aligned.
All right, you can rub a hamburger across and not get caught, or hear that, there only is in line when we press the two together. So when we make our welds, we're going to have to keep pressure on one side, tack it, let it cool for a second, press it, tack it. You never want to continuously tack your panel, you'll overheat the metal and melt it. So you're going to do attack, attack, attack, just keep working back and forth until you close up that bead with a bunch of tacks all the way across. It's called a stitch weld, so we'll go ahead and do that now. We'll just keep alternating and working in.
Foreign foreign Flattening out these welds just now, we're going to do a lot of that at the end. We're just going to use a wire brush to clean up all this. Good looking pretty good. We'll let that cool and we'll come back and we'll work on a section, a section, just keep alternating.
Right now we're going to do is probably come around the back side and start working this side in. All right, so we have here a good gap, or a big overlap rather, foreign piece to our bottom. So we're going to get in there with the small flathead screwdriver or something thin but yet strong enough to pry with, and we're just going to lightly put a little outward pressure on the patch panel itself to try and bring it forward.
All right, so what we're aiming for is to pull it forward right up here, and then just start working it back in the same way we did the front. So I'm going to come in back here with just a little bit of a stronger panel tool, see if I can't get this edge to line up a little better. And the goal by doing this is to use just the least amount of body filler possible.
So right here looks pretty good, we'll keep a little pressure on this, we'll go ahead and tack weld down in place. We can work with that and push it in until it's nice and flush while putting a little pressure on that panel. Go ahead and put another tack right here, just keep lining this up.
When we hammer, or when I'm hammering on this, I'm hammering on the patch panel that has to meet the old factory piece. I'm not hammering the both of them, just, just that lip in a little closer, nice and flush. We'll go ahead and put another tack back here, then we'll alternate up front.
Now what we'll do is just run across all this with our grinder. Foreign. Fill a couple of holes and big gaps here. Continue working this piece. Foreign. Foreign.
So now we're just going to clean up. So we're using a flux core welder, so there's a lot of spatter, so we're just going to clean all that up now.
All right, so once we've ground it flat, we can see everywhere where we missed. You can see some holes here or there, and what that's going to do is, if you decide to just prime this and leave it, that's going to allow water and moisture to get inside the panel and rot it out again.
So we're going to do is one more round of welding, fill up all those holes, grind it flat again, then we'll work down the sides and lock everything into final position.
So now on the inside door jamb flange here, just like the old panel that we took out had spot welds, we're going to do the same, but we're going to make our own. We're going to do plug welds all the way down, but to do that we now have a a gap behind here from moving and adjusting our panel.
So before we go ahead and make any kind of welds or plan for anything, we're gonna close this up a little bit tighter here. We're going to use a what is normally a body hammer, and if we need to, a flat screwdriver to help drive it in, but we'll start with the flat hammer. And as we go, try not to hit the edge, that will give you some rough hammer lines along the edge here. We're just trying to move the metal on the inside when we weld this flange in.
This bottom piece had a little bit of rebound to it, so it wasn't pulling in perfectly. When we start to plug weld down here, we'll use screwdriver or a wooden hammer, probably in this case a screwdriver, to push this in closer to the vehicle door jamb, like that, and we'll put a plug weld in while we're holding it.
For right now, looks pretty good. Let's start lining up our holes, I'm getting ready to weld.
All right, so we have one hole here from our original clip, and the panel came with one big spot weld piece here, but we trimmed it, so we'll fill that and use that. If you notice on our grinding wheel, size of the spot weld between them is about this big. So we shouldn't have a ruler handy, so we're using something, and we're just going to, we'll probably do one here and starting here, drill an eighth inch hole. And you only want to drill an eighth inch hole through this outside piece that we just put on, not all the way through both pieces.
Foreign go a little bit bigger, baby. That takes us all the way down to the bottom. So now, before we start welding, we'll have to remove the coating from around that area.
Foreign couple more spots up here with the welder, and that should be it on this side.
Foreign now we can move around the back. All right, so we still have this lip back here we have to address. I'm just going to take a flathead screwdriver and go right into the corner and try and push the corner in as close as we can.
One of the reasons we did this last is having all this nice and solidified to hold this in place makes it a little easy to do this part. So we're just going to work down this this edge right here, just a little bit, to make this a little more natural. Again, optional step.
Everything here looks pretty good, no gap behind it, so what we can do is we already have a couple eighth inch holes. We'll follow it up with a couple more and we'll plug weld those. So thank you.
Okay, before we can weld, clean up, paint around there, and we're going to start at the top. We're going to do here is plug weld this hole first, and then address where the two meet. We're gonna push forward, put some pressure on that panel so they're up against each other.
Before we can weld that top on, we just gotta clean some material off of here.
All right, now we can address this spot here. All right, continue working down.
Now we're just gonna use a screwdriver and put a little pressure to make sure the two panels are touching. Small world. Now we have to relocate a little bit, so we'll do the top one first.
The ground clamp still in position, and then we should be able to switch ground clamp and locking pliers.
Foreign so we've switched, and I'm just going to take my locking pliers and pull the bottom of this in just a little tighter. Foreign this up, then we'll go underneath with a couple more in here. You're gonna have to get creative to clean this.
Foreign foreign So on the bottom we have our piece clamped together with locking pliers. We're going to put two plug welds down here, one on each side of our locking pliers. We'll start here.
Foreign just going through this metal, not all the way through, it's not the end of the world if you go all the way through, but you don't need to.
All right, now what we'll do is we'll get our tool and clean up here so we can do some clean welds.
Foreign get our welder and spot those two in. All right, so now you should be done with your welder. You can disconnect your ground, pull off your locking pliers, you can take your grinder if you need to clean up your welds.
All right, now we can move on to protecting the bare metal that we just created.
All right, we're going to do here is clean, just want some glass cleaner, our new panel. So we're going to go ahead and spray some etch primer to protect the bare metal that we created on both surfaces.
Foreign we're just going to spray the entire corner.
All right, so before we start painting, I'm just going to run a little bit of masking tape around things that obviously don't need to be painted.
Foreign you can see our welder is pretty porous, but we're going to finish that with some Bondo.
Foreign foreign Just want to mix it up until the color looks uniform, and we can go to the vehicle. We're going to focus on our weld area.
Press in nice and tight, get any air bubbles to force it into the gaps. We're going to leave just a little extra on top to sand back down flat. Okay, now we have a little extra mixed up, we're gonna just clean up a couple of small areas here. There, we're actually going to put just a little bit on our finger, clean up the back here, anywhere else you feel like you need to fill in some holes.
After you're done doing your body work, you want to finish this off with some seam sealer to stop the moisture from getting in between here, and that'll somewhat match the factory design there. Once this is dried up, we can go ahead and sand it flat, put some primer on it, get it painted if you decide to, or just leave it in primer.
All right, at this point here you want to make sure your Bondo's nice and dry before you start sanding. Depending on where you started and how much you put down, you can start at 80 grit, you can start at 200 grit, 220. For us, we're going to start at 80 and just level off a bunch of this really fast, and then we'll step up a few grits, and then we'll put some primer on it.
So we just took our sandpaper and wrapped it around a little piece of 2x4 just to give us a nice flat surface, and you can see that this part's sticking through and went back to bare metal pretty quickly. It means we have a high spot there, so we're not going to sand too much more right here, we'll focus on the rest of it. You can see our Bondo is not fully dried, it's ruining our sandpaper pretty quickly, so we'll do just a little bit more and we'll wait for it to fully dry up.
All right, so once you've sanded and you're satisfied with what you have here, again you can do as many coats of Bondo as you feel necessary to get this as smooth as you want. We're going to stop here and just show you the rest of the process. We're going to spray our panel, just give it a good wipe, and then we'll go ahead and recoat it with primer.
All right, now we just recoat with primer. Purpose of this, I guess, because by nature of sanding you may or may not hit, make some bare metal. This is corrosion protection for your Bondo as well as your bare metal.
When only the best will do, demand TRQ. The only company that lets you view before you do. TRQ is committed to offering the highest quality aftermarket auto parts that are engineered for peace of mind. Thanks for using and viewing with TRQ.
Shop Products


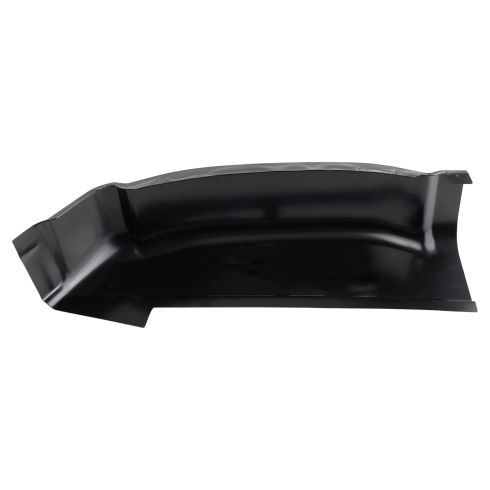
Chevrolet GMC Passenger Side Cab Corner TRQ RPA06325
Part Details:
- 3.94 in
- 100 mm
- 3.94 in
- 100 mm
- 7.01 in
- 0
- 19.13 in
- 178 mm
- 486 mm
- No
- Steel
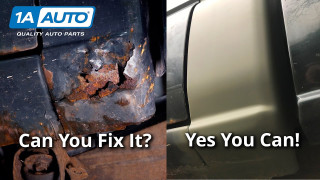
Tips From the Pros Easily Replace Dented Scratched and Rusted Body Panels on Your Truck or Car
Andy shows you three different ways to repair or replace rust damage on your vehicle.
