
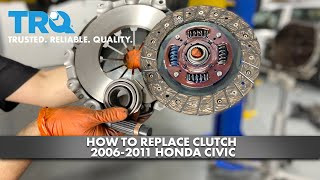
How to Replace Clutch 2006-11 Honda Civic
Created on: 2022-02-17
This video shows you how to install a new TRQ clutch kit on your 2006-2011 Honda Civic.
Tools needed
-
12mm Socket
Socket Extensions
14mm Socket
15mm Socket
Pry Bar
17mm Socket
Trim Tool Set
Pick
Bucket
Phillips Head Screwdriver
3/8 Inch Wrench
7mm Socket
Drill
10mm Socket
Ratchet
Jack Stands
M10 12 Point Bit
Bungee Cord
Anti-Seize Grease
Transmission Fluid
Floor Jack
Torque Wrench
17mm Wrench
Liquid Thread Locker
Brake Parts Cleaner
Flat Blade Screwdriver
Cloth Rags
3/8 Inch Impact Gun
1/2 Inch Impact Gun
We'll start by unplugging this mass airflow sensor, get the wire out of the way, and then with a screwdriver remove this clamp, just move it aside. Then I'm going to take a seven millimeter, stick it down there. I guess I should mention this car has an aftermarket intake. If you have the factory style intake you might need to take some different steps here, but this is what we have, so this is what I'm going to remove.
Loosen that, you don't have to take it off, you just have to loosen it with a 10mm. Remove this nut, again yours is probably going to be different, and the washer right down there. There will be another one of these clamps that you have to loosen. I think I got it, yep, that moves around, perfect.
So now we can grab this hose, disconnect it, lift up on the intake on both ends and fish it right out. Now grab this wiring harness, and there's a little clip on the back here, if you pry it out or back and then pull up on this, that'll unsecure the harness from the retainer. And with a 10mm remove this bolt here, so we can pull this harness up because we need access to everything underneath.
All right, take the bolt out, and I'm actually going to put it right back where it came from just because I'm going to have a lot of bolts soon and I don't want to forget where they all go. All right, this is out of our way now, perfect.
With a pick I'm going to remove this cotter pin, set that aside, and what I need to do now is pull this shifter cable up and off of this stud here. Sometimes these don't come off and they'll be stuck in there, so you'll have to spray them with some rust penetrant and just work them back and forth. Thankfully this one did come off, and now you want to do the same to the other one which is right here. Pull the shifter linkage off, leave those aside.
Then I'm going to disconnect this bracket with three 12mm bolts. I'm going to start with that 12mm bolt back there, it's kind of hard to reach and hard to see, and once you break it free you should be able to take it off by hand, it shouldn't be very tight. There's one, now remove this one and that one.
As you can see, this whole bracket wants to come right up, which is perfect. Remove these bolts, set them aside safely, and now this bracket is off the transmission.
With a long extension I'm going to squeeze in there and just undo these two 12-millimeter bolts that hold on the slave cylinder. Remove the second one.
And take this right out. Now you can take this slave cylinder and just push it aside. Perfect. I'm also going to have to unbolt this 10mm bolt right there. The other option is to remove the line from this bracket by removing this clip, but it's easier to just unbolt it, and I'm going to put it back so I don't misplace it.
One more bolt here to take off for the ground strap. Take that off and set that aside. Another connector down here, the locking tab is underneath, so it's kind of difficult to press in with a 3/8 ratchet.
Remove this drain plug. I'm going to drain the, I'm going to drain the transmission just so I don't make a mess when I pull the axles out and when I drop it. So remove the drain plug, and make sure you have a collection bucket underneath. There we go. I'm going to stop it here just because it doesn't need to be completely empty and the fluid is in decent condition, so I'm going to stop it here, and this is going to be enough to have it not come out of the axle holes when I pull the axles out. So snug it back up, and let's clean up the mess a little bit.
With a pry bar I'm going to stick it right in between the transmission and the axle and pop it out, and this is why we drained the fluid, because now we don't have fluid coming down. And I need to do other things because this isn't gonna come out all the way.
I'm gonna pop the ball joint out of the control arm with these two 18mm nuts and this 15mm bolt. For you it might be different just because this is an aftermarket ball joint, but basically doing this will allow me to move the knuckle and get the axle out. That's one, number two, and the bolts. Now I'm going to grab the control arm, push it down, pry the knuckle out. Perfect. Now with it popped out, go ahead and pull it out the rest of the way.
All right, I'm just going to leave the axle shaft up there. The transmission is coming down right here, so if I pull it down it's just going to be in my way later. Do the same thing for the passenger side, bolt and and the two nuts.
Take out this 14, 14-millimeter bolt here. There's gonna be another one on the other side of this mount for the carrier bearing. Now take off the 17-millimeter bolt. Okay, and I'm actually going to take this whole bracket off just because that'll release the bracket for the carrier bearing. So more 17-millimeter bolts.
Okay, remember that this one's shorter than the upper one, so try to keep these in their corresponding location. And there's one more right up there. I'm gonna have to remove that one as well. Remove this top one too.
Okay, this is another short one, so again make sure you keep those where they belong. And if you if yours has this bolt, which it should, I'm going to assume it's another short one. Go ahead and pull this down, and as you can see that releases that carrier bearing, which is what we want to drive out.
Now take the CV shaft and pry it out of the transmission. Perfect, wiggle it until it comes out and set that aside as well, just like that. And since I'm here, I'm going to disconnect this electrical connector, set that aside.
Next, I'm going to remove the splash shield with a trim tool or your fingers. Pop out all of these push clips, just go all the way around, stop here. There should be two on each side next to the wheel, pop those off too. All right, two more on the passenger side, and careful with this last one because the whole piece is going to want to fall down. There we go, and remove the whole shield.
Okay, with a 17mm, I'm going to remove this bolt here that holds the steering rack in place. There we go, that's one, and then I'm going to actually loosen this one up. I don't have to remove it all the way. The reason I don't want to remove it is because I don't need to remove this bracket, I just want to pivot it out of the way. So with this loose I can spin it, that's it, that's all I wanted to do.
Perfect, from the back side of the power steering rack you see these lines here. These are technically supposed to be bolted down, one 10-millimeter bolt here and another one right here on this bracket. Someone's already removed those for me and never put them back, so I'll try to put them back when I reinstall them. And then this bracket also needs to come off, that was also loose for me. Remove that, swing the bracket, or well you'd have to loosen up the 14mm, exactly like what we did in the front, swing that out of the way, just like that. Oops, make sure it's not caught underneath any of these lines, because the lines and the rack will stay with the vehicle but the bracket and the subframe will come down. You kind of have to push these out of the way here, perfect, just like that.
Now on this side you'll have a bracket that bolts here, and you can't see it, but if you just follow this you'll feel another 14mm bolt there. So two 14s, you're gonna have to remove both of those.
Okay, take that one off and another 14 behind it. Okay, remove this bracket and the bushing can stay in there. Now the steering rack is loose from the subframe.
Now is time to take the subframe off. You want some sort of support if you're doing this on the ground, of course I'm on a lift. If you're doing this on the ground, you can put a jack underneath or some jack stands, whatever you have to support this. Four 17mm bolts, one on each corner, let's remove those.
And keep in mind that the steering rack is loose, I did not tie it yet, I will tie it as this comes down, but keep in mind that you don't want to over extend your steering shaft. So hold it up, tie it however you, however you can.
Okay, two more 17mm bolts. You can either take these off or these, I'm just going to take these off because I don't know, for me it seems easier. Okay, these are short, one on each side.
So at this point I tied up the steering rack with a bungee cord around the exhaust, and another one that's hooked onto these. These are not the best points to put pressure on, but it's really not that much pressure. I just want to make sure that this doesn't fall down all the way and extend your steering shaft.
So at this point you can go ahead and lower the subframe. This should for the most part stay there. We go, make sure that this slave cylinder doesn't fall down and tear itself out with the subframe. Keep going down, push the wheel out. There we go, then lower this down all the way. Perfect.
Unplug this electrical connector here. You can do it from up above, but sometimes it's easier to do it here just because of the position of the little locking clip. Set that aside, make sure it's not wrapped around anything that's going to come down with the transmission, so it doesn't rip the wires.
Now I'm going to disconnect the two top bell housing bolts, two 17-millimeter bolts here, right underneath this thermostat housing there's one, and the second one is really hard to see, but it is somewhere underneath here, there's the second one.
Okay, now I'm going to take this one off. I'm only going to take two off, this one and then the one in the back there, because I'm working on a lift I'm going to have to go up and use a transmission jack to support this. So I'm going to leave these two for me to do from underneath, tucked back there kind of in the little crevice of this engine mount bracket, so it's hard to reach and hard to see.
Got it, okay, take that one out as well. And since I'm up here I'm going to break these free, but I won't remove them, I'm just going to break them free so that it's a little bit easier for me to do it from underneath. Oops, okay, that one's coming off, and do the same to this one.
Okay, so I have this pole jack here supporting the engine, I have a rubber pad, I don't want to put the steel plate right on the aluminum oil pan, there is a potential for it to get cracked, and of course you don't want that. If your pole jack or jack has a pad already built into it, if you're on the floor you're most likely just going to use a floor jack, either way, either go on the sides with a wood block or put a pad just to make sure that it's nicely padded and properly supported.
And at this point we can remove these two top bolts on the transmission that I left in. So this plate is supposed to have two more bolts here, mine are missing, so I'm just going to take this one off, but whatever yours has, this is supposed to come off because it's bolted to the transmission and to the engine. Oh, that's going to snap, I guess not. Okay, take that off. Now take this 17-millimeter bolt out. Oops, I'm tightening.
All right, now take this 17mm bolt out that's right next to the starter. I'm going to take this bracket off too, this was for the air filter housing, and well, first of all this car is not using it anymore because it's got an aftermarket intake, but also even if yours is using it I would still take it off just because it's going to allow this to be out of the way when we go to swing the transmission out and it's not going to hit the frame rail, just three 10mm bolts.
Okay, I'm gonna take the rest of this intake off just because it's in my way. If you still have the stock intake this is not going to be in your way, but for me there's a 10mm nut holding this on in there, and I just want to get more, more room with my ratchet for getting these two transmission bolts out that I didn't take off.
On the top, one of the bolts that I left bolted on is right here, 17mm, and I already broke it free up top so it comes off easily. I'll remove this, and the reason I left two, one on each side, is if I had left just these two it would would have been a higher potential for breaking this bracket. It won't bend, it's aluminum, so it'll just snap with the pressure on one side.
Now take off this rear bolt. There we go.
There it is. So I put a transmission jack underneath to support the transmission, and the last bolt that we have to undo is this 17-millimeter bolt right here. The exhaust is really close to it, so all you can get in is a wrench. Now that's broken free, I'm going to switch to ratcheting wrench.
Okay, take this bolt out. Okay, well I'm just going to leave that in there, it's off threads, it's separated, it's fine, it can stay. And now all that's left to do is to separate the two.
A lot of times these are stuck, especially if this is the first time that these are being separated. It's got steel dowel pins that go into the transmission, or into the engine I should say, and so just as long as all your bolts are off you should be able to wiggle these two apart.
Like, I can see that it wants to separate, it has separated a little bit, so I'm actually going to go to the other side and pry over there. So there's a little notch here into the transmission, and you can stick a pry bar in there, pry, and that should come off.
Move this out of the way, let's go back to the front. There's some dowel pins in there that gets seized, there's one of them. All right, this is separated now, do it again in the back here. Yep, that's free. Oh, there we go. Okay, more down. Oh, there we go, there it is, there's your transmission.
So you have your pressure plate here with the clutch disc in the middle. I need to take that off. take six 12 point 10mm bolts off, so you need a 12 point socket, and I prefer to use electric tools over air tools for this just because it doesn't blow all the dust around.
These shouldn't be very tight, but doing them by hand is going to be tricky because the whole flywheel is going to want to spin as you pull this off. This is going to want to come out, so make sure you hold it. And last one.
Okay, take off the pressure plate with the clutch disc. Spray some brake parts cleaner in there and just wipe off the surface. I want to get all that dust and debris out of there so I can see that pilot bearing better. Yeah, that's better. I'll clean this up better later.
Remove your throw out bearing from the transmission. If you just push on this fork, this should come right off. I'm just going to clean up the surface a little bit, just using some brake parts cleaner, removing some of this old grease and debris. That way the new new throw bearing has a nice clean surface to mount on. You don't have to go crazy with cleaning, because in, you know, half an hour of driving it's going to look just like that again.
Your clutch kit should have come with a little packet of grease. Use that for the throw out bearing, just lubricate this area here. If you don't put any grease, this area can build up some surface rust, and eventually it'll start squeaking every time you press on the clutch pedal, and it can also wear the throw out bearing prematurely, not the bearing itself, but the part that rides on the shaft just because it's dry. And there's a reason why they don't provide you with a lot of grease, and that's because you don't want a lot of grease.
Okay, oops. Now, now take the throw out bearing, press this fork out, hook it on, and there we go. Make sure it's properly secured top and bottom. Go through the operation a couple times to make sure nothing's binding, and this is perfect.
This car does not have a pilot bearing. Some don't, they don't come with one. And the kit came with one that kind of fits, you can see it's loosely fitting, and that's not good, usually there are press fit. So if yours did not have one, do not reinstall one, leave it as is. If yours did have one, you can remove the old one, press the new one in.
So here's your pressure plate, the new one of course, and I have some brake parts cleaner on this rag. I'm just going to wipe it down in case there are any oils from shipping. You want this to be nice and clean, free of any oils or any debris, and preferably use a lot of rag that does not leave behind much lint. If there are any oils on this, well your clutch isn't going to work great, and it's going to wear really fast.
Now take the clutch disc and put it on like that. Make sure that it has this piece of the spring assembly that sticks out more, you'll see it has a flat area and one that sticks out more. Put this up against the pressure plate, not up against the flywheel. I have my alignment tool in here, and I'm going to take the pressure plate and basically sandwich that clutch disc. Make sure the pressure plate is lined up with these dowel pins on the flywheel, there we go.
Once that's on, I'm going to take all of my bolts, which I have cleaned the threads on and installed red thread locker. All of those, now snug the pressure plate up in a cross pattern. I'm going to hold the alignment tool in the center, that way the clutch disc is centered. Once you snug two of the bolts, you can let go. I just want to get them close, I don't want to tighten them fully because then I'm going to torque them.
Okay, so now this is still centered, let's torque it. I'm going to use a pry bar, just stick it right in between the teeth here. Torque these to 19 foot-pounds. 19 foot-pounds is not a whole lot, so you can definitely hold it.
Okay, again, still going in a cross pattern. All right, and now I'm just going to go around in a circle, double check all of them, because sometimes as you tighten others, the first ones will start loosening up, and just because I don't want to have any issues, I'm going to go around a second time.
All right, now they're all torqued. This is optional, but I like to do this: put a little bit of anti-seize on these dowel pins, and this will just help it, help the transmission come out next time that you have to do a clutch or whatever service needs to be done that requires the transmission to be removed. Don't put a lot, just a little coating, it'll go a long way.
All right, now I'm bringing the transmission back up. I'm going to try and line it up with the engine and the clutch, make sure nothing's in the way, nothing gets pinched. The input shaft on the transmission needs to slide into the clutch plate, so basically right there and here. Hopefully you don't have a hard time, but usually it's not the easiest to line those two up.
What you don't want to do is get it close, put the bolts in, and suck it in with the bolts, because things are not necessarily lined up, so you don't want to do that. Always line it up manually first. So I'm using this bottom bolt hole as a guide to see where the transmission needs to pivot. I'm not using it to start it in, but it does help to see where things are lining up, and I think I got it pretty close now.
And push, see, this one wants to start, so it's somewhat lined up. Oh, did that just do it? Yeah, okay, so there it is. Now you can line up the bolts, that's exactly what you're looking for. You want it to fall in by itself, like I said, you don't want to use the bolts to pull it in.
Okay, so I have both of my dowel pins lined up, actually for me, when it fell into place only one of them lined up, so I had to just move it around a little, kind of jiggle it into place, and now I'm starting on my bolt. Let me grab a wrench for that. I'm just going to start this one in.
Okay, I'm not going to go all the way, but I want to get it close, and then I'll put in the other ones. It's not 100 set in yet until they all get tightened, so that's why I'm starting with this one because it's the easiest one to do.
All right, I'm going to put in the one next to the starter. That one started right in, so the hole was perfectly lined up. Let me snug that up now that the threads are started. I'm going to use my air gun and just get it close. Okay, that's not fully tightened, but it's close enough for now.
Let's do the other ones. I'm going to start in the front one, and that one lined up perfectly as well, so I'll snug this up too. Okay, perfect. Finish bottoming this one out. Now let's finish tightening this bottom one.
Okay, I'll grab a longer wrench to tighten this. I'm going to torque these to 47 foot-pounds. The the torque applies to all the bell housing bolts that go all around. All right, 47. Do the same to the one in the back, this one. This one I can't torque because obviously that doesn't fit, so i I'm just going to take a wrench and make it nice and tight. That's 47.
From underneath, I'm going to put this one in up here, the motor mount bolt, and it's not going to line up right away, but when I push the transmission over it does line up, so I'm just going to start it, and then I'll tighten it in a second. Before I do that, I'm just going to do the same to the rear. Put in the rear one. Okay, let's snug them up.
I'm going to go ahead and get these close. I'm not going to make them very tight yet, I'm just going to make them close. That way I can remove my engine support. I can pretty much get this one by hand all the way, so it's perfect. I'll leave it right there.
Now with the transmission mount bolted up, I can remove my support. Perfect. Go ahead and put the other two engine mount bolts in, start them by hand so they don't cross thread, that one in the front and this one in the back. That's kind of hard to see. Let's go ahead and snug them all up. Okay, that's one and this one.
Okay, those are all nice and tight, so the torque for these four bolts is 43 foot-pounds, and the problem is that you can't get a torque wrench all the way down here obviously. So you'd have to extend it all the way up to here, and when you do that you lose a lot of torque. So, and there's also the one in the back which is going to require a swivel, and that completely defeats the purpose of a torque wrench.
So what I did is I just tightened them with my air gun. You can just, you can torque them if you want, but just know that with a long extension and even a swivel the torque is going to be completely off. So I went ahead and made them tight. The torque is 43 foot-pounds if you want to torque them, but in my opinion having such a long extension is going to severely alter my torque specs, so I'd have to go way over 43 to make up for the difference, and in that case I don't even know how tight they are at that point, so I might as well just make them tight by hand, that way I can feel.
Let's get the top bell housing bolts on. There's one right here under the thermostat housing, and there's another one all the way back here which is really hard to see, but you can feel for it. Snug those up, and then we'll torque them to 47 foot-pounds.
Snug these up, these get torqued to 47 foot-pounds. That's nice and tight, 47 foot-pounds as well, perfect.
It's time to get the sub frame back on, and I have it up kind of lined up. I just wanted to show that the steering rack needs to actually go in between this area here, this brace or bracket and the bolts that it mounts through. So basically there's a little divot here, it kind of needs to slide right in there.
And what else, oh, and then of course you line up the two control arms with the ball joints. I'm not going to put them in yet, these can stay unbolted for now because I need more movement out of this, but just line everything up. Make sure the mounting holes line up, make sure the axle is out of the way. This is going to come up in here, so you don't want to pinch the axle in there. I mean you can't really pinch it, it's just going to get smooshed in there.
And now once everything is lined up, nothing is getting crushed, I'm going to continue going up. Okay, make sure everything is still where it's supposed to be.
Get this out of the way because I don't want it to go in yet. Make sure the steering rack is situated properly, and at this point I'm going to untie my bungee cords so I can release the steering rack down onto the subframe. And I know the subframe isn't fully attached yet, but it's about an inch away from where it needs to be, so I'd rather take these off now while it's loose.
All right, and the other one, this one is attached up at the top, so I'm just going to let it hang for now. I'll take care of it later.
These holes right here need to line up with those up there. Again, there's just four bolts, one on each corner. Slowly keep going up, make sure nothing's getting crushed. Move these out of the way.
All right, I think it's time to grab the bolts and start them in. About ninety percent lined up, so I'm going to start in the four corner bolts. I'll do this front one first. Now the one in the back, I just have to shift it to the passenger side a little bit, and the more bolts you put in, the better it'll line up because it's got more secured points. This one fell right in, and the last corner bolt, oh there it goes, right here at the front.
And I'm not going to tighten these yet, because if you remember, there are two short ones on each side that have to also go in. And the two side ones, the super short ones, and he has to come forward. Start those on. Oh, that's it right there. Yeah, so I have to come forward just a smidge.
Okay, let's do the other side. Passenger side is in, let's snug them all up. I'm going to lift my transmission jack that's supporting the subframe, make sure it's pressed all the way up against the car, that way it's seated, and I'm going to snug all of them up. I'm not torquing them yet, I just want them tight so that this stays in place. I'm going to do the four corner bolts first.
Okay, perfect, and now let's do the two side bolts. Oops, I need a swivel. And let's do the driver's side one. They are not fully torqued yet, but I tighten them up so I can remove my support, and now I can fully torque them, 76 foot-pounds for all of these bolts.
Okay, okay, okay, so that's all four. I'm gonna torque these two side ones. That's one and that's two.
Take your steering rack, make sure it's pressed down into its spot here, and make sure that this rubber bushing is lined up, and then take the bracket with the two bolts already started in the bracket, it'll be easier to line them up, and then just start the bolts into their corresponding threads.
I'm not going to tighten them yet. I want to put on the other two brackets first. That way this can move around a little bit, so I'm going to leave it like this just hand tight, and then there's a bracket here that has to swing over. I had it go underneath this cable, but then make sure you put the line over there. We go start this bolt in, and this doesn't line up yet. The rack has to move back that way. There's the hole, oh yeah, it has to move a little bit. There we go, all right, now this can get started in.
All right, and there's one more bracket up here. This bracket over here has to get reattached as well. That one's also not quite lining up yet. Come on, maybe I'll get a pry bar. Looks like I have to pry the steering rack a little bit to get this to line up, just to go back. Oh, there it goes, yeah, so I have to go back and left or right a little bit.
All right, now let's tighten all those. Tighten up the bigger 17-millimeter bolts first. Okay, I'll come back and check them at the end. For now I just want to make them all tight. There's this one in the back, okay, I'll come back to this one as well. Okay, nice and snug, and once I tighten this back one here, then I'll go over all of them again.
Okay, now it's getting tight. Okay, so there's no way I can get a torque wrench in here, so I'm just going to have to tighten them by hand. There we go, it's nice and tight. Let's do this front one. Okay, tight. Now tighten up this 14mm bolt here for this bracket. Go ahead and tighten up the 17mm. I switched to a a longer ratchet, that way I can get a little bit more leverage since I can't torque them.
Okay, let's do the front one, that's tight. Let's tighten up the 14mm. All right, tight.
So the lines for me weren't bolted down when I started the jaw, but I have some hardware laying around, so I'm just going to use this to secure the lines like they're supposed to be. Come on, there we go, put it through. These are just some small 10mm bolts. Okay, make sure that's nice and tight. Okay, now both of those lines are properly secured.
I'm going to grab the axle, I'm going to pop it into the transmission. Now when you put it into the transmission here, sometimes you might have to spin it just a little bit just so that the splines can line up, but it looks like for me they're sort of lined up, just has to slide in at this point.
But what's tricky is that this mount here kind of wants to get jammed up into the engine, between the engine mount and the engine itself needs to go. This mount for the carrier bearing, we kind of have to sandwich together. This thing needs to go forward, kind of like that. Okay, so now we got the axle in there, now it's time to push it into the transmission all the way. Oh, there we go, it wants to go in. Perfect, that's in all the way, and now this lines up here.
So what I was trying to say is this carrier bearing needs to sandwich between this bracket and the engine itself, and that one, if you remember, this one had the longer bolt because the bolt needs to go through both of these as opposed to just one. So try to wiggle that until everything lines up. I can't tell why not, there we go, all right, that's going in. Two more, let's get these bottom two started.
If you remember, I had one missing, excuse me, I had a bolt missing on this mount, on the bracket. I actually found one so I'm going to put that in, then the bracket will have all four mounts. Here's the one I found, I know it's a different size head on the bolt, but it's the same thread and almost the same length, so it's better than nothing.
Okay, maybe we'll put that one down here. I want it go in, oh okay, I just have to be nicer. Okay, oops, I just put dirt on camera, sorry. So here's the one I found, I know it's a different head size, but the threads and the length is almost the same, so this will do.
Now let's snug them all up. Okay, so for you they should all be 17s, for me this one's a 19, but like I said, it'll do the job the same. I'm going to come back and torque them later, for now I'll just make them tight. Okay, 47 foot-pounds, come up here, perfect, and this one, which I have to change my socket for, perfect.
Let's reinstall the two bolts for the carrier bearing. So I can't get a torque wrench in here just because of the angles that I have to go at, so I'm just going to take my ratchet and make sure that it's nice and tight. Okay, that one's tight, okay, that's nice and tight, perfect.
Be careful for your axle seal, don't damage it. Line it up and let's press it in. Now it's not going to want to just press in by itself, so what I'm going to do is turn this ball joint a little bit and do that. Be careful for your boot when you do this, but what I'm going to do is use the wheel, and basically, there we go, bottom out the axle until it goes in.
Okay, so as you can see the axle is almost in and there's no way nowhere to hook a pry bar onto this and drive it in, and doing the the trick with the wheel has reached its limitations. So what I'm going to do is put a pry bar in here, and I know I'm prying up against the boot, but I'm being very gentle, and all I have to do is just finish driving it in like that. Minimal pressure. As soon as it snaps into place at the end, that's it.
So I was not putting a lot of pressure on this boot. If you have to put a lot of pressure then something's not lined up and it's not going to go, and this this required very minimal force.
Go ahead and plug in this connector, the back of the transmission, make sure it clips in. Plug in this connector at the front of the transmission. Pull down on the control arm and let's line up the ball joints with their corresponding holes. Okay, there we go.
Okay, let's get the two nuts in the bolt on, two nuts and the bolt. Okay, let's tighten these all up, and these all get torqued to 43 foot-pounds, 43. Perfect. Now let's do the same to the other side. There we go, perfect.
Let's put up this cover here, and I only had one bolt holding it on, but I did find two other bolts that I can use, that way it's properly secured. Tighten them all up, these should all be 10mm bolts, nice and tight.
So this is optional because this car has a cold air intake. If you still have the factory intake, it'll be up at the top, but for me, I took this out, so of course I have to put it back in. So I'm gonna snake it back up in here and make sure it's going where it's supposed to, and there's a there's a retainer for it, and here I'm gonna tighten up. It's basically like a little fork that sticks out and it goes up onto a stud, and then the stud gets tightened up. There we go, tighten up the mounting hardware for it so it can stay up here, perfect.
I'm going to re-secure this corner piece here with my push clips. Now let's put the other piece in that goes here. Reinstall my push clips up along the front here. Make sure this gets tucked underneath where it needs to go, and then it goes into the wheel arches here. Just go along and reinstall all of the push clips that you took out, more over here.
All right, and now let's go up into the wheel well here, reinstall the two that go in here, two more underneath, perfect. Put the push clips in on the driver's side, make sure that everything is tucked up in place. All right.
Let's put the slave cylinder back in place, line it up with the two bolt holes, and make sure it goes onto the clutch fork here. Start the two bolts in, let's snug these up. Okay, just checking on my hand to make sure they're actually tight, yep, nice and tight.
Now let's put on the bracket for the shifter cable or cables, because there's two of them. I'm going to put the cables on as well while I'm at it. What's happening, so, so if you look at them, they actually have a cutout on each side, they're not perfectly round so they can only slide on one way. There you go.
All right, let's line up all the bolt holes, there's three of them, three bolts, get those back in and I'll snug them up. Okay, let's snug up these three bolts, 12mm, and that rear one I'm gonna have to do by hand because I can't fit a power tool in there. Okay, make sure that's nice and tight, perfect.
Let's secure the two cables, make sure they're pressed down all the way, and install the cotter pins. That makes sure that they don't come popping right off. There we go, that's one, and second one right there, press them on, perfect.
I'm going to re-secure this bracket for the clutch line, there we go, snug that up. While I'm here, I'm going to reinstall this harness, which I guess I didn't didn't have to take this harness off because this mount stayed with the car, but I wasn't sure earlier so I took it off.
Okay, let's snug that up, put this harness back, and it had a 10mm bolt here that secured it.
Oops. Okay, let's reinstall the intake tube. Of course if you have the factory intake this is going to be a little bit different for you. There we go, better. Okay, put that on, I think that just went in. Okay, make sure they're all pressed together properly.
Let's re-secure this hip up here, little 10mm nut, tighten that. Okay, snug that up, and now I'm going to double check that it's still on where it needs to be.
I have to loosen up this hose clamp a little more just so I can fit the the pipe better. I'm going to loosen it a little extra and try and squeeze these two together. I want to make sure there are no air leaks.
Okay, that should do it, put the clamp back, and now I'm going to tighten it up. Make sure it's sitting not too high up but also not down low, you want it to clamp this silicone fitting right where the pipe is. Make sure that's nice and tight so you don't get any air leaks.
Let's put on this PCV hose and tighten this. One one last one to tighten is down here.
Perfect, that's tight now. Let's plug in the mass airflow sensor, make sure that clicks in.
Now I'm going to fill the transmission. I'm going to use a 17-millimeter socket and break free the fill plug. Sometimes these are a little tight, but once they break free you should be able to just remove it by hand. Okay, make sure the gasket or the washer comes with it.
And it's really hard to get a bottle in here, so I'm using a little pump that has a little syringe on it, and I'm basically pushing all the fluid into the transmission. And if you're not using Honda genuine manual transmission fluid, you want to use something that will work with this. You can't use gear oil in this one.
Oh okay, now it's coming out. So it took about one and a half quarts for me. I'm gonna put the drain plug back in, let's snug it up, and then clean up our mess. Okay, make that nice and snug, perfect.
Now let's clean up the oil that dripped. Use some brake parts cleaner and just spray in that general area. You don't want to leave any oil residue behind, because well, first of all it gets gunky, and second of all, if you have a leak you don't know if it's a leak or your oil residue. So always clean up.
All right, now you can take it for a road test. You
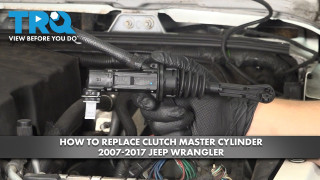
How to Replace Clutch Master Cylinder 2007-2017 Jeep Wrangler
This video shows how to replace a clutch master cylinder on your 2007-2017 Jeep Wrangler.
