
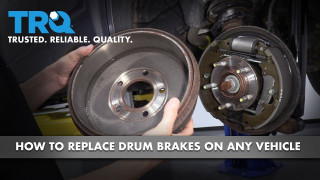
How to Replace Drum Brakes on Any Vehicle
Created on: 2019-07-01
The common features of drum brakes so that you can learn how to replace the brakes on your specific vehicle.
Hello, I'm Jeremy at the TRQ research and development facility, where we test out all of our parts to make sure that the quality that you guys need. Now today I'm gonna talk about this drum brake. Drum brakes are generally the same from, you know, the 1950s until today, and I'm gonna give you a little tour of what you might see if you're doing yours for the first time. So let's get started.
The first thing you want to do is to crack your lug nuts loose while your vehicle's on the ground, and it'll be a lot easier to remove the wheel that way. And then you want to raise and support your vehicle and make sure you do it on level ground, so it's nice and safe for you to work on.
All right, so this is your actual brake drum. The surrounding piece here is called your brake drum, and to get these off is sometimes difficult because the brake shoes in the side wear against the drum and then it makes it build up rust around the inside edge, and then you can't get them off the car.
So there's a few different ways of you getting this drum off of the car. One way you can try is hitting it with a hammer in between these wheel studs, and sometimes that frees up the rust enough to pull the drum off. Another thing that you can do is most drums have a little hole in the front of them, or there'll be one on the backing plate that you can put a flat screwdriver through, and you can you can adjust the brake shoes so that they come in, and when they come inward it frees up the drum from the brake shoes and it allows you to pop off. I'll show you all about that when we open this up.
Alright, so let's take this drum off and see what's inside.
All right, in this case we already have all brand new parts here, and that allows us to show you what this is supposed to look like. Inside here you can see there's a maximum drum diameter, so that's the the distance that this span can be before it becomes too worn out to reuse. So every drum should have that number on there, and these can be used until it meets that spec, and then they have to be replaced.
Okay, so here's your brake shoes. Here's your front shoe, here's your rear shoe. Now what happens when you push the brake pedal is fluid from your master cylinder goes through the brake hoses and into this, and this is called your wheel cylinder, and when the fluid builds up in here it takes these shoes and it pushes them outward on each side like this and like this, and then it grabs the drums. What happens when your brake shoes wear is no matter how much these push out.
The brake shoes aren't grabbing the drum, and therefore your brakes aren't working very well. So what you're doing most of the time is replacing these brake shoes or the brake drum or both.
When you do this job, you are gonna find a few things that you need to replace, or you need to at least inspect and make sure they're working properly. One of the things that is almost always a problem is this adjuster right here. This adjuster is going to be found on just about every brake drum that exists. Sometimes it's up at the top, sometimes it's at the bottom, but there's always an adjuster here that adjusts the brake shoes either outward or inward. And what happens is these things rust up and they get stuck. So what you have to do is remove this adjuster, take it all apart, and make sure you greased it really well, put some anti-seize on it, and then put it back in there so what it works properly.
To get these shoes off, you'll need to remove some of these springs, and it's a good idea to take a picture of this before you start any of it, because that way you can always reference it if you forget how it goes back together. The other pro tip is do one side at a time. Don't try and be a hero and take it all apart and then try and put it back together again, because it's easy to forget where things go.
So take the spring off, just use some needle nose pliers to pop the spring off both sides, and at that point the shoes will become loose at the top. And then you have to remove these two springs, there's a spring on each shoe, and what you do is hold something on the back, because there's basically a nail that goes through the backing plate and through this spring. You have to turn this washer about 90 degrees and it will release itself so you can pull the spring off.
Once the spring is off and the washer is off, the nail will pop up the back, and then you can pull the shoe right off. It may come with some springs with it, they'll, you'll want to pay attention to, because they only go back on in one place if you want to work right. So pay attention to where your springs are. There's a spring at the bottom and spring at the top, and then there might be a couple springs in between.
Right in here is part of your parking brake. So what happens is when you pull your parking brake, this lever moves and it pushes your brake shoes outward and grabs your drums. You want to make sure that that thing pivots properly. It usually pivots on a pin at the top of one of the brake shoes. You want to make sure that is moving properly. So
That your parking brake works properly. Right here is a wheel cylinder, and like I said earlier, there's fluid inside it, and there's technically two Pistons. There's a piston on this side of the piston on this side, and what happens sometimes as a car gets older, the Pistons start going out outward and they start building up corrosion on the inside. So then when you put new shoes on it, pushes the Pistons back in and then they get stuck on the corrosion that's inside there. So sometimes you need to replace this wheel cylinder when you do shoes, because the Pistons get stuck inside and then they don't no longer work right. So pay attention to that when you have your shoes apart. If it looks like it's all rusty and corroded, it's probably pretty gross on the inside as well, and these are cheap enough where it's just nice and easy to replace them, as long as you can get the line off the back.
Adjusting the shoes once you get the new ones on is pretty easy to do, but you want to make sure you do it just right. So the way to do it is you can see that there's an adjuster here, this is where all the adjustment takes place, and what you want to do is turn this little gear until the shoes are almost touching the brake drum. If you if you turn it too much, you're not going to be able to get the brake drum on, and if you turn too little, it'll slide on and then you'll push your brake pedal down and you still won't have any rear brakes.
The good news is that on most drum brakes there's a little access panel on either the drum on the front or through the backing panel on the back, and in this case you can see right here there's a little rubber access panel. You can actually pop this out like this, and now you have access with a flat tip screwdriver to adjust that gear once you have the drum on.
So once you have the drum on like this, you'll go in through the panel either in the rear or the front and you can adjust the gear up or down, and you want to get it to a point so you can turn the drum and you can also feel the shoes just barely on the drum, and that will let you know that the shoes are very close to the drum, but they're also not going to drag and cause your drum to heat up and overheat your brakes.
So that wraps up the drum brake tour of today. Hopefully that helped you out. If you're looking for brakes for your car, definitely find the TRQ brand, because you know you're going to find quality drums, quality shoes, and just quality parts all around. So good luck, and hopefully that helped you out.
You.
How to Install Front Brake Pads Rotors 2006-07 Mazda 6
How to repair, install, fix, change or replace your own worn, squeaky, fading old brakes on 06, 07 Mazda 6
