
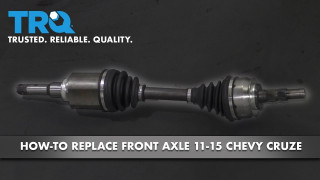
How to Replace Front Driver Side CV Axle 2011-15 Chevy Cruze
Created on: 2020-01-16
This video shows you how to install a driver side CV axle on your 2011-15 Chevy Cruze.
Tools needed
-
Funnel
Torque Wrench
Hammer
17mm Wrench
Pry Bar
8mm Wrench
18mm Socket
19mm Socket
Torque Angle Gauge
Pocket Screwdriver
Axle Fork
32mm Socket
Rubber Mallet
Center Punch
Drill
Brake Grease
Drain Pan
Transmission Fluid
11mm Wrench
3/8 Inch Impact Gun
I'm gonna take this wheel cover off before we remove the wheel. Just use a 19mm socket, loosen up these plastic covers. All right, let's slide that hubcap off and take the 19mm socket, take the lug nuts off and pull the wheel off.
He's a thirty two millimeter socket, take the nut off. Now we're gonna take the tie rod end stud nut off, you've got 18mm socket. Now I'm gonna remove the stud from the knuckle, I'm just gonna use a hammer, just carefully hit on the stud, you don't want to Mar the end of it or mushroom it.
You want to make sure the axle is loose from the wheel hub, just use a punch, give it a tap, just make sure it moves in a little bit. I don't have to punch it all the way in yet, just make sure it's loose.
All right, now I'm gonna remove this nut, I'm gonna use a 15mm wrench to hold the bolt and a 15mm socket to remove the nut, take that off. You can slide the bolt up just to give yourself a little bit of slack on the wheel speed sensor, just disconnect this right here.
And then on the control arm, it's pushed in, there's some retainers, so just use a small screwdriver, push the retainers out right there and right there, just give you a little more slack, go pop those up.
I'm just gonna use a rubber mallet and a pry bar, I just want to separate the ball joint from the knuckle. I just try not to rip the boot on the balls. Right now, yeah, go separate that to side a little bit.
Now I'm just gonna hold the knuckle and just hammer out the axle from this side, and then I can use the punch. Alright, that's loose. Push this out of the way, use a pry bar, slide this out.
And just keep in mind there is gonna be a washer or a spacer right here, you need to install that on the new one. I put a drain bucket underneath the transmission underneath the vehicle, and I'm gonna use this fork, this is an axle fork, to remove axles. Just get this in between the transmission and the axle, yeah, you could also try to use a pry bar or even a couple pry bars. And now I'm just gonna give it a tap, and there, this, the axle is popped, work out of the way, just grab the axle, just slide it up.
It's always a good idea to replace the axle seal, but if you don't have one and it looks like it's in good shape, you can reuse it, and slide the axle in position. You can put a little grease on the end if you want, or a little Vaseline always works. Just try to get this lined up, try not to hit the seal while you're doing this, you don't want to rip the seal. All right, make sure locks in place, trying to grab it and try to pull it out, and that looks good.
Take this little spacer, you can put a little grease on it, that way it stays attached to the axle, it doesn't fall out of place, it almost like glues it to the axle. Just slide the knuckle out of line, the axle up, go through the hub. Yeah, I take the lower ball joint, get it lined up, put the nut ball, looks good. Take a hammer, deadblow hammer or a rubber mallet, just tap this back in place.
This bolt and nut, slide it through the nut ball, tighten this up, snug this up a little bit. Right, so it is recommended that you replace this bolt and nut when you're doing this job, we're gonna reuse ours. The first torque, you want to torque this to 37 foot-pounds. Next we want to loosen it up 120 degrees, so just do the best you can, then we're gonna retorque it 37 foot-pounds.
And then after that if you have a torque angle meter, do the best you can. You're gonna tighten it another 35 degrees. It's good. We're gonna reinstall this ABS wiring harness. Just get these clips lined up, push the retainers back into the lower control on them. It's good.
Now take the tie rod in, get it lined up with the knuckle. The nut on this one happens to be 17mm, so use a 17mm ratchet wrench, and I'll use an 8mm wrench just to hold the stud from spinning. Tighten this up till it bottoms up. All right, just snug that first, and torque this to 26 foot-pounds. That's good.
Take the new axle nut, install that to keep the hub from spinning. I'm just gonna take a pry bar and slide it in position like that. Take a torque wrench, need to torque this nut to 111 foot-pounds.
Now there's three parts to this. At this point we're gonna loosen this back up 45 degrees, so I'll just spin the pry bar around about there, flip this around again. Now I'm going to torque this again an additional 185 foot-pounds. There we go.
Now after you're done this job, you're gonna have to top off the transmission fluid because some of the transmission fluid came out. So right on top of the transmission there's a fill cap, unscrew that fill cap right there. You're gonna want to use a transmission style funnel, and the easiest thing to do is just take the fluid that went into the pan and pour it back in, as long as your pan was clean and the fluid looks good. Now this fluid doesn't look that good, but we're gonna put it back in, or you could take about half of core of the proper transmission fluid, dump it in.
With the car running, you're gonna shift through the gears, go to reverse, neutral, drive, let it stay in the gears for a minute, and then back to park. And then you're gonna let it run for about three minutes.
This is where the level check plug is. You're gonna take a 11mm wrench, remove this while the engine is still running, transmission is in park. Make sure that the vehicle is on a level surface. Remove that, make sure you have a drain bucket underneath, you're gonna have fluid come out.
Now I added a little bit extra just to show how the fluid is gonna come out, so I added about half a quart. So I probably could have only added a 1/4 of a quart and that would have been fine. So you want a little less than a steady stream, almost to a drip, to the point of a drip. That looks pretty good.
I'm gonna install the level plug, then just use a wrench and snug it up, not too tight. Now you can remove the funnel and install the fill cap. Make sure the engine is off when you're doing this. Good to go.
After you're done this job, you want to make sure you go to a local garage to have the vehicle aligned so you don't have premature tire wear.
Install the wheel. I'm going to torque these lug nuts to 100 foot-pounds in a star pattern so that the wheel gets tightened down evenly. Just going to go around again, double check, line up the hubcap, and just take the socket and tighten these down. Just do it by hand, otherwise you're gonna strip these out. You
Shop Products


Chevrolet Cruze Front 4 Piece Drivetrain Kit TRQ CSA70792
Part Details:
- Ball Bearing
- 4 Piece
- (2) Front Wheel Bearing & Hub Assemblies
- (2) Front CV Axle Assemblies
How to Replace Front Passenger Side CV Axle 2003-07 Honda Accord
Watch this video to learn how to replace the passenger side CV axle on your 03-07 Honda Accord. The driver side is covered in another video!
