
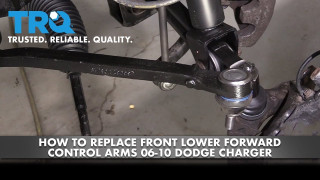
How to Replace Front Lower Forward Control Arm 2006-10 Dodge Charger
Created on: 2020-02-25
This video shows you how to install a new made to fit front lower forward control arm on your 2006-10 Dodge Charger.
Tools needed
-
Torque Wrench
Hammer
Pry Bar
18mm Socket
Liquid Thread Locker
Brake Parts Cleaner
Pocket Screwdriver
21mm Socket
6mm Hex Wrench
Flat Blade Screwdriver
Paper Towels
Copper Anti-Seize
Wire Brush
Now that we've got the vehicle raised and supported, removal center cover, remove your lug nuts, remove the wheel.
Okay, so now the wheel's off, I can tell that these brakes are garbage. I'm gonna have to replace the brakes. I don't know if you will on your application. If you do have to replace the brakes, you're gonna take caliper off the bracket, to bracket off the knuckle, and continue that way, which is the way I'm gonna go. If you don't, you can just take the bracket off the knuckle and continue on that way. Like I said, I'm gonna be replacing the brake so I'm gonna go right here. If you aren't, you want to go to this big bolt right back there.
Remove the bracket bolts with an 18mm, remove that bracket, remove the rotor next, remove the bolt that holds the brake hose to the knuckle, get your ABS wire off the bracket and follow it up here, do the same thing right there. And if you come right here you can use a small pocket screwdriver, there's a little metal clip right here, just push down on that, then you can draw this out.
It's got this 18mm, not off of here, not on there, give it a bonk. Remove your tie rod nut, we're gonna use your hammer and bonk right along this, and hopefully I shouldn't want to drop free, just be careful for that boot.
Let's remove this 21mm nut. There's different ways of getting this joint separated, I'm just gonna use a tool that looks like this, come right up along this. I'm gonna try to just apply pressure right onto that stud and try to drive it up through the knuckle.
That worked really well, so now we're gonna remove the bolt that goes through over here. I'm gonna use an 18mm on the bolt side and a 21mm on the nut side. There it is. Compare your new control arm to your old and make sure that they've got the same curvature.
Time for the install. Washer, and you're not. Now before we snug that up, you need to make sure you grab this arm, put it like this. You can grab your pry bar and we just want it to be pretty much so it's gonna be parallel to where this knuckle is gonna be. Snug it up. Torque this to 130 foot-pounds.
Let's get this tie rod back in here. Let's torque this to 63 foot-pounds. Let's get this in here.
Before we put this nut on, I just want to show you it has two sides. So you have this side with the little dimples in it and the side without. The side with the dimples faces away from the knuckle. It's bottomed that. Oh, you just use a six millimeter Allen head to hold the stud. Torque this to 50 foot-pounds. You just use a six millimeter Allen head to hold the stud and you should be able to take it right over.
Torque this 235 foot-pounds. Let's get this bracket back on the backside of the knuckle here. Make sure you have this ABS wire nice and secured, give it a tug, nice.
If you're still using your old bearing, just make sure you clean it up so it looks nice and pretty like this one. If you're using your old brakes, make sure you clean up the area where the hub's gonna ride. Let's put a little bit copper never seize right on this mounting surface.
Time to get the rotor on here. I like to hold it still, I just use whatever scrap nut I've got there, and then of course the lug nut, and this just makes it so the rotor can't move around and potentially hurt anybody.
It's time to install that cleaned and prepped caliper bracket. I've got my two bolts, I used a little bit of thread locker cuz that's how I roll, bottom these out, torque these to 70 foot-pounds.
Time to install the pads, slide them right into that bracket. If for some reason you feel as though you have to use a hammer to get them in, odds are the bracket's not cleaning up and you're gonna have major issues driving down the road. This feels great.
Grab that caliper, get it right up on here. I've got my two bolts, a little bit of threadlocker, start them both in and bottom them out, torque these to 44 foot-pounds. Clean this down, do the same to the other side of the vehicle.
Do this, get the wheel up on here and bottom out all your lug nuts. Now when it comes time to torque the lug nuts, there's two things to remember, whether you have the regular Charger or if you have the police edition. If you have the regular, you're gonna torque these lug nuts to 110 foot-pounds. If you happen to have the police edition, go ahead and torque them to 140.
Here we go, torqued. Copper cover, give it a loving bak and a shake. You.
Shop Products


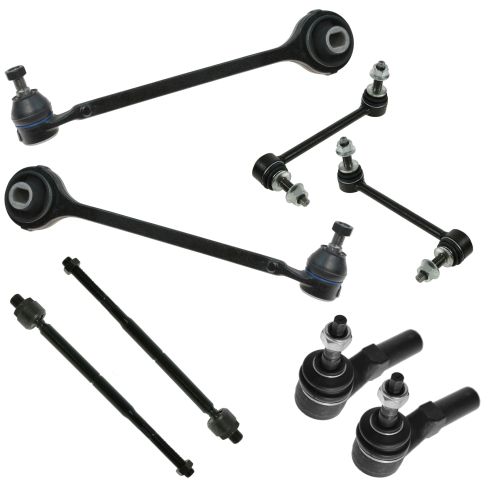
Dodge Chrysler Front 8 Piece Steering & Suspension Kit TRQ PSA59524
Part Details:
- (2) Front Sway Bar Links
- 8 Piece
- (2) Front Outer Tie Rods
- (2) Front Lower Forward Control Arms with Ball Joints
- (2) Front Inner Tie Rods
How to Replace Lower Control Arm 2007-14 Toyota FJ Cruiser
Watch this video to learn how to replace the lower control arm on your 07-14 Toyota FJ Cruiser! 1A Auto shows you how to DIY!
