
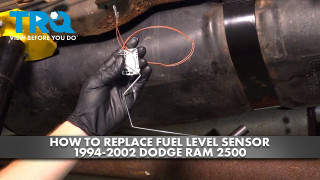
How to Replace Fuel Level Sensor 1994-2002 Dodge Ram 2500
Created on: 2023-09-11
This video shows you how to install a fuel level sensor on your 1994-2002 Dodge Ram 2500.
Tools needed
-
Hammer
Socket Extensions
15mm Socket
Pry Bar
Jack Stands
Safety Glasses
Pocket Screwdriver
Pick
Gloves
Flat Blade Screwdriver
Wheel Chocks
Drain Pan
Ratchet
Floor Jack
Cloth Rags
11mm Wrench
In this video, we will show you how to replace your fuel level sensor on this Dodge Ram. This will be mounted to your fuel sending unit inside of your fuel tank. Let's get into it.
Okay friends, let's get started on our job. The first thing we'll do is make our way under the hood. We're looking for the fuse box. We'll lift this up by grabbing onto these two tabs and quickly have a look at the legend along the inside. What we're looking for is the fuel system relay, number 51, right there.
Now if we were to hold this right next to where the fuse box is, we're going to find that same relay. Go ahead and take hold of that, give it a little wiggle, and lift it up and out of there. A quick look for corrosion, we'll set this aside temporarily. Now we can hop inside the vehicle and attempt to start it.
Now once you attempted to start the vehicle and you found that it did not start and run, continue on by reinstalling that relay. You want to make sure you press it in there as far as possible so sure it's making complete contact. We'll put on a protective cover after that and move along to the negative battery terminal.
To disconnect the negative battery terminal, I'll be using an 11mm wrench. I just want to loosen up this nut just enough that I can remove the terminal end from the battery. We'll set that aside so it's making no contact.
Let's make our way over to the fuel door, remove the fuel cap, give it a quick inspection, and set it aside.
Now let's make our way underneath the driver's side rear of the vehicle. We're looking for the fuel filler neck and the return line. To remove these, we'll be using an eight millimeter or flathead screwdriver. We'll just loosen up the clamp a little bit, we should be able to slide that down and out of the way. Once you have that loose, go ahead and remove the hose from the tube itself, being extremely careful not to damage the hose. Give each hose a quick inspection, make sure it is still soft and pliable, and it's not torn, worn, or damaged in any way.
Now that I have that one off, I'll do the exact same thing for the filler hose. A quick check, this feels good as well.
Now the next thing you're going to want to do is apply support underneath your fuel tank, because we're going to be removing each of our fuel straps. To remove the fuel straps, you'll find that you have a stud that comes down from the frame and has a 15mm nut holding it in place. Remove that nut, as that mounting nut, will clean and inspect our mounting hardware, replace it as necessary. Let's do the same to the front strap. Foreign
Once you have the nut off of there, we'll continue on by taking hold of the strap. We're going to pull it down. Now we can flex that strap out of our way, and now we'll do the same to the rear strap. Let's take this strap, we're going to bring it around to the slot. You should be able to pull it right out.
Now we can start lowering the fuel tank down. While doing so, we want to be paying attention to our fuel hoses along the driver's side frame. We'll be bringing this down and carefully put each of those hoses on the inside of the frame rail.
Once you have the fuel tank lowered enough that you can reach up along the top, we'll start by disconnecting the electrical connector. For this electrical connector, you'll find that you have a red locking tab. I use a small pocket screwdriver to slide this towards the rear of the vehicle to unlock this. Now, once that's unlocked, you don't necessarily have to fully remove the red locking tab. The next thing we'll do is squeeze right where my index finger is, and we should be able to draw this off of the fuel pump assembly. A quick check for corrosion, assuming that looks good we can set that aside.
Now just to the rear of that, you'll find that you have your fuel line. For this, it has two locking tabs, one on either side of it. You want to squeeze those in, and then you should be able to draw the line off. Sometimes you have to use pliers for this, or you could just use your fingers, it really depends on what works best for you. There's that.
Now we'll pay attention to this return line. For this, once again, it has two locking ears. We'll squeeze those in, and we should be able to slide this up and off of here.
Now we can start bringing down the fuel tank the rest of the way so we can gain access to that fuel pump assembly. While doing so, we want to pay attention to our two hoses, we don't want to crimp those or damage them in any way.
Foreign once you have your fuel tank down to a workable position, we'll continue on to removing this line across the top of it. Now for this, there's an area that you want to try to squeeze together, and once you have those two ears squeezed, we can pull this right off.
Just give that a quick inspection. At this point we can continue on to removing the locking ring that's holding the fuel pump assembly down to the fuel tank. To remove this, you want to make sure that you remove any debris from around this area so nothing falls down inside of the fuel tank.
There is a fuel tank ring removal tool that you can slide right on top of this and spin it. Not everybody has one of those. What you could do is continue on with a small pry bar and a hammer and just give it a couple loving box counterclockwise to remove it. Before I go too much further I'll just give it a quick blast with compressed air.
Now once you have that locking ring off of there, the next thing you want to do is just pay quick attention to it, make sure it is still reusable. If it looks like it's dry rotted or cracked in any way, you want to make sure you replace it.
Let's take hold of this, we'll give it a little wiggle to break it free. Might have to pry it up and out of there. Just be careful not to damage the fuel tank in any way. It is probable that there'll be a whole bunch of fuel still inside of this sending unit, so you want to be extremely careful. We'll make sure that we recycle it properly. Let's get this over to the bench.
Now looking at the fuel level sensor, you can tell that it has two wires that go up inside of this area. If you were to follow them, they go all the way up here and then you'll find that you have an electrical connector all the way right in there. Now to get this out of here, we're going to squeeze on this little tab and draw this down and out.
Now at this point we'll just untwist the wiring here, and we're going to want to pay attention to the two center brown wires. We have to remove them from the electrical connector. To do that, we want to have a look at the inside right here. We're paying attention to this green area.
What I want to do is remove this so I can gain access to the locking pins inside of here. You can use a small pick for this, or even a screwdriver, to remove it. I'll place it down on the bench. Once I have it down there, I can see the green area inside of here. I just want to press that down to unlock this side.
Now once you have that loosened up, we'll just make our way along the other side. We'll use a small pick for that, and we can pull it out. A quick inspection, we will be reusing this.
Now that we have that out of there, let's pay attention to these two areas right here. That's the terminal ends for each of those two sender wires we have to remove. Now as far as the terminal ends themselves, they're just a small rectangular piece of metal, but that metal is held in place with a small plastic tab holding each one in.
I'll use a small pick and get in between the plastic tab holding in the metal connector, and now we can turn this over and remove that wire. Gotta make sure we have it in place, obviously we don't want to break that locking tab.
Foreign do the same to the other brown wire. See, that's unlocked right there. We'll inspect the connector end here just to make sure that we did not damage it in any way. That one looks fine.
At this point we can take these wires, we'll untangle them from the internal wires here. Typically they are twisted around or held in place with a wire tie of some sort. These wires are ready to come through this port.
We do that, we have to remove the level sensor from the fuel pump assembly. To remove this, if you were to look down along the bottom area, it has a small gray locking tab which will slide up through this slot in and over, and then it's in the locked position.
What we need to do is carefully try to pry this away and slide this down and out of here. I'll use a small pick for this, make our way right inside, and then press this down. A little bit of pressure here, we are, just slide this down.
I'm going to turn this so you can see exactly where the wires go up and through. Pull those right out, and there it is, friends.
Once you have the fuel level sensor out of there, you need to pay attention to one more thing inside this area. You have this small spacer, slide that right on out of there. You can set that aside, your kit comes with a brand new one.
All right, let's get ready for the installation of our brand new level sensor. Let's start by putting this spacer in place, slide it right on up in there, all the way up to the top.
Now we can continue on to the level sensor itself. Now we can take those two wires and slide them right up through that circular hole I had showed you during the removal process. When doing this, we're going to do them one at a time, so they can slide up right through the center here.
There's one. I'll hold on to that on the inside there. Continue on to this other one. Let's take those wires and we'll bring them through the same port that we have that electrical connector through. Pause in this area. We'll make our way back down to the level sensor.
We'll take that level sensor and slide it right into place. You can see that along this area along the back you have the alignment tab that will slide up through this groove. It also has the locking tabs that will lock into these two points. Disaligned and slide it right up and in there. This should be a pretty tight fit. While pressing, I could hear an audible click where this fell right into the proper position.
Before continuing on to the electrical connector, we'll take hold of that level sensor and try to pull it right out of there. We want to make sure that it's nice and tight and it cannot fall down out of place.
Now let's have a look at those two wires and the electrical connector. If you were to look at the wiring, you'll find on the terminal end you have a small notched out area where my index finger is pointing. Looking at the other side, you have a cutout rectangular hole. We want to make sure that we have the cutout rectangular hole facing towards where the bottom of this connector would be, down along here. The small notched out cutout will be up towards those locking tabs.
Take these and put them in position. We'll do them one at a time and slide them right in. Press it all the way in there with a small screwdriver or pick and listen for a click. We'll give that a tug to make sure it is secured in place, and do the exact same thing to the other wire.
Once you're sure both of those wires are secure, we'll continue on with the green locking clip. Get this in position and slide it right in. Press that in as far as we can. You want to ensure that it is flush with the inside portion of this right here. If it's sticking up even a little bit, your tabs won't be locked in.
Now that we're done with the electrical connector, it's a good idea to throw a couple wire ties holding all four of the wires together. After that we'll continue on with that electrical connector and plug it right on in up along the top here. Foreign get a nice click from that. Now reach inside, I'm going to give it a good tug. I don't want to ruin the wires, but I do want to ensure that this will not fall off when it's in the vehicle.
Let's get this back in the truck. The next thing we'll do is clean up the top of the fuel tank where that fuel pump will sit.
We'll take this and put it in the proper positioning, slide it right down in. Now before we slide it down too far, we want to put the gasket into the fuel tank here, snap this down there. Let's just make sure that the gasket's seated properly, you don't want it falling in anywhere. Now before we bring it all the way down until it's completely bottomed out, it's important to make sure you put on the ring.
Now we can install that locking ring, we'll just carefully put this over here, we're going to have to bring it around. Foreign here we are, once you feel as though you have it flattened level, we can continue on by pressing this down, and we'll continue bringing it down as far as we can with the locking ring.
Now that I have this started on, I'm going to double check all the way around to make sure that it's seated properly. We'll just continue on by tightening it until it's good and tight. You want to make sure there's a good seal, double check that fuel pump, make sure it's in there nice and tight.
Now at this point we can start raising up the fuel tank until we can gain access to reconnecting our fuel lines and our electrical connector.
Connecting our electrical connector, we'll press this in, listen for a click, there's our click. Give it a tug to make sure it is secured, and then make sure you lock it in with the red locking tab.
Now we can attach this and bring the line right over, slide it into position, listen for a click from that, double check to make sure it is properly secured.
Now we'll continue bringing the fuel tank up so we can connect in our last fuel line. Let's get that fuel line in place, you might have to shift the fuel tank around a little bit. Press it in, listen for a click, give it a nice tug, make sure it's secured. You do not want, if you will, leak up along the top of your fuel tank.
Once you have the fuel tank all the way up against the body of the vehicle, we'll be continuing on with our straps. We'll take the forward one and carefully start bringing it around between the drive shaft and the fuel tank. Carefully press it all the way up onto that stud. If you have a hard time, you could put a jack underneath this area to continue pressing it up while you press this into position, start on that mounting nut.
Now we will not tighten this yet, we're going to move along to putting on the rear one as well. Let's get the rearward strap on here, just slides right into the groove on the frame there. Now we can swing this around, put it on the stud, and start on that mounting nut.
Now we can snug these up. You want to start with the rearward strap first, and then we'll tighten the forward one.
Foreign let's remove the support. Let's reattach our fuel fill hose right onto the filler neck. We'll take hold of the clamp, slide it into its original position, and tighten it up. Double check to make sure that's nice and tight.
Okay, now we can reconnect our negative battery terminal. These are 11mm. Make sure this is nice and tight.
At this point we can make our way to the gas cap. We'll put that in the proper position and close the hatch.
Okay friends, we showed you how to install your fuel level sensor. At this point, go ahead and start up the vehicle, let it run and check for fuel leaks. Aside from that, take it for a road test. Thanks for watching.
When only the best will do, demand TRQ, the only company that lets you view before you do. TRQ is committed to offering the highest quality aftermarket auto parts that are engineered for peace of mind. Thanks for using and viewing with TRQ.
How to Replace Fuel Tank 1988-96 Buick Regal
This is part 2 of a three part video. This video shows how to remove, prepare, and install the fuel sending unit on the 88-96 Buick Regal
