
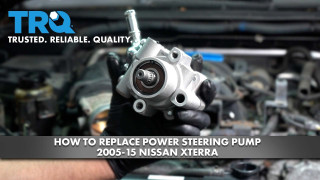
How to Replace Power Steering Pump 2005-15 Nissan Xterra
Created on: 2022-01-31
This video shows you how to install a new power steering pump in your 2005-15 Nissan Xterra.
Tools needed
-
12mm Socket
Torque Wrench
Hammer
14mm Socket
Pry Bar
19mm Socket
10mm Wrench
24mm Wrench
Flat Blade Screwdriver
Serpentine Belt Tensioner Tool
Hose Clamp Pliers
10mm Socket
Drain Pan
Ratchet
Cloth Rags
Fluid Transfer Pump
There should be two bolts that hold this cover down right here. Use a 10mm socket or whatever size that they actually are. Pull those two bolts out, and then just grab this cover and just pop it up like that. Let's just secure it on right there.
There may be another grommet over here. Yep, there's a grommet right there and fill off, so just pull that up. You can remove this hose, use a hose hose clamp pliers, slide it down and just try to wiggle this off, just like that.
There's two bolts right here, use a 10mm socket, remove those two bolts, and we want to remove this intake duct. Use a straight blade screwdriver, loosen up this clamp right here, you can slide that off, and then loosen up the clamp over here and just slide this side off the air box and out of your way.
Just to remove the air box, get it out of your way. Slide these two clips off, disconnect the connector right here, just push down, and there might be a retainer, just pry that off with a trim tool and just pull that up.
Take these two bolts out right here, the 10mm, use that 10mm socket, and this one right here. There's two brackets right here, I'm just going to remove the bolts for those, there's a 10mm socket, just take the bolt out.
Disconnect the hose that's right here, you just slide it out, and right here, and then there's another hose down here that's attached, you just gotta pop that out of the fan shroud assembly. We're going to remove this hose so that we can pull the fan shroud out and up.
You could always have a drain bucket underneath here, just make sure you don't do this when the vehicle is hot, and same with taking the coolant cap off. Just use a hose clamp pliers, slide this clamp down, you can just twist this off, and it's pretty dry, that's good, and just slide that out of the way.
Take a 10mm wrench and you can loosen up the nuts that are on the the fan clutch and the belt. Since the belt's still on, it makes it a little easier. Loosen them up at this time, you can take the nuts off, just you don't have to take the fan off completely.
With everything loose, you can just raise this up and reach in here, just grab the fan, just raise it up about to there. You can slide the fan out right here just like that. You can try to slide it out on the other side as well, but that works, and slide the rest of the fan shroud off.
There is a hose at the bottom, you're gonna have to slide that hose off, and then it'll come out completely.
It's not connected or anything, a little bit of a wiggle, just because it's easier to take this off while the belt's still on. That's going to prevent it from spinning. And use a 19mm socket, take this off, just loosen it up like that. That's fine right there.
Now use a belt tensioning tool, loosen the tension on the belt and just slide it off the pulleys. You can either pull the whole belt off or you can just leave it like that. Now I'll take the nut off, that lock washer, and just grab the pulley and slide it off.
Just to prevent some fluid from going all over the place, I am gonna extract some of the fluid from the reservoir. Take the cap off. If you have one of these fluid transfer pumps, you can extract the fluid.
Now I'm just going to put some rags underneath here, or some absorbers, just because some of the fluid is going to come out. You might want to put something, a catch pan, underneath just to grab some of the other fluid.
And we'll take that bolt out right there, use a 24mm wrench and just loosen this up. Be careful not to hit the radiator, and loosen that up. That might be a little bit tight, you might have to hit the wrench with a hammer, just be careful.
You could always take the bolt out right here on this side, the banjo bolt, and then once the pump is out, put an impact on there. So we'll just take this out. There should be a seal on the bottom, there's a seal on the top, you should replace those seals if you want to.
You can disconnect this connector right here, just move that wiring harness out of the way. You can push this down. If you want to protect the radiator, just use a piece of cardboard, that helps out.
Now I'm going to take this hose off. You can either take it off right here, or take it off where the hose clamp is, it's a little tricky to get to though.
For now I'm just going to take these two bolts out, use a 12mm socket, and if this hose is in your way just pull that out of your way. Once you loosen it up, they come out pretty easy, and slide that hose off.
Now use a 12mm socket, take this bracket off. It's a bolt there, there's a bolt down here, there's another bolt right here. This bracket should slide off.
And then take this bolt out, use a 14mm socket, slide that bolt out. There is a bracket on the back side that has a retainer that goes around some wire loom or some wire insulation, and if you can try to tap that off that would help. You can use a a pry bar or a screwdriver.
Just trying to get it off the bracket. I'll show you once I get this off what it looks like, and you can wiggle this off. Use the pry bar and just try to slide this out. There you go. There's that bracket, and that's where that piece is that you have to try to slide off there. But there it is.
I'm just going to take this tube off right here, it's going to make it a little easier. You can use some hose clamp pliers, loosen up that hose clamp, move that up a little bit, and you can either twist this or take some type of pick and just slide that off.
When we go to put the pump on, we'll just slide the pump right in there because I don't want to reuse this, we can. The new pump has one of these. On the old pump, we're going to transfer this bracket over. Just use a 12-millimeter socket, take this bracket off with the bolt, slide it in position and snug it down.
When we go to install the pump, there's the bracket that goes right there, and this bolt goes through that. On the back side there is this little bracket with a nut on it, and that has to go through here so this bolt can thread on it. When we took this out, this just fell down, it's not something we really noticed right at that second.
So this little bracket with the nut on it is going to go behind this bracket right here. You're not going to be able to see it very much while I'm installing it, but I'm going to have to reach around the back side and hold that while I get the nut started, while I get the bolt started through there, so keep that in mind.
So take the pump, we're going to slide the hose on the pump and then slide that hose clamp down. The bracket's kind of in the way a little bit, but do the best you can. Slides down like that, that looks good. And then if you can slide this bracket into where that conduit is, where the wire loom is, you want to do that.
Get the pump lined up. When you're trying to fit the pump on this bracket you may find that it does not line up, it doesn't go in between the where the bracket is. There is a little bushing right here that sometimes you need to hammer that back a little bit. Now if you use a punch and a hammer you just got to be careful because you could potentially break this ear off, although it is steel so probably unlikely that you do.
But what I did was just take a bolt, and what you could do is take a bolt on one side, slide it through there, and on the back side use something that's a little bit bigger than the bolt hole, not necessarily a washer, but if you had a socket that's a little bit bigger than the hole so that the bushing can slide through, and then put a nut on there and then tighten it up real tight and it'll suck the bushing further back. And when you do that, once once you finish that, you can come back and the pump should fit in there properly. You don't have to do it very long, just just tighten it up a little bit and it should move that bushing a little, make it a little easier.
Now we can line this up, slide the bolt through, and I have this little bracket to try to get in there or get behind it. It's a little bit of room, if you have to you can go in through the wheel well, see if you can see a little bit more to get in behind there. It's not that easy but I can get behind there, and I'm just doing this blindly, but I found the bolt, it's in the right location. Now just tighten this by hand.
And before I tighten this up completely, let's put that other bracket on, that's not going to fall off, that's good. Before I put that bracket on, I'm actually going to put this pipe on because it's going to be a little bit easier. Make sure you get your new seals, go through your banjo bolt with one seal through, the just like that. Get this lined up and get it started, and now tighten that up again. Be careful of the radiator, make sure the hose is in the same location it was when you took it apart.
If you can get a torque wrench in there, you can torque this bolt to 44 foot-pounds. Now I can take this bracket, line it up, get the bolts started, tighten all these down, and make sure you go back and tighten this one down.
Now you can put the pulley back on, line that up, get the lock washer on and the nut.
And if you want to you can put the belt on to hold it, or you can just hold it with your hand and tighten that down.
Now let's put the belt on, pretty much the same way it came off. Make sure it goes around the crank, around this pulley that the fan is attached to, around the AC compressor down there, over the top, down to the alternator. And I'll get my tool, take the belt tensioner tool, loosen the tension on the tensioner, and just get the belt over the power steering pump. Make sure everything lines up good before you take the tool off. That looks good.
Now if you unplug this connector, plug this in. Now take the fan shroud and just kind of get it slightly in the right location. Once it's about there, then grab the fan, try to slide them down together, try to slide that fan on the pulley, and you can maneuver the housing a little easier. There is some pins on the bottom that have to line up.
And take the bolts for these brackets, slide these in position and tighten them down. Put these two bolts in, tighten these down. Reattach the hose that goes right here, the one on the side that goes over here, and then underneath. If it was if there was a hose underneath, you want to attach that underneath as well.
Now we can put the coolant hose on, upper radiator hose, use the clamp hose clamp tool. That's nice and tight. At this point you can go back and top off the coolant if you lost any coolant.
Put the air backs back in place and clamp it down. Reconnect the connector and lock this in. Slide the air snorkel on over the throttle body and slide this hose on. Use the hose clamp pliers, move that hose clamp over and tighten down the worm clamps. Use a straight blade screwdriver, snug it down, and snug it down over here.
Put these bolts in, tighten them down. Put this cover in place, and if you have the two bolts that go there, put those in and tighten them down.
Now we can add the appropriate power steering fluid, you want to check your owner's manual to get that.
Now you want to raise the wheels off the ground and turn the wheel back and forth, stop to stop, about 20 times, and that's just gonna bleed the power steering system. After you've done that you want to leave the wheel going straight forward.
At this point you can recheck the fluid level, adjust accordingly. You can start the vehicle, turn it stop to stop again, shut it off and recheck it again and adjust you.
How To Replace Power Steering Pump 1964-67 Pontiac GTO
How to repair, install, fix, change or replace a broken, bad, or leaking power steering pump on 64, 65, 66, 67, 68, 69 Pontiac GTO.
