How to Replace Rear Wheel Hub Bearing 2013-19 Ford Police Interceptor Utility
Created on: 2020-05-20
Watch this video to learn how to install a new rear wheel hub and bearing assembly on your 2013-19 Ford Police Interceptor Utility, or Ford Explorer.
Tools needed
-
Torque Wrench
Hammer
15mm Socket
Pry Bar
18mm Socket
19mm Socket
Brake Parts Cleaner
Sandpaper
32mm Socket
T40 Socket
Flat Blade Screwdriver
Brake Caliper Hanger
8mm Socket
Copper Anti-Seize
Center Punch
Ratchet
Cloth Rags
Needle nose pliers
1/2 Inch Breaker Bar
1/2 Inch Impact Gun
Pull the center cap off. Just use a pry bar. You can use a rag if you don't wanna scratch the wheel. I'm gonna use a 19-millimeter socket, take the lug nuts off. Remove the wheel. Now I'm gonna take the caliper off. I'm not gonna take it off separate from the bracket. I'm gonna take it all together off. So just take the bracket bolts out. Use a 15-millimeter socket. Take this one out and the one that's a little bit higher up. And just take a pry bar or screwdriver and just pry out the caliper. And you can just set it aside over here. If you want to, you can use a brake caliper hanger, but as long as it sits right there, it should be good. Now I'm gonna remove that screw right there. Use a T-40 socket.
Now I'm gonna take the rotor off. I'm just gonna use a hammer and just tap in these areas. Loosen it up. There we go. Slide it off. Now I'm gonna take this axle nut off. I'm gonna use a 32-millimeter socket. Take that off. All right. Now, I'm just gonna tap the axle a little bit. Use a punch. You don't really wanna hit on the end of it because you don't wanna mushroom the end of it and it'll prevent putting the axle nut on later. So just make sure it's loose. You don't have to hammer it all the way in, just make sure you see movement, which is good. Now I'm gonna pull the wheel speed sensor out. Let's use an 8-millimeter socket. Take this bolt out. Take that bolt out. Let's use some needle nose pliers. Try to twist it a little bit. Try not to break it. And slide it out and just set it aside. I'm gonna take these bolts out. I'm using an 18-millimeter socket. There's three that you can see right here and there's a fourth one on the other side of the axle.
All right. Take these bolts out. And then the other one right there. Just hit the backside with a hammer. There we go. Slide it out. All right. Just take some... You could take some Emery cloth or some sandpaper and just sand down any corrosion. Brake parts cleaner. Just clean it up. I'm just gonna put a little thin coat of anti-seize on here just to prevent corrosion. All right. Take the hub and line it up. The two holes at the top are closer together than the two at the bottom. And take the bolts. Get the bolts started from the backside. And now I'm gonna torque these bolts to 122-foot-pounds.
Now I take the axle nut, put the old axle nut on, and I'm gonna take a pry bar and just go in between the lugs. And you wanna make sure you don't...you don't wanna put the wheel on here and torque it with the weight of the vehicle on it. You wanna make sure there's no load on the actual wheel bearing. And torque this to 258-foot-pounds. Now, what that's gonna do is that's gonna seat the axle. What you need to do next is take this nut off and put a new nut on and torque that to 258. Take the wheel speed sensor and slide that back in position. Put the bolt in and snug that up. That's good.
If you want, you can put some anti-seize right there. Put the rotor back on, line it up with the hole, and put the screw back in and just snug that up and take the brake caliper and just slide it over the rotor. Put the bolts on and torque these bolts to 76-foot-pounds. And put the wheel on. Put the lug nuts on. Now I'm gonna torque these lug nuts to 110-foot-pounds in a star pattern to tighten the wheel down evenly. And just go around again, double-check. Take the center cap and line it up. Tap it on.
Shop Products

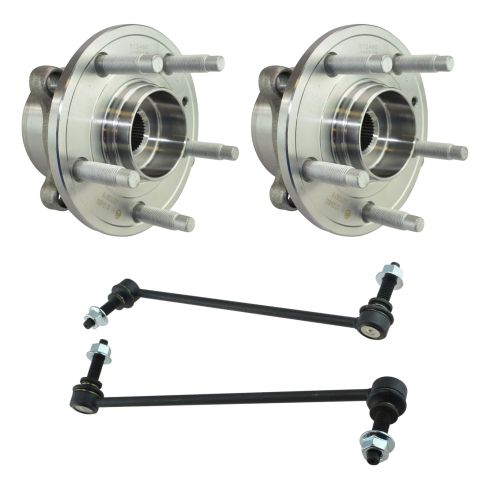
Ford Front 4 Piece Suspension & Drivetrain Kit TRQ PSA50244
- (2) Front Sway Bar Links
- (2) Front Wheel Bearing & Hub Assemblies
- 4 Piece

How to Replace Rear Wheel Bearings and Axle Seals 2000-06 GMC Yukon
Learn how to install a new TRQ axle seal and bearing in your 2000-06 GMC Yukon by watching this video.


