
How to Replace Side Rear View Mirror 1992-99 Buick LeSabre
Created on: 2013-07-03
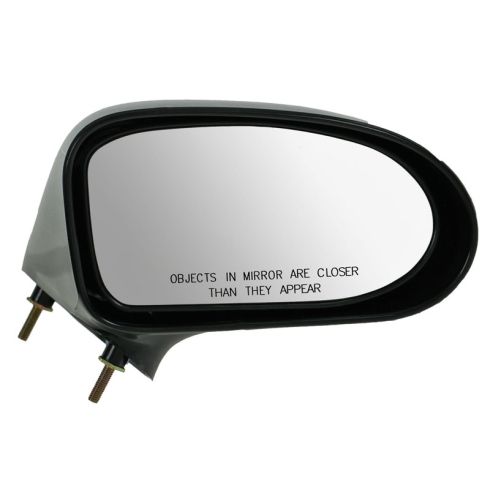
Find out how to replace the door panel and the side view mirror with this how-to video
-
step 1 :Removing the Door Panel
- Using an 8mm wrench disconnect the negative on the battery.
- Remove the two T25 screws on the door panel.
- Remove the panel behind the door handle and disconnect the harnesses.
- Pry the front edge of the switch panel and pull up and out.
- Disconnect the harnesses.
- Pry out the reflector on the side of the door.
- Remove the three 10mm bolts. One in behind the reflector and two under the switch panel.
- Pry the door panel out.
- Lift it up and off the door.
- Disconnect the connectors.
-
step 2 :Removing the Mirror
- Pull back the water shield.
- Disconnect the mirror harness connector.
- Remove the two 10mm nuts securing the mirror. Use a ratchet and extension for one and a wrench for the other.
- Pull the mirror free.
-
step 3 :Replacing the Mirror
- Put the harness down into the door.
- Line up the mirror and replace the two 10mm nuts. Start them by hand then tighten them.
- Reconnect the harness.
- Replace the water shield.
-
step 4 :Replacing the Door Panel
- Reconnect the harness connectors on the inside of the door panel.
- Push the other harnesses through the door panel.
- Put the panel up into place and push down.
- Push in along the edges of the door to secure the clips.
- Replace the three 10mm bolts.
- Replace the two T25 bolts on the door panel.
- Reinstall the reflector.
- Reconnect the harnesses to the switch panel and push the switch panel into place.
- Reconnect the battery.
Tools needed
-
10mm Socket
Socket Extensions
8mm Wrench
10mm Wrench
T25 Torx Driver
Flat Blade Screwdriver
Ratchet
Brought to you by 1AAuto.com. Your source for quality replacement parts and the best service on the Internet.
Hi! I'm Don from 1A Auto. I hope this how-to video helps you out. The next time you need a part for your vehicle, think of 1AAuto.com. Thanks.
In this video, we're going to show you how to replace the driver side mirror on this 1997 Buick LeSabre. Passenger side is basically the same procedure. It should be about the same for a '97 to '99 LeSabre. It's similar for many cars like the Pontiac Bonneville, although removing the door panel may be a little different. The tools you'll need are. You'll need a new mirror from 1AAuto.com, T25 Torx driver, a small flat blade screwdriver, a 10mm socket with a ratchet and extension, and 8mm and 10mm wrenches.
I'm using an 8mm wrench to remove the negative terminal on the battery, pushing it off to the side. I'm going to remove two Torx 25 screws here and on the backside of the door. We'll just speed it up as we remove those screws. Pull the panel out of the way here. At the same time, we can disconnect the unlock/lock switch. I'm going to do that by using a pocket screwdriver and popping up on the tab here on the side. Using the pocket screwdriver I'm going to pry on the front edge of the switch pack and pull it forward and out. We have a bunch of connectors.
Okay, some of the connectors have tabs, some just hold together by friction. We're just using the small screwdriver to either help push the tabs in or to just pry the connector up and off. Using a pocket screwdriver I'm going to try and get in to unlock the clips behind this. There you go. See inside here the one 10mm bolt. Another 10mm bolt here and here. Okay, so we'll fast forward here as we use a 10mm socket and a ratchet to remove the bolt that's in behind the reflector and then the same tool to remove the two bolts that are underneath the window switch or the switch panel. With this connector here, I'm going to use a pocket screwdriver to pry off on the clip, pull out. Then here on the side, little tab, pull out. Okay, so one of our clips didn't come out with the panel. We'll pry that out of the door and now we're sliding it back into the slot where it goes in the door panel.
Slowly peel back the water shield. You need to peel back, basically, the whole top. There's your harness. The black cable coming down from the mirror. Bring it down to the connector. Undo your connector and then disconnect. There are two 8mm and 10mm nuts that hold the mirror on. One of them you're going to be able to feel if you put your hand up like this. The other one, you could come in like this, and it's right here and here. Okay, the four nut is easier to reach. You can see we just use a 10mm socket with a ratchet and extension and take that off. Just be careful not to drop it down into the door. If you do drop it down into the door, it's pretty easy to reach and a magnet would help you if you do that.
The other nut is not so easy to reach. We kind of start at the top then slide our hand in behind. We're using a 10mm wrench and, basically, just get the nut started. The good thing about it is once you get it started, usually, you can take it off the way with your fingers. Again, be careful not to drop it down into the door as you take it off.
Your replacement part from 1A Auto will come in flat black if you choose you can install it and leave it as is. Or you can be as crude as going to the hardware store and grabbing a can of spray paint that matches the color as close as possible and spraying it. Or you can go to an automotive parts supply store that has a paint department and get the color match paint, and an air charge can and spray it yourself.
I'm just going to re-install this mirror for the sake of the video and show you how to do it. The mirror's fine. We're going to snake this through, middle hole, pull it down through here, two holes. Then go back up with our 10mm.
Okay, we're just installing the original mirror because there's nothing wrong with it. I can't see putting a new part on a car that doesn't need it and we just want to do this for the video, for you. Put the mirror back in place, make sure you get the harness through and then put the nuts on. Start them by hand first and then tighten them up. Connect your connector down here. Keep this up in the appropriate slot. Reconnect your harness at the top. Make sure that all one, two, three, four, five, your connectors are free. Put your panel back up on the sill. Okay. Make sure you get it up on the door sill, activate the clips. The T25 Torx screw, and the door handle close out panel and that screw. Now, install your three 10mm bolts. The two right underneath where the switch panel goes are pretty easy and straight forward. The one that goes in behind the deflector in the back of the panel, you have to feed it in by hand first, get it started and then use your wrench to tighten it up. Reinstall the reflector. Plug in your harnesses. Push the back end first, make sure not to pinch any of your wires, put it in. Reconnect the battery.
We hope this helps you out. Brought to you by www.1AAuto.com. Your source for quality replacement parts and the best service on the Internet. Please feel free to call us toll-free, 888-844-3393. We're the company that's here for you on the Internet and in person.
Shop Products


Buick Olds Passenger Side Mirror TRQ MRA05307
- Paint to Match
- Manual
- No
- No
- Paint to Match
- Clear
- Curved
- Plastic
- Yes
- Black
- Yes
- Yes
- No
- 2
- No
- No
- No
- No
- No
- No
- No
- Manual
- No
- No
- No
- Black
- Paint to Match
- No

How to Replace Side View Mirrors 2012-14 Toyota Camry
How to repair, install, fix, change or replace a broken, smashed, cracked, or shattered side view mirror on 12, 13, 14 Toyota Camry

