
How to Replace Side View Mirror 1998-2004 Nissan Frontier
Created on: 2013-10-16
How to repair, install, fix, change or replace a broken, smashed, cracked, or shattered side view mirror on Nissan Frontier XTerra, model years 1998- 2004.
-
step 1 :Removing the Door Panel
- Pry off the mirror base trim piece with a flat blade screwdriver
- Remove the Phillips head screw inside the door handle
- Remove the Phillips head screw inside the door pull
- Lift off the rear of the arm rest
- Remove the Phillips head screw inside the rear arm rest
- Pry up the window switch panel by hand
- Disconnect the window switch wiring harnesses
- Remove the Phillips head screw inside the door
- Pry out the door panel
- Lift the door panel up and off
-
step 2 :Removing the Side Rear View Mirror
- Carefully peel back the water shield
- Disconnect the mirror wiring harness
- Push in the clip holding the harness to the door with a flat blade screwdriver
- Remove the three Phillips screws on the mirror
- Remove the mirror
-
step 3 :Installing the Side Rear View Mirror
- Insert the mirror into place
- Insert and tighten the three Phillips screws to the mirror
- Connect the mirror wiring harness
-
step 4 :Reinstalling the Door Panel
- Lift the door panel into place
- Push in the door panel clips
- Insert and tighten the Phillips head screw inside the door
- Insert and tighten the Phillips head screw inside the door handle
- Insert and tighten the Phillips head screw inside the rear arm rest
- Connect the window switch wiring harnesses to the switch panel
- Push in the window switch panel
- Push in the rear arm rest
- Insert and tighten the Phillips head screw inside the door pull
Tools needed
-
Flat Blade Screwdriver
Phillips Head Screwdriver
Brought to you by 1AAuto.com, your source for quality replacement parts and the best service on the Internet.
Hi, I'm Mike from 1A Auto. I hope this how-to video helps you out, and next time you need parts for your vehicle, think of 1AAuto.com. Thanks.
In this video, we're going to show you how to replace the driver's side mirror assembly on this 2003 Nissan Frontier. It's pretty much the same for model years 2001 through 2004. You'll need a new mirror assembly from 1AAuto.com, as well as a pocket flat blade screwdriver and a Phillips screwdriver.
Locate the Phillips head screw in the door handle, as well as down there in the door grab and the plastic clip up in the corner. Use a small flat blade screwdriver to pry that little clip off, and then I'm going to use a Phillips head screwdriver to turn those two screws. I'll fast-forward as I do that. Lift off the rear of the arm rest. You'll expose another Phillips head screw right there. I'll go ahead and fast-forward as I remove that. Now remove the portion of the arm rest with the switch pack assembly in it. Just pull it up, and you'll notice two connectors, and they're just removed by pressing the tab in on them and pulling them out. Go ahead and do that.
Notice this exposes another Phillips head screw, and I'll go ahead and fast-forward as I remove that. Now, the only thing holding the door panel on are plastic flip sitters behind it, and just give a good tug to the door and it should pop right off. You can pull it and put it out of the way. Peel back on the upper portion of that paper barrier, and you'll see a wiring harness with a connector that goes to the mirror. Push the tab in and disconnect it. You'll notice a plastic clip that holds the harness that goes to the mirror right there. I'm just squeezing it from the back side and pulling it out to get it out of the way, and, at the same time, using a little flat blade screwdriver to help push it through.
Locate the three Phillips head screws that hold the mirror. I'll fast-forward as I remove those three screws. With those three screws out, the mirror should be loose and you can go ahead and pull it right out. I've got some rain guards on my windows. That's what's kind of making it difficult in pulling it, and make sure that you feed your harness up through the door panel there and pull it out.
Here, you can see the old part with the new part from 1A Auto. It's brand new, shiny, new glass, that black texture and the corresponding connector. Feed the wiring harness down inside and place the mirror in.
You want to now reinstall and tighten the three screws that hold the mirror on, and we'll just fast-forward as he does that. When you tighten them, tighten them up nice and firm. You don't want to over tighten them and warp or break the mirror. Now, pull your harness through and plug it in.
Line up the plastic clips on the inside of the door panel with the corresponding holes in the door itself. Place the top of the door panel on to the sill and feed your wiring harness through to the spot where it goes. Place your door panel on the sill and once you know that those plastic clips are in place, give it a couple of whacks around the outside to fully sit them.
Start to reinstall your Philips head screws right there in the inner door handle, and then the two that were hidden by the arm rest, and then the one in the door grab handle, as well as the clip that goes up in the triangular piece that covers the mounting screws for the mirror. I'll go ahead and fast-forward as I do that.
Now you can take your door handle and switch pack assembly, reinstall the connectors to it, and then place it down inside of the door there, starting with the back side and then working your way to the front. By pushing it down, you can see the clips flip in, and then you can go ahead with the back portion of the arm rest. Slide that in and then down in the back, and then once that's all set, you can then reinstall the final Philips head screw.
We hope this video helps you out. Brought to you by www.1AAuto.com, your source for quality replacement parts and the best service on the Internet. Please feel free to call us toll-free, 888-844-3393. We're the company that's here for you on the Internet and in person.
Shop Products


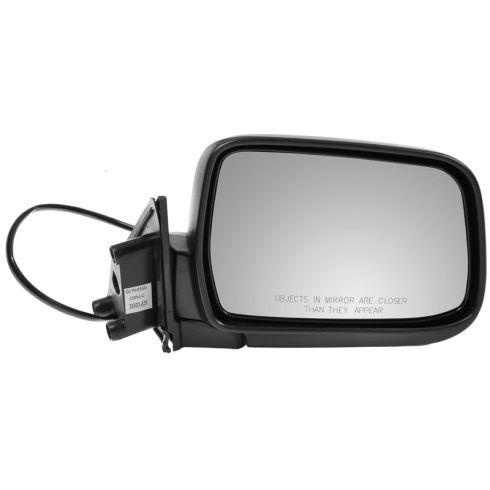
Nissan Frontier Xterra Passenger Side Mirror TRQ MRA05467
- Paint to Match
- Electric
- No
- No
- Clear
- No
- Textured
- Curved
- Yes
- 3
- Black
- No
- No
- No
- No
- No
- No
- No
- No
- Manual
- Yes
- No
- No
- Black
- Textured
- No
- 3
- Plastic
- 14.96 in
- No

How to Replace Mirror 1997-99 Toyota 4Runner
If the side view mirror is broken, this video shows what the steps are to replace it

