
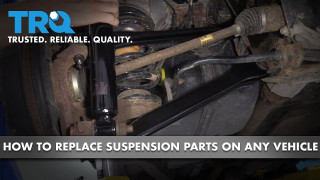
How to Replace Suspension Parts on Any Vehicle
Created on: 2019-06-21
This video will teach you about the different types of suspensions, how they operate, how to identify when do they need to be replaced with a high-quality TRQ part.
Tools needed
-
Torque Wrench
Socket Extensions
Hammer
Socket Driver
Pry Bar
Jack Stands
Wheel Chocks
Straight Cutters
Ratchet
Floor Jack
1/2 Inch Impact Gun
Hello, I'm Jeremy at the TRQ Research and Development Facility, and this is where we test all of our parts on a fleet of vehicles to make sure they're the quality that you deserve. Today I'm gonna show you a little bit about the suspension kits that we carry and how to install them. Every vehicle is a little bit different, but this should be a quick guide on kind of how to get you started in the right direction. So let's get started.
The first thing you want to do is to crack your lug nuts loose while your vehicle is on the ground, and it'll be a lot easier to remove the wheel that way. And then you want to raise and support your vehicle and make sure you do it on level ground, so it's nice and safe for you to work on.
So what we have here is a typical McPherson strut style suspension. There's a bunch of different styles of suspension out there that you can have. So like a Chevy truck, you'll find that there's an upper control arm and a lower control arm. The lower control arms come out with usually two bolts on the inside where they connect to the frame, and then there's ball joint on the outer side that connects to the knuckle. The upper control arm also mounts to the frame with two bolts, and then on the outer edge there's an upper ball joint that connects to the knuckle.
Ball joints typically have cotter pins going through them with castle nuts, so you pull the cotter pin out and they need to remove the castle nut. And then you can use a ball joint press, you can use a pickle fork, or you can use a large hammer to remove the ball joints. Typically replacing a whole control arm is a little bit easier than replacing the ball joint because ball joints are often pressed into control arms, and pressing things in and out is generally a lot of work, so you'll save yourself a lot of time and money by just doing the control arm itself.
On vehicles like BMWs, you'll find multi-link suspension which has front upper control arms, rearward control arms, rear lower control arms. There's basically a variety of arms in the front and the rear suspension of these European cars, and the bushings end up going bad on these cars and it causes some misalignment issues, weird tire wear, and sometimes noises in the front end of the car. So replacing the whole control arm is usually the way to go rather than replacing just the bushing, because by the time you're spending the money and time on a bushing, you could have easily bought and replaced a whole control arm. It's definitely the more efficient way of of going about it.
If you have a vehicle with front shocks instead of struts, a shock is usually pretty easy to remove. Usually there's one bolt on the top and then two bolts on the bottom. You shouldn't be able to pull the shock out and it won't really affect the the structure of the vehicle, as opposed to a McPherson strut where you'd pull up the strut and the whole vehicle kind of like falls apart in the front end. The a shock is is an individual unit, it can be removed from the car and the car will still, you know, stay together. The wheel still stays straight, so you can pull the shock right out on the bottom of the control arm or wherever it happens to mount. It's usually attached to the bottom control arm and then somewhere on the frame. Shocks are generally really easy to install, so it's totally a do-it-yourself driveway repair.
This is pretty typical on a front-wheel drive car or more newer unibody trucks, and it's called a McPherson strut style setup because it has a McPherson strut in it. A McPherson strut has a coil on the top and the strut, is or the shock, is built into it, and it also connects to the steering knuckle, so the whole strut turns with the steering. And when these things wear out, they tend to make noise and they tend to sag, and you'll end up with a bouncy ride. But to replace these you need to remove a whole bunch of other parts, so I'll show you kind of what's involved in replacing one of these.
Up at the top there's usually three or four bolts that hold the top of the strut to the car. At the bottom there's two large bolts that hold the strut to the knuckle, and then there's going to be a couple of brackets in between. So right here we have an ABS bracket and a brake line bracket. You'll want to remove both of those to remove the strut. And then back here you have a sway bar link, which is almost always attached to the strut from the sway bar.
So once the two bolts are removed from the strut, and the sway bar link is removed, in the and the brake brackets are removed, you can basically fold this whole knuckle down and you can pull the strut right out of the car. When you put it back in, you basically install it the same way you took it out, and when you're done you want to get an alignment because there's usually some adjustability in this region right here where you can tip the camber of the wheel in or out and adjust adjust your camber. So you always want to make sure you're getting alignment when you're done doing struts.
Over here you have your tie rod end, and this is technically an outer tie rod end because it's on the outer side of your steering rack, and when these things wear out, you'll notice some play in your steering wheel. To replace this you would want to loosen this nut right here, and that frees it from the steering rack rod. And then down underneath it you'll find a castle nut most of the time, and the castle nut is held in with a cotter pin. So to remove the tie rod end, you remove the cotter pin, you twist off the castle nut, and then you can use a press or a hammer or a pickle fork to remove the tie rod end from the knuckle.
With it removed from the knuckle, then you want to count how many turns this is because this is threaded onto the rod, so you want to count how many turns it takes to spin it off of this rod, and then you want to put the new one on the same amount of turns, and that way your alignment will be pretty close to where you need to be.
Once you've replaced it, you want to get an alignment on your vehicle because this right here has adjustability in it, and if you don't get it quite right, the toe of your wheels is going to be wrong. So the front of your wheels are going to be tipped in or tipped out, and your steering wheel might not be straight. So you always want to make sure you get an alignment after you do tie rod ends.
The sway bar link just has two ends on it with with nuts, and there's one at the bottom where the sway bar connects and one usually on the strut. So right here you can see that there's a nut, but inside is where you put an Allen head tool, and that allows you to hold the center steady while you turn the nut with a wrench. The other thing you can do is if you're removing the old sway bar, you can actually put a pair of locking pliers on the back side, and then you don't have to use the center one, you can just basically remove this with a socket. But you don't want to do that on a new one because you'll damage the boot when you put pliers on it, so when you're installing the new one, you always want to use this center Allen screw to tighten this up properly.
With the control arm, there's usually three or four bolts that hold it in place. In this case there's one up here that towards the front, and it connects into the subframe. There's usually some pretty large bolts in here that are very tight, so sometimes it can be kind of a wrestling match to get them out. Usually using rust penetrant will kind of save you some headache, and air tools obviously help us well if you have them. So in this case you'd remove this front bolt here, and then there's one in the back that's even bigger, and once you remove those you can come up.
Here to the ball joint and disconnect the ball joint bolt. In this case there's a bolt that holds the ball joint in, but in a lot of cases there's a castle nut with a cotter pin, and in that case you'd pull the cotter pin out and then you'd remove the castle nut, and then you use a ball joint press or sometimes a hammer to remove the ball joint from the knuckle. And at that point you should be able to remove the control arm from the vehicle and do any work needed, by like replacing the control arm or working on the ball joint.
Right here we have sway bar bushings, and when these things wear out, they, the rubber will actually like fall out of the inside and you'll end up with a sway bar that hits the bracket, and it makes a ton of noise when you're going over bumps or going around corners. Generally it's just one bolt holding each bushing in place. In this case looks like we have one bolt here, and you remove this bolt and then it usually pivots on the other side, so you lift up the bracket and then you can pull the bushing out. The bushing is like a c-shape, so it wraps around the sway bar, and then you can put the bracket back down and you can tighten up the bolt. So that's what, that's one of the things that is a drastic improvement when you have a bad one versus a new one, it's it makes it feel like a new car again.
In the rear of a car there's a bunch of different styles of suspension you can have. This one has independent rear suspension, and it's an all-wheel drive vehicle, so you can see we have an axle here, and then we have an, for a control arm, a lower control arm, shock, and I guess I'd call this the trailing arm. You can remove this shock and the car will still sit here, it just becomes very bouncy. To remove it up here, you have usually one nut on the top, and it's usually on the interior of the car, so to get to that it's usually hidden behind some interior plastics, so you'll have to remove some interior trim to get to this nut. Sometimes they make it nice and easy and they'll have a little access point that you can just pop open, but other times you have to remove an entire interior interior panel too to get to that. Down on the lower side there's usually just one bolt or one nut that you can remove, and then you can pop the shock right off.
Up here we have an upper control arm. In this case there's a ball joint on this end, and then there's a rubber bushing on the inside end. Where the rubber bushing side is, there's usually a pretty big bolt in there that's quite tight, so you'll need like a breaker bar or an impact gun to remove that. Spring some rust penetrant on it is usually pretty helpful. On this end where the ball joint is, sometimes there's a castle nut with a cotter pin, and sometimes it's just a bolt that's threaded on and tighten to a certain torque. To remove these you can use a pickle fork, which just goes in between here and you hit it with a hammer and it pops right out, or you can use some ball joint separators or other tools like that. Sometimes a hammer works just fine as well.
The lower control arm, you can see, is held in with a ball joint on the outer end, and again sometimes it's held in with a cotter pin and a castle nut, sometimes it's just tightened to a certain torque spec with a nut, and again you can use a pickle fork or a ball joint separator to remove it. Up here on this end is the rubber bushing that holds it to the subframe, and again those are usually held in by some larger bolts that are torqued to like over 100 foot-pounds most of the time, so they're pretty tight.
Right here we have a trailing arm. Some vehicles have a control arm right here, and some others have just a solid axle, which is completely different than this. In this case you just have a bolt up front that holds it to the chassis, and and over here it actually holds all of the wheel brakes and everything, the hub to the vehicle. On the inside of this trailing arm is the sway bar link, and in this case it's a pretty small one, and it looks like it's pretty easy to remove because they actually give you a hex bolt on the inside that you can put a wrench on. On the other side you have a nut that you can put a socket on, so you would just put a wrench on this side and a socket on the other, and you can just zip the nut off and replace it pretty easily.
So whenever you're replacing suspension components, it's always good to have an alignment afterwards. In this case none of these parts are adjustable, so in alignment is probably not going to change anything, but on many cars there are adjustments in the back that you can actually adjust to control the alignment of the rear wheel. So whenever you're doing control arms on the front or the rear of a car, or struts, it's always good to have an alignment afterwards, that way you know your wheel is straight after the word job is done.
The last thing I want to say is torque specs are important. A lot of these control arms have specific torque specs, and if you don't tighten them the right way it's possible the nut can come loose and leave you stranded somewhere. So always follow this the torque specs and get the job done right.
Fast Turn Signal Learn How to Fix Hyper Blinkers on Your Car or Truck
Watch this video to find out what fast flashing turn signals mean, and what you can do to fix them!
