
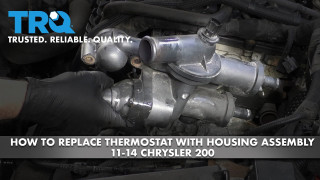
How to Replace Thermostat with Housing Assembly 2011-13 Chrysler 200
Created on: 2019-11-22
The thermostat controls the flow of coolant in your vehicle’s engine. When a thermostat fails, it can lead to overheating, which will damage the engine. One sign of a faulty thermostat is a cool upper radiator hose when the engine is at full operating temperature. It’s important to replace the thermostat immediately if you suspect it is failing. How to install a new TRQ thermostat with housing in your 2011-14 Chrysler 200.
Tools needed
-
Razor Blade / Gasket Scraper
Torque Wrench
Socket Extensions
Trim Tool Set
Brake Parts Cleaner
Coolant Funnel Set
Pick
Soapy Water
Flat Blade Screwdriver
8mm Socket
7mm Socket
Drill
Hose Clamp Pliers
10mm Socket
Drain Pan
Ratchet
Cloth Rags
Needle nose pliers
Now you can pull the wheel off or you can just turn the wheel to get it out of your way. I'm just going to use a seven millimeter socket, take this bolt out here. There may be one right there, and take that one out as well.
And then take a trim tool, and there's pushpins, there's one right here, there should be two right there, take those out, and there should be one right here as well. You can take that one out, move this panel back, just grab the bumper, slide it over here, pull this piece of the bumper out.
You can access the negative battery terminal right here. I get ten millimeter socket with an extension and just connect the negative side. You don't want to disconnect the positive side, it's always better to disconnect the negative side so you don't arc anything out.
Listen, this up a couple turns, should be able to grab the terminal and just wiggle it up and out of the way.
I want to take this panel down. If you have this vehicle, you might have a panel that goes right here with other fasteners, this vehicle doesn't have it, but take that one down first.
And I'm gonna use a seven millimeter socket, take all these screws out, and there's a pushpin on both sides on the ends. Just take a straight blade screwdriver or a trim tool, try to pry it out. If the pushpin's not in too bad of shape, you can use a Phillips head screwdriver and loosen it up that way.
Slide the center out, slide the other piece out. There's a couple pushpins right here, take those out on both sides, just use a trim tool, slide the center part out, down out underneath here.
Take these three ten millimeter bolts out, just use a ten millimeter socket. Now I can grab this panel and just slide it out.
Now on the passenger side of the radiator at the base, there is a drain, it's a pep. What I can use is some pliers or some needle nose, just to try to loosen this up a little bit. Just be careful, and you want to make sure you do this when the engine is not hot. You don't want to do it when it's hot because it'll spray out. Just put a drain bucket underneath here. There we go.
The drain, I'll let that drain from up top to make the coolant come out a little quicker. I'm gonna take this coolant cap off, just slide that off. Disconnect this connector right here, just push it down on the tab, slide it up. Loosen up this worm clamp to get a straight blade screwdriver or an eight millimeter socket. Slide this snorkel off just like that, set it out of the way. Then we'll take this hose, this air two breather, slide that off.
Now I'm gonna remove this bolt right here, it's a ten millimeter socket. Take this pushpin off right here, just use a trim tool underneath here, slide that out. We can grab the whole airbox, you should be able to slide it straight up, pull it up.
I'm gonna remove this snorkel, basically just for the video so that you can see what's going on a little better. Just use a hose clamp pliers here, slide this off just like that. I'm gonna loosen up this worm clamp right here, I'm using eight millimeter socket, loosen up that much and I should be able to grab this intake tube or snorkel, slide it off. There is a wire that connects right here, so just pop that wire off.
Ll so I'll pull this cover off just so we can see more. Disconnect this connector right here, just push down on the tab and slide the connector up.
Take some hose clamp pliers, remove this upper radiator hose, and you can just slide the clamp past, twist the hose a little bit and slide it off. Might lose a little bit of coolant taking that off. It'll take the lower hose off as well. I'm just gonna use a different type of hose clamp pliers, and then I'm just gonna use the pic, just go right around here, oops, and just loosen the seal up like that. Should be able to twist the hose, slide it off, that hose off.
I'm gonna use the hose clamp pliers on these back hoses, you could take these off after if you struggle trying to get them off. Now, while this stall connected, just knees up, and same with this one down here, it's kind of hard to get to that one. Those are both slid down, just take my pick, should get the hose off. you go, this one's loose. Keep in mind which one goes on the top, which one goes on the bottom, and you might lose a little coolant. This one's okay, yeah. I'll do the same for the bottom one and slide it off.
All right, there's three bolts to right here, and one on the other side of there. Use a ten millimeter socket, take those bolts out.
Then we'll grab this housing and just try to rock it back and forth a little bit and just pry it out. There is a thermostat right here, you just want to pull this out this way. Some coolant will be in there. So there's one thermostat right here and there's another thermostat that's in there.
All right, I'm just gonna pull this thermostat off. If you need to get a pic behind it, just try not to scratch the head of the vehicle, head of the engine, and slide that off. Keep in mind the orientation of the way that came off.
Just take a razor blade and just clean up some of the corrosion around here. You can use a scraper, just be careful not to grap gouge the cylinder head, and then just clean this area up as well. Use a little brake parts cleaner and a rag, just wipe up these areas.
All right, I'm gonna replace this o-ring. I'll just take a pic, just get underneath the o-ring. Once you get underneath it, you should be able to pull it out just like that and slide it off. Just make sure that surface is pretty clean, looks pretty good. Take the new o-ring and just slide it on, that's good.
You need to remove this old temp sensor, I'm gonna transfer it over to the new one. I'm just gonna take a pic, go right underneath here and loosen it up to the left, and just grab it and wiggle it out. I might have to use the pic to try to pry it out a little bit, just be careful. Just take a little screwdriver, get in there, we go it back and forth, and slide it up.
I have a new o-ring for this, just take a pic. Just go underneath the o-ring and just slide it off. Just make sure that area looks clean. Take the new o-ring and just slide it right over.
I'm just gonna take a little soapy water, spray it down. We'll just line it up same way the old one came out, just like that, and lock it in place.
So take this thermostat, and there is a key way right here, so this is gonna go into the engine. So take this thermostat, line up the key way and slide that in position right there. Here we go, that's good.
Now we're ready to slide this on. Before I do that, that ol ring in the back, just take a little soapy water, spray it on that o-ring. That I'll just make installing this a little bit easier and safer to not roll the o-ring. And just line this up in position, press it on, that's good.
And install the bolts and start to tighten these bolts up. Try to tighten these bolts evenly, just go back and forth between the bolts. And I'm gonna torque these bolts to 159 inch pounds, make sure you're on.
Inch pounds, not four pounds. We're gonna install the heater hoses on the back. Use the hose clamp tool. Make sure you put them in the same spot that you took them off. On this vehicle, the curvy hose goes on the bottom.
All right, make sure that's good. Looks good, it's out of the way of everything. I'll install the upper hose, that's good. Install the lower hose, lower radiator hose, and it's a good idea to replace these clamps, but if you don't have extra clamps you can probably reuse them. It's a good idea if you're reusing the clamps, try to get the clamp in the same position that it came off, and just like that, just that, that's good and tight.
Take this upper radiator hose, install that, remove the clamp, sure it's tight, it's good. Connect the electrical connector. I'll slide the snorkel back in position, put that wire retainer through the bottom of the snorkel, and just line that up like that. With that in position there, I'll just tighten this one clamp down, and then I'll reposition this hose.
The air box, get this lined up in position, it's two little two little tabs that line up on the bottom, push down on those tabs, line the snorkel back up, push this hose on right here, breather hose, tighten this worm clamp down, plug this connector in, just all the bolt right here, snug it up, and push pin right here. Just put the cover, engine cover, back on.
Now reinstall the lower shield, supply this in position and install the screws, and these up, and install these push pins on the corners, and put the push pins in right here, right here on both sides, lock them down, and then install these three bolts, tighten them down, and then if you have another shield that goes right here, install that.
Now we can reconnect the negative side of the battery, just take the terminal, put it on the battery. Just take a ten millimeter socket and extension, get it on the battery terminal and tighten it up, and just grab the battery cable, make sure it's tight, that's good.
Now be a little bit easier to get this on if you put the inner shield in first, line that up and line the bumper back up. Alright, reinstall this screw and the one down there, tighten it up. All this pushpin right here, right there, if you have one right there, install that, and then these two as well.
Remove the radiator cap if you didn't have it off already. I'm gonna use a funnel, I'm gonna use this adapter first, you don't necessarily have to do this, but it makes it a lot easier. Check your owner's manual so you can add the appropriate coolant. Once the air has burped out, we can do is squeeze some of the pipes, the upper radiator hoses, see if any more air comes out, and at this point we're going to leave the level right there, and we're going to start the vehicle.
I want to turn the heat all the way to full blast, I can have it coming out the vents and turn the blower on medium. And I want to constantly check and make sure I get heat coming out of the vents. I want to monitor the temperature gauge, make sure it doesn't go above into the hot range, so constantly checking on that. Then I'm gonna constantly check the level out here, making sure the level of coolant does not get too low.
So it's been running about 10 minutes, my upper radiator hose is really hot, so that's good, the thermostats have opened. So my temp gauge is right where it's supposed to be, which is good.
So if you didn't have a lot of heat coming out of the vents, but the temperature was still okay, probably still have a little bit of an air pocket. We can do is throttle the accelerator up to about 2,000 rpm, hold it there for a little bit. You want to constantly check the level outside, maybe you can have a friend looking at that while you're doing this. Hold it there for a little bit, and then you should be getting heat again out of the vents.
When that's all set, at this point you can shut the vehicle down and let it cool down. Right at this point, I'm just gonna take the funnel off, there's a little stopper in for that funnel. Take the adapter off, make sure the coolant is up to that level, you can put the cap on.
And then check over on the reservoir, you're gonna want to add coolant to the reservoir. It shows a line where it's hot, and then there's a line where it's cold, adjust accordingly. You should be good to go. You

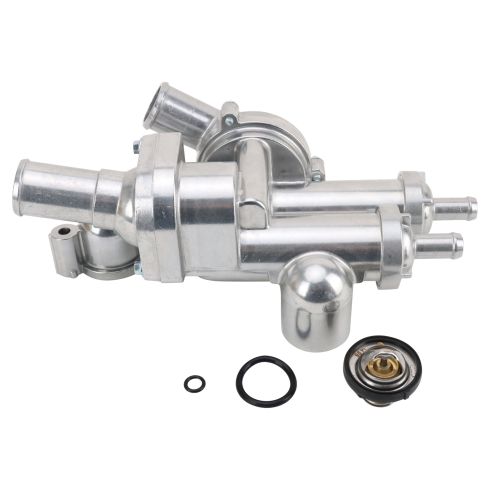
Jeep Dodge Chrysler Thermostat with Housing Assembly TRQ ECA70895
Part Details:
- Yes
- Aluminum
- No
How To Replace Thermostat 1998-2006 Suzuki XL-7 2-7l
Learn how to replace the thermostat in your Suzuki XL-7 with this video from 1A Auto. The expert mechanics will show you the steps to do it yourself.
