How to Replace Tow Mirrors 2010-18 RAM 1500
Created on: 2020-03-26
Watch this video to learn how to install upgrade tow mirrors on your 2010-18 Ram 1500 truck.
Tools needed
-
Socket Extensions
Socket Driver
Phillips Head Screwdriver
10mm Socket
Liquid Thread Locker
Trim Tool Set
Pocket Screwdriver
Okay, friends, let's get started on these mirrors. The first thing we're gonna do is start taking off the door panel. I'm gonna start right up along the top, you can either use your hands, but if you're not strong enough, I would use something plastic and come right in between here and pop this off. Now, you can see the mounting bolts for the mirror. There's one here, here and here, but we're not gonna touch those yet because there's still some wiring we need to get to. Right behind this handle there's a little secret door, we're gonna get to that with a small pocket screwdriver. Behind that, you're gonna see that there's a Phillips head screw. There it is. Next thing I'm gonna do is I'm gonna come right along here and just try to pull this up. I'm gonna use my pocket screwdriver, but you could also use something plastic if you're super worried about it. I just want something thin. I'm gonna lift right up and disconnect this. There's a little squeeze tab, pull it off, check your connection.
The next thing I'm gonna do is I'm gonna move along to here. You can see that there's little mounting screws, but they're not actually screws. What they are is they have little Torx heads, but they're kind of like pushpins. So, what I like to do is take this small pocket screwdriver, and I just try to grab the edge of it. There's two parts to this and I'll show you. The center part, and then you have the outer part. There it is. Okay? So, when it was together, it looked like that. I separated the two by grabbing with a pocket screwdriver, pulled out the center and then the outer portion comes out as well. I'm gonna do the same to all of them. The next thing I'm gonna do is lift up on the door panel, should wanna come right up. And then carefully pull this out, just like that. Lift up right up along here, that off of there, and remove the door panel.
Now that we have a clear view of everything on the inside, you can follow your wire, it comes right down along here, and it's the black and white. To release those, you just grabbed this little piton, and you draw it out. Do the same thing here. Now they're held in by push clips here, you got little squeezy tabs there, we're gonna pull it out of there, and there's another clip there. You can use a fork tool, pull that right out. You wanna carefully pull this out of that and then this one. Awesome. At this point, all we have left is the three mounting nuts. I'm gonna use the 10-millimeter, I'm gonna loosen the top one. And now I'm just gonna put it back on a few good threads. It's still loose, but it's gonna hold that on. So, now I came around to the outside, I'm just gonna grab this mirror, I'm gonna wiggle it around. There's nothing else holding it so I'll grab that last nut while holding on to the mirror so I can't fall. At this point, what's holding it in is just a little push clip that holds the mirror into the door. Just give it a little tug, and it pops right off. There's the clip. Now I'm gonna draw this out of here, and there we go, friends.
So, I've got my new mirror here. The first thing I'm gonna do is grab my wiring, and I'm going to put it through that hole where the wiring goes. Bring this right up, and I've still got that last nut that I took off the old mirror. I'm gonna line this up with its holes just like so. Should wanna line up with that little push clip too and just press it in. Put that nut on as many good threads as you can so you know what's holding the mirror secure. We've got our wiring, make sure it's not pinched. Gonna grab my little screwdriver, and I'm just gonna try to grab some of this foam here. This is just protective foam. I wanna try to bring it down and make sure that this wire can't get caught on anything, looks like it's about as far as it wants to go. Grab my other two mounting nuts. We know that this clip goes right here. We'll go ahead and do that now. We know we have plenty of slack and there's nothing stuck up inside here. This wiring is definitely out far enough. At this point, I'm gonna snug these up.
It's super important to make sure that these are tight. The last thing you want is your mirror to be wobbling around while you're driving down the road. If you wanted to, you could use a little bit of threadlocker but I would use blue. Just gonna snug it. There it is. Okay, it's bottomed out, teeny bit more. Bottomed out, teeny bit more. Give that mirror a nice wiggle. I see no movement here. All right, so let's move along. We've got our black and our white, the black goes up top and then next the white. Awesome. You don't wanna leave this hanging like this though, okay? I'm just gonna pull this down and put it right through this little thing. If for some reason the wires don't wanna go you could try to flatten them out. If they're bunched up in a circle it's just not gonna fit through there. Then if it still doesn't wanna go through there, what I would do is I would use my pocket screwdriver, put it in, kind of give it like a little leverage and that'll help it go right in. Perfect. Yeah, this looks great. Awesome.
Okay, let's test this. Test this side to side, up and down. That's perfect. Let's get the door panel back on. Okay, so let's get started on installing this door panel. The first thing that I'm gonna do is take out this, it's just a little piece of rubber, I'm gonna set it aside for now. I'll turn this around because I wanna show you something. You can see these hooks, they come all the way around the door panel. Those need to go on these, okay? They're all over the place on the inside here. Another thing that we wanna pay attention to do is you have your door handle here, that's gonna have to go through this hole. And then you also have your wiring, that's gonna come through this hole right here. Here we go. Let's start right there. Gonna grab that handle, I'm gonna grab the wire. Okay, I've got everything that I need here. Now I'm just gonna press in on the door panel, press it towards the rest of the door. And then here's the hard part, just lining all those little hooks up.
Once you think you have the door panel completely on all the hooks, just feel around the whole sides. As you do that, pay attention to the holes, make sure the door panel's completely up against the door and all those holes are lined up. This one looks great. Let's grab some of those push tabs that go around the outer portion of this door panel. The first thing that I wanna do is grab all the outer portions. That's the part that presses in through the door panel and into the actual door itself. You go just like that, grab that inner portion looks kind of like a screw. You don't have to worry about screwing it in though, you just press it. We're going to do the same all the way around the door panel. The next thing I'm gonna do is grab my anchor screw. This is the main anchor screw for the whole door panel so you can't forget it. Comes right behind here, just start that right in, snug it up. Once it's bottomed out, just give it a teeny bit more but you don't need to go too much further than that. I'm gonna grab this little panel here. Just make sure it's completely pressed in, and that feels great. Let's move along to this switch. Just gonna line it up. Press this in, listen for the click, give it a tug. Turn it so it makes the most sense, there we are. Perfect. We'll grab the cover for this. Basically you start with the bottom, it's got little flippy-do that comes out and down and then you press it along the top. That's great. Go ahead and put that right on there. Awesome. I'm gonna check the lock real quick. Perfect. Just grab this last piece of panel here, just presses right on. Give it a couple of loving bonks, that looks great. Before I let you go, don't forget these mirrors do this. Not bad.
Shop Products


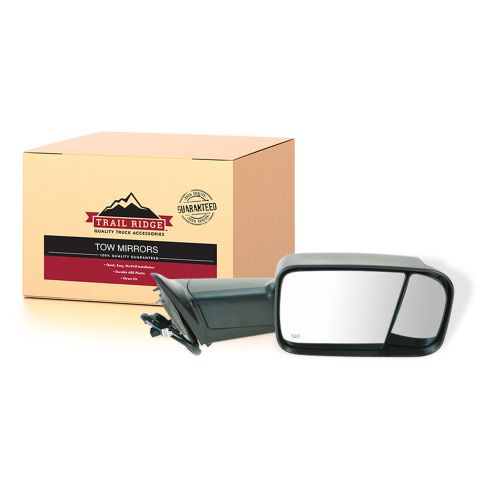
Ram 1500 2500 3500 Passenger Side Mirror Trail Ridge TR00084
Part Details:
- Flip-Up
- Towing
- Features and Benefits
- Yes
- Black
- Powered
- Yes
- Yes
- Electric
- 7 in
- 11 in
- No
- Black
- No
- No
- Textured
- Textured
- No
- Plastic
- 13
- No
- No
- No
- No
- No
- Manual
- Clear
- No
- 3
- No
- Yes
- No
- 74.8 in
- Flat
- No

How to Replace Side Mirrors 2002-07 Subaru Impreza WRX
How to repair, install, fix, change or replace a broken, smashed, cracked, or shattered side view mirror on 02, 03, 04, 05, 06, 07 Subaru Impreza WRX
