How To Replace Trailer Wheel Hub Bearings
Created on: 2012-08-18
Need to replace a wheel hub bearing on your trailer? This 1A video will show you how!
-
step 1 :Tightening the Bearings
- Raise the vehicle with a floor jack
- Secure the vehicle on jack stands
- Pry off the center cap with a flat blade screwdriver and hammer
- Pry out the metal tab and push it down flat against the spindle with a flat blade screwdriver
- Turn the nut a little bit clockwise with pliers
- If removing the hub, continue the steps
-
step 2 :Removing the Wheel
- Remove the nut with pliers
- Remove the washer
- Pull out the wheel
- Remove the second washer
- Pull out the wheel
- Remove the outer bearing
- Remove the wheel
-
step 3 :Removing the Bearing and Axle Seal
- Place as towel and seal extractor into the seal and pull out to remove it
- Remove the inner bearing
- Check the bearing for uneven marks
-
step 4 :Removing the Bearing Race
- Place a drive down on the flat side of the bearing race
- Hammer the drive with a ball peen hammer while alternating sides
- Remove the race
- Flip the tire and repeat the process
-
step 5 :Installing the Bearing Race
- Clean the inside of the hub from dirt
- Insert the outer bearing race in the hub
- Drive the race in with a hammer and metal tool and drive
- Flip the tire and repeat the process
-
step 6 :Installing the Bearing and Axle Seal
- Place a light coat of bearing grease inside the hub
- Place grease in the crevices and rollers on the new bearing
- Place the bearing in the hub and spin it to get the rollers moving
- Place grease in the backside of the bearing
- Place the axle seal on top of the bearing
- Evenly drive the bearing in with a metal tool and ball peen hammer
- Clean off the spindle with a rag
- Place a light coat of grease on the spindle
- Grease the outer bearing with the same process as the inner bearing
-
step 7 :Installing the Wheel
- Lift the tire and place it straight onto the spindle to avoid damaging the seal
- Place the outer bearing into the hub
- Grease the outer bearing again
- Insert the flat washer hub
- Insert the locking washer into the hub
- Preliminarily tighten the lock
- Spin the wheel and tighten the lock with pliers
- Lock the tab with a flat blade screwdriver
- Place the center cap on the wheel
Tools needed
-
Bearing Grease
Hammer
Flat Blade Screwdriver
Channel-Lock Pliers
Jack Stands
Ratchet
Cloth Rags
Floor Jack
Brought to you by 1AAuto.com, your source for quality replacement parts and the best service on the Internet.
Hi, I'm Mike from 1A Auto. I hope this how-to video helps you out, and next time you need parts for your vehicle, think of 1AAuto.com. Thanks.
For this repair, we need jack and jack stands, hammer, screwdriver, pliers or appropriate socket, and ratchet for the hub nut. You'll need a tool to remove and reinstall the bearing races, as well the seals, some rags, and wheel bearing grease.
We've got the wheel lifted up off the ground. The jack's under there, as well the jack stand. There are few things you can do to check your bearings: one is when you have the wheel jacked up underneath and above the tire. You can kind of go back and forth, and you may feel a little bit of play, but it shouldn't be excessive. I hope you hear that but I'm able to actually jiggle it probably too much. The other thing you can do is spin it and try to feel the hub, and if you feel any kind of roughness or anything, that's usually an indicator.
The best way actually is to drive a short ways on the highway, probably five or six miles, and then pull over on a rest stop and, right away, get out of your vehicle and grab the hub right here. Your hub should be warm. You should be able to grab on to it. Feel the warmth, but you should be able to keep your hand on it. You grab on to it, feel the warmth, and then it's hot enough that you have to take your hand off, then your bearings are bad and need to be replaced. That's the best test, really, the best indicator in connection with that.
Occasionally jack up your trailer and feel that there's play. This, what I did do, was test out on the highway. It did feel okay, there is a little bit of play in it so I actually take this one apart and just show you how to tighten up the bearings just a little bit. First thing you want to do is get your center cap off. This has a style that has a rubber plug in it. Underneath this rubber plug is a grease fitting. I'm going to use a hammer and a screwdriver and drive them between the cast iron part of the hub and the cap. Got it in there pretty good, it kind of pops free, and that comes right off. This is not really a good thing, there's a ton of grease in here. That says to me that maybe grease filling is no good and it is allowing to fill into the bearing. I'm going to take this apart and inspect it.
Now you need to figure out what type of lock you have. There's a nut here where all these grease is. Usually, there is a washer in behind or a cotter pin. There's a lock for this nut, it's right here. There's a little metal tab, you can see as I'm prying it out there. You want to pry that out and then push that down flat against the spindle. Now, if all you wanted to do was tighten up the bearings a little bit to take some of the play out. I just take a big pair of pliers or the correct size wrench for this nut and turn this nut a little bit clockwise.
You want to make sure you're not using too much force, two or three foot pounds is okay, pressing in the bearings, that's okay and tightening it up, that takes the play out of the bearings. Again, you don't have to pull it really tight. You just want to use a little bit of force. Like I said, I don't like how there's so much grease around the outside. The grease should be inside. I am actually going to take this apart and inspect them. All I'm going to do is take this nut right off, and I'll fast-forward while I do that.
Now take the nut off and then this washer that has the locking tab on it, comes off, and then I can pop this out and you see that there's another washer here. Pop up some more and outer bearing comes right out. There's quite a bit of grease in there. Now I can just take my tire, lift it up, and pull the whole thing right off. What you want to look for on the spindle, as you can see, this is the most shiny part, that's kind of where the outer bearing rest on it. Make sure there's not too much difference in ... make sure there's not a groove worn there or a groove worn back here. It looks like this is okay, basically looks like this is not the highest quality spindle ever made but it's okay. New set of bearings will fix it up well.
This here is the grease seal. This is a seal extractor, and I'm going to put this towel in there. I was unable to locate these seals, so I need to try and get this out damaging as little as possible. I pull the seal out, just use a little hammer, and kind of flatten that back out. It should be okay. Once that seal is out, and this is the inner bearing assembly, it comes right out. This here is the bearing race, this is the surface that the bearing runs on, and you can see, there are uneven marks on it. If this has marks on it, they should be nice and even and straight.
You could see that probably the rollers have stuck in spots, and they've just made all kinds of uneven marks, so we'll have to drive that race out and put a new one in. We'll do the same for the outside one. Now we want to drive the bearing races out. I'm looking down from the backside in, and what you want is a large treated metal tool or some type of driving tool. This is actually a bearing race install and removal tool.
Right here, it's going to be hard to film one of these. Let's see if I can get it from the other side. Right here is the back side of my race. I'm going to take the tool, put it down in right against the back side. Put that in and use a hammer. Get one side of the race and go to the other side. Go to the bottom or top, and, eventually, it will start moving. I drove it down and out and that old race out. Now, flip the tire over, and go from the top side, and do the same thing for the rear race. Here, we're just going to speed up as I drive that rear race out. There's my other race out.
Now, you can see, we're in the garage, nice and clean. We cleaned out the inside of the hub. Make sure there's no dirt inside there, and we're going to take our new bearing race. This is the outer one, and we're going to put it into place. You'll need some tools, some large metal tools that you can use to put on. I'm going to start hitting it with this that I drive it in nice and straight. Now the race is even with the hub, it needs to go down further. You need this race placing tool, they're really not something everybody has. That outer race is now in, nice and smooth. Let's move this tire over.
Next, you want to do the inner race. Again, make sure everything nice and clean. Let's start it in, and I have here is my old bearing race so I'm going to put it right on top. You need to make sure it goes all the way in there. It's all in now. Now I have to carefully, since I use my old one, put it in very carefully and just pull over See that in there? See that old one? Just put my tool on there enough. Be very careful not to scratch your new race. That's good.
Now we're going to install our inner bearing. Let's take some grease. I'm not going to put a ton, but I'm just going to put some into the hub in a very light coat on that bearing race. Now here's my bearing and I'm going to pack this bearing and take my grease. I'm just put it right into that crevice there, right around, work it in. Then I'm going to put it on the rollers and trying to spin assembly a little bit to get the rollers move around a little bit and also going to take it, and squeeze it right into the crevice in the front. Light coating on the inside, you don't want to -. Put the bearing in. Spin it a little bit, make sure you get rollers to move. Take yourself some more grease, pack it in the back side here. Make sure no dirt or debris gets in there.
Now take your seal your axle seal and just evenly drive that in. You really shouldn't go any further than flush with the wheel here.We're back out here with the trailer and I've got my spindle cleaned off. This spindle is in rough shape, but for the purpose of this video I can't really do much about it. I'm using the trailer this weekend so it should be fine for at least a season, I'll have to address it in off season. Put a little bit of grease on my spindle, my brakes as well. There are some issues: my actuators is actually not even there, so this side of the brakes is not working. Again, I can't fix that today. I don't have the parts, but I will address that later.
Put a little grease on there then take my new outer bearing the smaller one and grease it up just like the other ones. Put that aside with my cap for right now.
Okay and the tire hub assembly up, very light coating of grease in here. Now, I need to lift my tire up and put it straight under the spindle to avoid damaging that seal at all. Keep it ready at least, to make my bearing and again, lift up and push on. Now let's put some grease. Just going to back it right here a little bit. Aflat washer goes on first and my washer with the tabs. We'll just fast-forward here as I'm just kind of putting that on and preliminary tightening it. You basically want to spin the wheel as I'm tightening this up. As it gets tight, pull it tight and pull it back.
Take my locking tab. Make sure they're nice and tight. Take my screwdriver and then we'll lock in the tab right up into place so that can't move, and my dust cover. Pat it in some with pliers here. Next step, before we get it on off the ground, just take a rag and spin in all the grease off. Much ready to go.
We hope this video helps you out. Brought to you by www.1AAuto.com, your source for quality replacement parts and the best service on the Internet. Please feel free to call us toll-free, 888-844-3393. We're the company that's here for you on the Internet and in person.
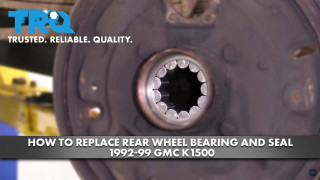
How To Replace Rear Wheel Bearing and Seal 1992-99 GMC K1500
If you hear a grinding or groaning noise while your vehicle is rolling, it might have a worn out wheel bearing. A worn bearing can allow the wheel to wobble, creating a host of other issues. To save yourself from more headaches down the road, replace your bearing right away. For solid rear axles, you'll need to replace the axle seal too. How to install a new TRQ wheel bearing and axle seal on your 1988-2002 GMC K1500.
