Most Common Brake Installation Mistakes
Created on: 2021-05-21
Andy shows you some of the most common mistakes when it comes to brakes
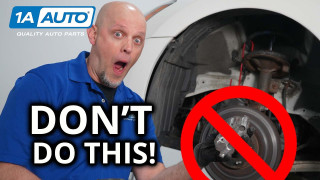
In this video, we're going over some of the common install mistakes when doing your own brakes. So don't do any of these.
We're gonna break this down into four categories. We're gonna start with the brake pads, then the rotors, the caliper, and then the hydraulic system. Overall, brakes are not that complicated, but there's many ways to mess them up. For instance, putting the brake pads on backwards. So we're gonna start the video out by putting them on backwards and showing you what happens.
Let's look at the damage that was done. Obviously, the rotor has grooved because the back of the pads were in there. Now this was extremely hot. It took us a while to let this cool down. There was a lot of metal that was hot to the back to the pad. So if these were brand new and you just did this, you basically ruined everything. You're gonna need new rotors again and you're gonna need new pads. We were only driving around in a parking lot about 25 miles an hour, so just imagine what this would be like if you drove down the road. If your brake pad looks like this then it's on the wrong way. That's how it should look.
When you pull the old brake pads out, check them, compare them with the new brake pads and make sure they look very similar. They don't have to be exact. Some will have this line right here, some may not have the line at all, and some may even have two lines.
Make sure the ends of the pads look the same and that's gonna line up fine, and look to see if there's any dimples on the pads. So this is the outer pad. There's no dimples on it. If you look at... This pad has some dimples on it. So there's a dimple and then there's the squealer. And if we put this pad on the outside it's gonna ride up not necessarily on that dimple but where the squealer is, so that's gonna make the pad not sit flat. So this is an inboard pad.
Since we're talking about squealers, some pads have squealers, and you wanna match those up to where they came off. But when you're in doubt, most of the time the squealers are at the top or where the rotor cuts into the pad. If the pads are on the back then it would be on the bottom and pads are on the front. They're gonna be at the top.
If you're putting grease on the pad, you can put grease on the ends just like that. Some people put grease on the backside to keep it from squealing. Don't put too much grease though. You don't wanna put a lot on, and you definitely don't wanna put grease on the pad material. And if you have greasy hands, don't be wiping down the pads because that's not gonna be good. You're gonna have a problem stopping.
While we're talking about brake pads, let's talk about the brake caliper bracket where the brake pads sit. Now you have these pad slides or anti-rattle clips there to keep the pads in there and keep them from rattling around a lot. If you put these on wrong you could have them rubbing up against the rotor, or sometimes they are side-specific and they will cause other issues. So make sure you put these on right and make sure they're not rubbing on the rotor. Make sure you either reuse these. You wanna clean them up a little bit. Use a wire brush, or get new ones. Sometimes they come with the brake pads. You don't wanna just throw them out. You don't wanna just take the brake pad, slide them on there. They will fit but then they're gonna rattle around while you're going down the road and that's not gonna be good.
The brake caliper bracket itself, if it's rusty, you wanna clean these up. Use a wire brush underneath where those pad slides go or the pads are gonna stick in this bracket. It's gonna cause too much material touching the brake rotor and it's gonna cause your brakes to wear so much faster.
These slide pins sometimes get bound up if any moisture gets in there if it's not sealed properly. So if you don't take these out and clean them and lubricate them, that's gonna happen, and make sure you seal these properly. So make sure those are movable. So that looks good. Now, it's pretty obvious you're not gonna install it that way with the bolt holes on the outside, but you definitely wanna make sure you don't mix them up side to side. Sometimes these are machined differently and you wanna make sure that you got the right side with the right caliper.
Now let's talk about the rotor. When you're taking the rotor off, if you can just grab it and slide it off that's great. If not, you can use a hammer. Just tap on these locations. Just be careful not to hit the studs. Now, normally you don't wanna hit the rotor itself just in case you can't reuse it. If you're having trouble getting this off, you can always spray some rust penetrant in the holes, let it soak a little bit. If you're still having trouble, you can tap the rotor from the backside, but you better make sure you get that rotor off. If you don't, then you're gonna have marks in the rotor and if you had to reuse it it's not gonna be good. We had a lot of trouble getting that rotor off, and one of the reasons why is because this hub surface isn't very clean. So make sure you take a wire brush and just clean up all the rust buildup you can and corrosion. So make sure you don't have any specks of anything. Even something as small as a little piece of sand, if it was on there and you put the rotor on, the rotor is gonna be crooked while it's going down the road and that's gonna cause you pulsation. So make sure that's clean, same on the back of the rotor. If there was any rust debris on there, you gotta take care of that. To prevent some of that rust, use some anti-seize and that'll prevent the rotor from sticking and some corrosion.
When you get a new rotor, a lot of times there's a protective coating, almost like a oily coating. That's to prevent rust. You wanna make sure you take some brake parts cleaner, clean that off. These have a different type of coating that we don't necessarily have to do that, but we don't wanna get grease on them. So if you see that, the fingerprints of grease, clean that up with some brake parts cleaner.
Keep in mind the backing shields. Sometimes these will be bent out or rusted, and when you put the rotor on you're gonna hear that noise going down the road. And once it's all together, it's really not that easy to bend these back. Before you put it together, make sure the shield isn't rubbing on the rotor. That looks good.
Let's move on to the caliper. When you're reinstalling the caliper you need to make sure you compress this piston, and you wanna do that properly. You don't wanna compress it too quickly or you're gonna cause damage in the rest of the hydraulic system. You could take a caliper tool similar to this, put it there. And then it's always good to have an extra brake pad. I'll just use one of the old brake pads and it just makes it a little bit easier. Then just compress it nice and slow.
Another great idea while you're compressing that caliper is to open the bleeder screw. If your bleeder screws don't look too rusty, you crack open the bleeder screw, compress the caliper, then the fluid is gonna come out the bleeder screw hole instead of being pushed back into the master reservoir. As you're compressing it, it's pushing fluid out the bleeder screw, and then you could close the bleeder screw right before you're done compressing it. Just snug it up.
Sometimes you'll notice when you compress that caliper the boot around here, the dust boot, sometimes expands like there's air in it. If you just take a little pick or a small screwdriver, get underneath it. Just make sure you don't stab it. If you stab it, you're gonna have to replace the caliper or get a new boot. If you see fluid in here, most likely the seal inside the caliper needs to be replaced. So in that event, you're gonna need a new caliper.
Now, when you install the caliper, you wanna make sure the hose is straight, it's not twisted. A lot of times people twist the caliper, run it the wrong way on there and the hose is twisted, and it could potentially rub on the wheel and eventually you'll lose braking. On this vehicle it looks pretty obvious that the caliper hose, it has been twisted, but on some vehicles it's not as obvious as this. So keep in mind how that's supposed to go, how it's supposed to look.
Now, this is flipped the opposite way and it's not as obvious that this isn't right. So let's take the caliper, spin it around, and that's the way it should be. Sometimes people forget to put the bolts in or not torque them properly, and then the caliper is just hanging out and moving around like that. As it does that, this caliper is gonna slide out and drag on your wheel. So you'll hear the noise from that. Then you're gonna need a caliper and a new wheel.
When you're replacing brake hoses or brake lines, double check after you're done. Make sure you don't have fluid leaks. Go for a road test, clean it off real good, and just double check.
When you're installing a caliper make sure the bleeder screw is at the top of the caliper. If you put the wrong side on, and if you put the passenger side on the driver's side, the bleeder screw is gonna be on the bottom and then you're not gonna be able to bleed the brakes correctly. So keep that in mind.
When you're bending and making your own brake lines, make sure you put the fitting on. A lot of times you get the tool set up and it's all set and you make your flare and you forgot to put the fitting on. So put that on. Make sure you use the correct fitting tool as well. There's bubble flare and double flare. You never wanna use a single flare on a brake line. When you're making your lines, make sure you don't kink the line while you're bending it. It's easy to do, and if you do it, just cut it out, start fresh, because that part of the line is gonna be compromised. It's gonna be weaker than the rest of it.
When replacing the brake lines, you wanna make sure they're as close as factory as possible. You may not be able to get nice bends like this or get it as close as this, but you don't want those lines dragging down where something can get caught on them and it can rip them down. You don't wanna have them wire-tied up to the exhaust or any moving components.
Let's talk about fluid. The important thing is using the correct brake fluid that's required for your vehicle. Normally it's on the cap, but definitely check the owner's manual. It's important to note it's not a good idea to use a brake fluid bottle that's already been opened. Moisture can get in there and contaminate the fluid. Most vehicles use DOT 3 or DOT 4 brake fluid. It's extremely important not to mix any other type of fluid in with the brake fluid. If you mix oil in it or any other type of lubricants, you're gonna damage the entire system.
Here we have a little experiment. We put some brake fluid here and a capful of oil and we mixed it together. It looks just like regular brake fluid. But when we put one of the O-rings from this caliper in there and let it sit, we're gonna see what happens. If you have contaminated brake fluid like this in your car, you're gonna damage anything that's touching the rubber seals or any rubber components, such as the calipers, the brake hoses, the ABS unit and the master cylinder. We left this over the weekend. Let's take a look at it. Pull it out. You can see right off the bat it's definitely warped, and if you look close at it, it's definitely swollen the rubber. So that's not good. You don't want this to be in your brake system. You don't want any oil in there. You're gonna have to replace your entire brake system if this happens. In the event this happens that you're gonna have all these seals leaking, the caliper is gonna be leaking. If any of that fluid gets on the brake pads or even on the brake shoes, you're gonna have to replace those as well. That was only a capful of oil in this amount of brake fluid. So remember, don't mix oil and brake fluid. Don't mix anything with your brake fluid.
If there's anything I missed, or there's anything you've done that you probably shouldn't have done, leave me a comment below. Overall, Just take your time, do the brake job the right way. If you need to, watch some of our YouTube videos on how to repair these brakes. If you enjoyed this video or it helped you out, make sure you subscribe to our channel, ring the bell, turn on all notifications so you don't miss any of our videos.
Whats the Difference Between Struts and Strut Assemblies Which Should I Buy for My Car or Truck
Len discusses the differences between struts and complete strut assemblies, and how you can save a lot of time and headache with one over the other!
