Hi, I’m Mike from 1A Auto. We’ve been selling auto parts for over 30 years!
In this video we are going to be replacing a rear lower control arm on a 2000 Nissan Pathfinder. If you need this part, or other parts for your vehicle, click the link in the description and head over to 1AAuto.com. We're going to take this wheel off. Before I do that, I'm going to take this cover off. If you had a thin wall socket, you'd be able to take the lug nuts off without doing it, but I don't have thin wall sockets. Just grab the cover and pull it off. You can get your socket on the lug nuts.
We'll use a 21 millimeter socket and a breaker bar. I'm going to loosen them up before we put the vehicle up. In this last one there's a wheel lock, so we'll put the wheel lock on. Get it lined up first and take out socket. Break it free. Now it can go up. Now we're going to take the lug nuts off. They're all off. Take the tire off. We're going to use some rust penetrant on these bolts, nuts and bolts. You want to do this and let them soak for a little while before you try to take them off. Hopefully, they don't break.
I'm going to do all these nuts too because these are going to have to come off. Then over here, this one right here as well. We're going to start by taking these nuts off first before we remove the big ones. Go back and forth a little bit. We're going to hope that the studs don't break. Yeah, of course. That one broke. We may not have not let the penetrating oil soak in long enough. We'll try the other ones. Hopefully, the other ones don't break. If they do, then we'll figure it out.
Now we're using a 10 millimeter socket and ratchet. That one broke too. I'm going to try and go back and forth a little bit. Hopefully, that helps. Nope. This parking brake cable, bolts broke. We're going to use a punch and a hammer. Pop that out. We'll have to drill those out. This one, this bracket broke too. Before we take the lower bolts out of that control arm, you're going to want to support the rear axle. Bring it up. You can use some floor jacks and some jack stands. Get it up. What you want to do is get the angle of this bar as close to ride height as possible. Then when we go to torque the bolts, it will be in the right spot.
Next we're going to take this nut and bolt out. We're going to use a 17 millimeter wrench on the inside and a 19 millimeter socket and ratchet on the outside. Before I loosen it any more, I'm going to put a little more rust penetrant on it. Now we'll loosen up the bolt and the nut. Pull the nut off. I'm going to take the bolt off that's in here and the nut that's right here. I need to take a 17 millimeter socket and a ratchet. Get that in there.
I'm going to use a 19 millimeter socket and a breaker bar on this nut while I hold the other ratchet and break that free. Once I break the nut free, I can switch to a ratchet on the 19. I'm going to use some more rust penetrant on this bolt before we try to get it out. I'm going to take this bolt out, just use a hammer. Hammer it out. The whole axle is going to move back a little bit. Just be careful. I'm going to use the long punch to get the bolt out. Tapping it with a hammer. That came out. Now it's just a punch, holding this.
There's a lot of tension on this lower control arm. When I'm trying to pull this out, it seems like the axle is trying to twist it back. To relieve some of that tension, I'm going to support the front of this. Let me say that again. To get the rear differential to twist more this way, I'm going to take and support right under the pinion here. Just be careful. Don't support over here. Make sure you're not on where the seal is. That seems to loosen it up, so that I can pull this out. Drop this down.
Our bolt is frozen in the center of this lower control arm. What we're going to need to do is use an air hammer and try to hammer it out a little bit. We keep spraying it with rust penetrant, but it's still stuck in there. We'll try it with an air hammer. Now it moved a little bit. I'm going to spray some more rust penetrant and try to work it back and forth. The ears on this bracket had pretty much bent out a little bit. I was able to get a locking pliers in there. That was helping us be able to push the bolt out. Otherwise, what was happening was the vibrations from the air hammer were getting lost because of the rubber.
When you put the locking pliers in there, it was more solid, and was able to push it out. As you can see, we got it out. The bolt is pretty mangled. Generally, you want to get a new bolt when something like this happens. What was happening was the bolt was seizing up in here, and this was just spinning. Grabbing it with the locking pliers, we were able to push it through.
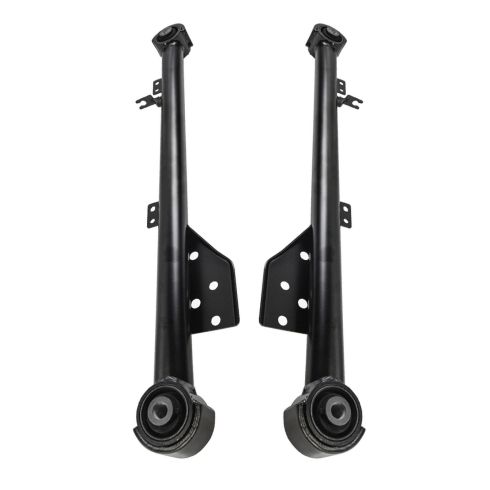
This is our old lower control arm. This is our new lower control arm from 1AAuto.com. As you can see, the mounting holes are in the same locations. The bars are very similar. The mounting brackets, although, are slightly different. There is other applications this lower control arm works for. Get yours at 1AAuto.com. You'll be ready to rock and roll.
First thing we're going to do before we put our lower control arm back, we're going to bend these ears back a little bit. Take some channel locks. Just grab them and bend them back just a little bit. We're going to install our arm at the bottom. You should use new hardware, if you can. If it's not available, we're going to use the old hardware. Slide this up. Just going to put the nut on here first. It's going to be hard to line the hole up with the bolt.
I'm going to use a punch on the outside and pull the arm forward. Try to get the bolt to line up. We can reuse the wrench and start tightening it down. That will suck the bolt in. If you had a ratchet wrench, that might be a little bit easier in this location. Pretty close. You can hammer it with a punch. Install a nut. At this point, we can lower this. I'll take my 17 millimeter wrench. Put that on the inside here. Take a 19 millimeter socket and ratchet on the outside. I'll start tightening it. I don't want to tighten it too much because we're going to have to raise the rear suspension before we torque it.
I'm going to use the breaker bar and the 17 millimeter socket on the inside and the ratchet on the outside with a 19 millimeter socket. We're going to raise the rear suspension before we torque this arm. What we want to do is have this suspension about where it would be when it's sitting on the ground. It will be easier to torque it while it's up in the air. We'll raise this up. With our suspension up in the back, we're going to take a 17 millimeter wrench on the back side of this bolt. We're going to use our torque wrench with a 19 millimeter socket. You can get these torque wrenches at 1AAuto.com.
We're going to torque this bolt to 95 foot-pounds. With our suspension up in the back, we're going to take a 17 millimeter wrench on the back side of this bolt. We're going to use our torque wrench with a 19 millimeter socket. You can get these torque wrenches at 1AAuto.com. We're going to torque this bolt to 95 foot-pounds. Then on the back one, on the rear axle, we're going to put our 17 millimeter socket and a breaker bar in here, and hold the bolt. Then we're going to torque the nut with a 19 millimeter socket to 103 foot-pounds. Now that those are torqued, we can lower the rear axle. We've tried to get these studs out a couple different ways. Tried hitting it with a hammer. Tried hitting it with the air hammer. We've tried using pliers, and sticking a socket on the other end, and try pushing it through, but they're too rusted in there. At this point, we're going to grind down the tips. Then we'll drill new holes.
I'm going to hold this bracket with some locking pliers. You don't want to hold it by hand because if the drill bit grabs, it might hurt your hand while you're doing it. Use the pliers. I'm going to start with a smaller bit, and then work up from there. I'm going to keep adding some lubricant while I'm doing this. I don't want to heat up the drill bit too much. Stop every couple seconds and add some of the lubricant. We made it through with that one. I'll step up to the next size. We've got the right size.
Now we're going to drill out the other three just like that one. We drilled these holes out, so these are all set. Mount this. We're going to use new bolts and new nuts. Stick those through like this and like this. We're going to install this bracket with the nuts like that, just like that. We'll tighten those down in a minute. For this new lower control arm, it doesn't use this same screw hold for the bracket. We're going to take this bracket off. We're going to use the screwdriver and pry up under here, so that we can pull out. This is one of the wheel speed sensor wires. Pull that out here. Then over here, do the same. Pry this up. Get it underneath. Pry it up with your straight screwdriver. Now this is going to move a little bit. We're going to move it down to here.
It's going to lock into there, and that's where it's going to sit. Put this along through there too. Stick this nut here. I got 10 millimeter bolts for this, so I'm going to use a 10 millimeter wrench on the inside and a 10 millimeter socket and ratchet to tighten these down. Tighten that snug, and I'll do the same for the other two. I'll put the tire back on.
Start the lug nuts. I'll lower it down. I'm going to torque these wheels to 105 foot pounds with a 21 millimeter socket and a torque wrench. I'm going to torque then in a star pattern, so that the wheel sits flush up against the hub correctly. Now I can take and install the center cap. Line it up, tap it on.
Thanks for watching. Visit us at 1AAuto.com for quality auto parts, fast and free shipping, and the best customer service in the industry.