
Ticking Clicking Noise Coming From Your Engine Diagnosing Collapsed Lifters
Created on: 2021-11-20
Andy diagnoses a top end clicking ticking noise in our Chevy Avalanche! Andy locates the clicking noise to the top driver side of the 5.3L V8 engine, and discovers an intermittent misfire in cylinder 1. After removing the valve cover, he finds a very loose rocker, the source of our noise. He determines the rocker is loose because its lifter has collapsed, meaning it's not pushing up on the rocker when activated by the camshaft. The fault is in the AFM (active fuel management) lifter.
What's up guys, here we have this Chevy Avalanche with an engine noise. We're gonna try to figure out what's going on with it, so right off the bat let's start it up, see what we got. Sounds pretty bad. I personally feel like it's coming from this side, but let's see. I'll shut it off now, I don't want to run it for too long because what if there's no oil in it and it's just not getting to the lifters or the top of the engine. In my opinion it sounds like it's coming from the top of the engine, it doesn't sound like low end, but we'll check that out.
So let's grab a rag, make sure there's oil in it. Oh, the dipstick is broken, so it's going to need a dipstick too, sometimes that happens. The oil looks disgusting, I can get that back in. Well it looks like there's plenty of oil, it's just not good looking oil. It's about a half a quart over full and the oil really doesn't look good.
Now before we start it again, just look at the oil pressure gauge when you turn the key on, just to make sure it doesn't go above 40 or anything. With the keynote running, did move up a little bit, that might be normal, not that worried about that. Let's start it up. Yeah, looks like we have oil pressure. As far as we know we have oil pressure getting to the top of the engine, just doesn't sound like it.
I'm going to plug the scan tool in, don't worry about that. And if I rev it, yep, it goes up with the engine, it's not sounding good. Let's see if we can narrow this down. So this is a automatic HVAC, so go to automatic, right? So we at least have a code, fault code. It does feel like there's a misfire, I just gotta late wait for the scan tool to scan everything. Almost there, 96, all right.
Oh, there's a code in the transfer case, also read fault codes, evap, that's not related to the engine noise, so that's no good. It's not good for us.
Let's see if we can view misfire data. Oh, gonna head back, back, data stream, let's see if there's misfire. Misfire data current cylinder, let's try this, this fire current cylinders, I don't know if this is going to work yet. Oh, and then you can check history too. Let's check current, first one through four, yeah, no misfires.
Let's see if I rev it up a little. Oh, cylinder one, so that's a good sign, so we got a starting spot. So even though at idle, you just let it idle down, it's not coming up with a misfire once it clears out. Yep, see, but the second I accelerate.
Rev the engine a little bit, around 2000 rpm, then we get a misfire on cylinder one. So something's going on with cylinder one, so let's back out of here. We can shut off the car.
Cylinder 1 is located right here at the front of the engine on the driver's side, and that's where I thought the noise was coming from. If you don't have a scan tool, it's ideal to use a scan tool to at least get some of that information, but what you could do is take a stethoscope, and we'll try that out. We're going to put this right here, start the engine up, see if it sounds real close to that area. You can definitely hear it right there.
I'll see if I can hook this stuff, this... whoa, I think I just broke the mic. Let's see if I can hook the stethoscope up to the mic. It definitely sounds like, definitely sounds like, you can hear it right there, pretty loud.
Now you could always check down below, see if you're hearing it from down below, but I'm pretty confident that it's coming from up high. Now we've narrowed it down, we know it's cylinder one is what's most likely making the noise. We could do a cylinder compression test or a cylinder leak down test and confirm that.
But this valve cover comes off extremely easy. If you had a different engine, this happens to be a 5.3, if you had the 6.0 it's going to be the same configuration. It's not that difficult to pull the valve cover off, but if you had a different style engine where it wasn't as easy to pull stuff off to look, then you might want to do the compression test or cylinder leak down test.
So at this point, let's just take this cover off, slide that out of the way. There's really not much in the way of the valve cover, just disconnect this, it's the main connector, and we can take these, take that off there. A little bit of rodent damage in here, some kind of nut there.
All right, let's get a 10 mil, and I can also see the valve cover is leaking, you can see oil dripping. So either way, we're going to need a valve cover or valve cover gasket. Take those studs out, just move this aside for now, just like that.
Take an eight millimeter socket, just make sure there's nothing that's gonna fall in there when we take the valve cover off. I should probably vacuum that up. Pull the PCV tube out and slide it out.
All right, oh look at that, it's not supposed to be that loose.
That looks like we're gonna have a collapsed lifter there. So it's just one side, and it looks like that's the intake side. So we've got an intake lifter that's collapsed, because this would be the exhaust lifter, because you can see where the exhaust is. So that's pretty cool, that's kind of what I thought we were gonna see. So this is part of the, I believe it's part of the displacement on demand lifters, so there's cylinder one and also cylinder seven, and those are tight. This is how they should all look, they all look good. See how quick and easy that was.
So I wasn't sure if we were going to have a broken valve spring or if it was going to be a lifter issue, but it's pretty cool, just so you can see something cool. We're going to plug this in, you can see how this actually works with the engine running. It's it's okay, it's not going to hurt anything the engine, as long as this doesn't fall in there that should be okay.
So we'll start this up, then you can see how the rockers are going to move and see the valves opening and closing. So it, the rocker, so at the bottom of this there's a push rod here that goes to a lifter that's attached to the cam, and when the cam lobes move it raises up on the push rod and then rocks the rocker, and that pushes down on the valve which opens and closes the valve.
So let's see how it works, and you should be able to see there's a little hole right there, that's where oil should be coming out of. You can see the oil coming out, it's starting to splash all over the place, but yeah, see the lifters open a little bit, I mean the the valve, but not enough. Oh, it's gonna get ya. All right, I'm gonna shut it down.
All right, now that I got oil on the coil packs, let's disconnect that. And I can disconnect the coil packs and just disconnect the plug wires, just get this out of the way because we don't have to run it anymore, now we just gotta fix it.
Let's drain the oil first, we're gonna have to drain it afterwards again, but at least strain what's in there. This oil does not look good, definitely overdue on their oil changes. And we can plug that drain plug back in, either way I'm gonna take this out again because some of the coolant is going to fall into the oil pan, but I'll just snug it up just in case.
Make sure you disconnect the battery. We we don't have a battery in here so we don't have to disconnect it, but we'll take the intake off.
Get some stuff out of the way, so there's no drain plug on the radiator. I'm just going to take this lower radiator hose off. I'll take it off on the water pump side because it's easier to get to. You could pull the inner fender well out if you want, do it that way, but this work this will work. If I can get my clamp on here, this tool works a little better, a little bit easier. There we go, loosen that up, make sure you have a drain bucket underneath and watch your toes, it's gonna make a mess. At least I'm not taking a shower in it like last time.
I take the serpentine belt off, just slide this out of the way and disconnect the alternator. Disconnect the connectors, slide the wires off. And get the wrong size, that works a little better, and just pretty much slide everything out of your way and disconnect that. Actually could probably just disconnect it here instead, because we're going to take this whole assembly and just move it forward.
I know there's a bolt way down here, these bolts right here, so that one I can do by hand, and there's a ground attached to that, so I don't want to forget that. Oh, two grounds, yeah. I don't have much room here. That got heavy, just slide this down out of the way. I'm going to leave all the power steering hooked up, that'll be fine right there, not putting any strain on anything. I could just wire tie this over here if I wanted to.
Now we're going to remove these brackets, take these bolts and screws out. We want to start disconnecting connectors, getting it all cleaned up up top, and take that off. I can move some of these up a little more. Rodent evidence.
And disconnect the fuel injectors. There is some safeties on those, just use a pick, slide those up. You gotta disconnect them all on both sides. Oh, that one's completely missing, and break it, and disconnect the purge valve. You can also disconnect the line going to the gas tank. Actually disconnect the brake booster, it'll be easier to disconnect it here, and that'll come with the intake, and I'll disconnect the fuel line last.
Disconnect all these injectors, it's just a big puzzle, it's easy. Looks like someone's been in this harness before, it's all taped up, kind of funky. And let's connect the map sensor. You can actually just pin that up there to make it easier. I can just wire tie this out of the way.
Don't forget to disconnect the throttle body, slide that out of the way. Now I'm going to take the bolts out, or loosen them up before I take the fuel line off. All right, you need a smaller extension. Should be one more right there. And do the same on the other side.
I'm going to leave the fuel rail attached to the intake, I'm not gonna take it off. It should be one more, I just can't see it. Two more, is there another one right there? All right, that's released. Slide it up a little bit and we can disconnect this fuel line over here.
Before I disconnect the fuel line, I'm just going to bleed off the pressure. Although this has sat overnight so most of the pressure has bled back into the fuel tank, but it's always good to do this. Just be careful, you should probably wear safety glasses. Use a rag, just take a screwdriver, just push it, and there's no pressure in there, so it's a little Schrader valve, just like on your tire valve. So no pressure, we're good. You could always run the vehicle with the relay out just to bleed off the pressure, but I just do it this way.
I'm going to release the line. There is a little safety here, just slide that up and off, and then you need a little tool like this. It slides over the line, and there's different sizes and stuff. So push the line all the way on and push this tool on, and then I just put a rag just in case it splashes, and then slide the, the whole line off. And maybe this is the wrong one, I'm gonna try this one. This one looks a little better. Push that, there we go, it just slides right off. You take the tool off, and if you have a plug that you can plug this up, that would be ideal, or I'm probably gonna just tie, a tie a bag over it so it doesn't leak. I'll just put a rag there for right this second.
Now we can grab the intake. Oops, you gotta lift it kind of high. Oops, I'm leaking a little fuel there. And slide it out, try to tip it more towards the front so it doesn't leak, just to keep the gas from coming out. I'm just gonna put a bag over it and zip tie it or wire tie it, but if I had a plug that would be better.
And then also to prevent the pressure change in the fuel tank, come on over here, because it's probably going to be overnight, I'm just going to loosen up the cap, just leave the cap in there loosely. That way if there is a change in pressure, it doesn't force all the gas out.
And disconnect any other connectors. We're gonna take the plug wires off, if you wanna keep them in order you can. It's always a good idea to put stuff back the way it came out. Got some oil leaking on that one, it's from the valve cover, valve cover gasket.
And those all came out pretty good, so we can reuse those. A lot of times those break off, and when they break off, obviously you gotta replace them.
From underneath the car, I'm gonna use a 15mm socket and just take these nuts off underneath here. It looks like one of them is a bolt. There should be three of them. Should put some penetrant on that one, but I got it out.
I'm going to take all the exhaust manifold bolts out now. You could leave the manifold on and just take the whole manifold and head off, it's just when you go to put it back together, trying to line up the bottom flange of the manifold, it's a little bit tricky. So instead of messing around, I'll just take it off.
Loosen these all up first. Sometimes these break, most of the time they break, especially on the corners. It seems like the manifolds warp and they break the bolts off, the bolt heads off. Sometimes they break flush with the head, and sometimes you get a little bit of area to grab. You can either use some vice grips on them or some twist sockets. I like to use twist sockets on them.
This one seems loose, hopefully it's not broken. I'll switch to some power. That's good, that one came out perfect. Someone's probably done these before, that's probably why they all came out.
Just grab the manifold and slide it up a little bit. Tight between the steering shaft and the head, but it does come out. Take that gasket off.
We're going to take the rockers out, and then the lifter, the push rods out. But a good idea is to take a box, and especially if you were doing both sides, label the front of the box, and then you're going to put the push rods in the box. So drill a bunch of holes in the box and we'll just put the push rods in. That way when you put it back together, it's as close as it was when you took it apart.
On this engine, it's not extremely extremely important to put them in the same spot. They will go in other spots and they will work, but it's always best to just put a more. They came out, loosen all these up.
All right, you can take these out one by one, and it's a good idea to keep these in the same order that they came out as well. Just looking at the one that had damage, looks okay. It'd probably be a good idea to replace this rocker as well.
All right, so keep these all in order, and actually if you're careful you can just pull this plate up now. I'll just stay in order like that and grab the push rods. Take a look at it, this one doesn't look that bad, and put them all in order.
And like I said, this engine, these are all the same, so it's not a big deal. Some engines have the intake and the exhaust are different sizes, so if you put them in the wrong spot, you're going to cause some damage. You're going to either bend the push rod or mess up the valves. I've seen it. There we go, set that aside.
Now I'm going to disconnect the ground strap. A lot of times these fray. This one looks like it's just getting ready to start to fray or need to be replaced. You start turning green like that, it's going to give you some weird electrical problems, because the engine will find a ground somewhere else and just certain things aren't going to work right. You get some weird codes or something. So once you see a ground strap doing this, just replace it.
Yeah, loosen up the, take off the coolant crossover pipe. This hose is in my way. I got it, don't worry Steve, I got it. Scuba Steve. Oh please don't break. What the heck, it's like frozen on there. There you go, just rocking back and forth a little bit. There we go.
We want to replace those seals also. Looks like there's little O-rings on there. They used to be gaskets, but maybe they're just O-rings now.
All right, now I'll loosen up all these bolts. Oops, where's that. One's tight. All right, take all those bolts up, and you got to replace these, you can't reuse them. Same with the large head bolts. So those were the easy ones.
All right, you definitely want to break these free first. You don't want to use an impact when you're taking these out. You can loosen them up first and then use an impact if you want, but just get them loose first. And I'm going to start from the middle and work my way out on these, whether it makes a difference or not, it's probably not a big deal. When loosening, definitely when tightening you want to tighten them the right way.
Oops, you getting this Steve, sir? All right, I kind of want to call you Charlie instead of Steve. I don't know, because Charlie's a little funnier. Charlie, this could be Steve. No, it's just Steve. All right Steve, sounds like a cop named Steve. Jimmy Steve. Yeah, I know, shameless, shameless.
There we go, last one. Oh, starting to leak some coolant right there. I'll let that drain out a little bit, because my drain bucket's right over here, so just let that drain for a little while. That one's already loose. All right, that's all of them.
This oil smells lovely, can you smell it Steve? No, no, that smells burnt. I'll just grab the head and slide it off, there it is, and pull the head gasket off. Can't reuse that, I'll have to clean that. Coolant out of there, it's normal.
And these are what are holding the lifters on, these little guides, so we'll take those up. And there we go, there's the two lifters. You can see the roller, see if the roller's chewed up at all. If the roller is chewed up, it looks like it's pitted and stuff, you're gonna need a cam. This one looks okay, slide that out, and you can see that's what it's supposed to look like. It's collapsed, so these are, the yeah, these are the ones that shut down with the cylinder, the for the displacement on demand. So we're gonna need a new lifter.
Pretty cool, you can look down in there, look down in the bore and take a look at the cam. I'm pretty confident the cam's okay, judging by the look of the roller, it's probably fine. But these are the regular lifters, pull one of those out, come on, there we go, that's the regular lifter. It doesn't have that extra spring on it. That one looks okay too. There is a line down it, that could be concerning, but it's not that bad, I'm sure it's fine.
And when you go to insert these, you can put these in here, slide them back in like that, the guide.
All right, so I'm going to order some parts, so I just want to talk about how the displacement on demand kind of works. So one and seven, so this is cylinder one, cylinder seven is back there, these both have these lifters like this, and also two and four have the lifters like this.
Now what happens, when the vehicle goes into four-cylinder mode, it cuts oil pressure to these lifters, and these lifters will stay closed so that the valves will not open and close, and the piston is just going up and down and it's not doing anything. No fuel is going in there, and it's not letting air in or out, and that is controlled by this. There is solenoids in this body right here, you can see there's a connector right there. That's not the brain of it, but that's where the solenoids are, that's what's activating whether these get pressure to collapse or uncollapse.
Now after they relieve the pressure, or they add the oil back to it, these should go back to normal with the spring like this, but this one is collapsed, so you might even be able to
No, it's collapsed, collapse. There's nothing we can do, either way it's got to be replaced. So that's kind of how that works. So when your vehicle goes into four-cylinder mode, this cylinder is shut down, this one, and then those two also, and it's only running off cylinder two, cylinder three, cylinder five, and cylinder eight. That's how that works.
Here we have the new lifter, there's one of the old ones, that's not the bad one though, there's the bad one. So we'll throw the bad one out, we're only going to replace the one lifter. Normally it would be ideal if you replaced all the AFM lifters, AFM stands for active fuel management.
So what you want to do is take the lifter, take some of the appropriate oil, this happens to be 5w30, and soak it in the oil. That way, if there's any air bubbles in the lifter, some of the air bubbles should escape. It's ideal to let this soak overnight, soak the old lifter too. And also, if you could, if you had enough oil, if you could set the lifter up vertical, that might be a little bit better, but just doing this is fine. You can see some of the air bubbles coming out of there, so we'll just let that soak while we clean up the rest of the head and the engine block.
Now we're going to clean up the head. One of these pins came out in the head, so we want to take that out, just use some needle nose pliers, and we'll put that back in. The engine block, because it's going to hold the head gasket on a little better when we go to install it, so that's no big deal.
Now I need to clean this up. It's not ideal to use a razor blade, if you are very careful you can, you don't want to gouge the head at all. It would be more ideal to use a plastic razor blade, but it takes a lot more effort to do that. So just take your time and just scrape as much gasket material off as you can get.
While you have the head out, you might as well clean where the intake ports go. You can do the same with a little scraper or plastic razor blade, or just be careful with a real razor blade and some brake parts cleaner. And then also where the valve cover is going to go, well, valve valve cover gasket, clean that up. And then the exhaust side of it as well, just clean this up.
If you put the head down, make sure you put it on a piece of cardboard or some something to prevent it from scratching, a blanket or something. Just clean those up. If you have any coolant, you want to use a fluid extractor, suck as much coolant out as possible.
You could also probably use a blow gun, blow some of that out, and then in the spark, I mean, in the holes for the bolts, sometimes some coolant gets down in there or some oil. You want to extract that as well, because otherwise the new bolts are not going to go in so easily. And then again, very carefully, with a razor blade or scraper, scrape as much of the head gasket material off as possible, just like you did on the head itself, without gouging anything. Just be careful, and you don't want any sand going in there either, so try to wipe it off.
Now take the lifters, and you need to put them in this guide. Let's see if I, it goes in like that. You want to make sure you put the right lifter in the right spot, unless you're replacing all of them. In most cases you're going to be replacing all of them, but, and this is where the new one's going. That looks good. And very carefully slide it in position. I'm just going to work it all the way down, put the bolts in, tighten it down.
Now we'll just clean out the cylinders, just make sure there's nothing in there, and it looks pretty good. You can take a blow gun, and all this surfaces look good, this is nice and clean. If you want, just take a little brake parts cleaner and wipe it down one more time.
Now, if any of the dowels came out, you got to put those back in. Get that lined up, just give it a tap. It's looking good, perfect.
And take the head gasket, only goes on one way. You can match it up with the old head gasket just to make sure. So that looks the same, same, yep. So you want to make sure you put it on the right side, the correct side, and says front right there, so that's good.
Now take the head and just get it to line up, get it on the pins. It's good, it's nice and clean, we already cleaned it. So, and put the bolts in, these have thread locker on them already. You always want to use new head bolts. You have to get a socket for those, and we have the little ones up front, up top. All right, that's good. I'll get these all snugged down first before we torque them. I can't reach that one. All right, now tighten up the top ones.
So now we're going to torque these. I'm going to start out at 22 foot-pounds, and there is a sequence, so I just took a picture of it with my phone. You can obviously print it up if that helps. Let's see, hopefully this torque wrench goes down to 22 foot-pounds. 22, there we go. All right, so let's start with number one, which is right here, and number two just below it.
Three, which is over here, pretty much you're going from the inside outwards, from the center outward. Number four is on the other side. Number five is straight up. Number six, number seven. All right, number eight's a little tricky to get to. Let's see if we can. All right, number nine is up here, and 10 back here.
All right, so that's the first pass. The next pass we got to go an additional 90 degrees, so we're going to tighten all these larger bolts first before we even get to the smaller ones. So let's go 90 degrees. So this should do degrees. There's degrees. So you're going to let this calibrate 360 degrees. So now you go around again, the same procedure as torquing them, and if you don't have an angle torque wrench, do the best you can. It's best to use an actual, you can use a, they make a special tool adapter so you can do angles.
Okay, let's see if this works. This way, yep, good. So that's the first one. There we go. Oh, I wasn't going high enough for the other ones. That's all right.
All right, okay, number three, number four. I like this torque wrench, it works good. So that's four, five. We got six. We got seven. It's gonna be a little tricky. Now we're on nine, and then ten. So that's all those, the second pass.
Now we have to do the third pass. So go around again, another 70 degrees. I know it seems like a lot. That's one. This is two. Whoops, I gotta reset it. Two, and doing them in the right order helps you keep track of the ones you've already done and stuff, so you don't want to stop in the middle of torquing these to like go get lunch or something. If you're working in a place, you don't want someone to bother you while you're doing it either, just finish what you're doing.
That's four and five and six, foreign, seven. So eight, not the easiest angle to get. There we go. Oops, oh no, what did I do, hit too many buttons. Get 29. Sometimes you almost feel like you feel the bolt loosen up a little bit, and that's a lot of times that's the bolt stretching, so don't get too nervous, unless the bolt breaks, then get nervous. That's good.
All right, so that's all those. Now we can tighten up these little guys. Now we'll torque these 22 foot-pounds, and 12 would be on this side, 13. 14 is a little trickier, I'm going to use a swivel socket just to make it easier to get in there, and then the last one is 15. There you go, all torqued.
Now we can put these push rods back in their proper locations, and you can't really mess this up. I mean, obviously you can probably mess up anything, but...
They don't really go in wrong, they just go in one way. I mean if you put them in upside down by accident, I think it'll be okay, so oil just gets shot up through there, comes up there, and that's how it goes on the rocker and stuff. But that's okay, try to put them back the way they came out and take the rockers, trying to get these to line up without them falling.
So, so, okay, you can see when you tighten that down that it did put push down on the spring a little bit. See this one's pushing down a little bit more, pushing, pushing down on the valve. So that one really didn't push down on the valve, which is good. Well, it's not bad either way, but you got to keep in mind when we go to torque these that we can we're going to want to spin the motor a little bit, because there is going to be a little tension on these ones that push down on the valves. So to torque them properly, we'll just, we'll just rotate the motor, push down the back.
All right, let's get the torque so you can go around and check the loose ones. So that one's loose, that one's loose, and that one's loose, and those are the only ones that are loose, and torque these to 22 foot-pounds.
What might be a little bit easier to do, which I'm going to do, is just torque them all to 22 foot-pounds, and then I'm going to rotate the engine. They want you to set the timing on the engine to top dead center cylinder number one, and if I had the timing marks accessible, I could do that, but it looks like you might need the timing cover off to do that. It might be, a there's not normally timing marks on the outside anymore, you don't need a timing light anymore, so that's why they don't do that, but there might be timing marks. I'm not worried about that, so anyway, now I'm gonna rotate the engine so that the other ones are loose, so those are the three that were loose, now maybe.
All right, so now I got a socket on here, let's just rotate the engine, go nice and slow, and you can see this one's raising up. That one's loose, that one's loose, that one's still tight, those are still tight. Let's see if I can get some more loose. That one just raised up, loose, loose, loose, all right, and the back one's loose, so this one's the only one that's tight.
Let's tighten all those down, and they're probably going to be the same anyway, it's going to be pretty close either way. All right, so those are all tight, and then this is the last one that wasn't loose when torquing it, so let's see. So that's compressing now, just going nice and slow.
And now that one's loose, so we can torque that one. And there you go, those are all torqued. Now we want to clean up the valve cover. Obviously this one really doesn't look too good.
You can take the bolts out, there is some rubber grommets in there, slide this out. We have new rubber grommets and a new gasket, because I don't really need that yet. You want to take some brake parts cleaner and clean this all up real good, or if you have a parts washer that would be ideal. Just take a rag, clean it all up the best you can. You could probably take a small wire brush if you wanted to, just clean up some of it and get some of this stuff up. You don't have to go nuts, you don't have to make it spotless.
But I gotta take these seals off the bolts. You can just take a pick if you want to, just rip them if you can, or you can take a razor blade as well. These are in very poor condition, so, and we have new ones, just put the new ones on and clean these all up.
Take the new seal and just slide it over the bolt. You could use a little bit of engine oil if you want, and you should be able to pull this through. So that's just like that. Do the same with the other ones, but a little bit of engine oil would make it a little easier.
All right, just look like those are all in perfect, and this is all dry. And just line this all up. If you have any oil in here it's not going to stay in there good, so make sure you get all the oil out.
So, all right, here we go. Take the valve cover and just line it up, get the bolt started, and tighten these down. Oops, put that on backwards, cut that out.
And torque these to 106 inch pounds. You're gonna cut that out. Okay, please cut it out. All right, those are good.
And some of these have gaskets, this one has O-rings, so I'm going to replace these O-rings. Just use a pick, just get underneath here, slide these O-rings out, and just clean it up a bit. You can use a wire brush.
Good then on the engine block, clean that surface right there and right there, or on the head, not the engine block. Come on, Steve. And just put the new O-rings on, line those up, and just snug those down. It's good.
Oh, why did I do that. We go, we don't want that in there. Take the exhaust gasket off, just use a screwdriver. This is the little donut seal.
And slide the new gasket in place. That's good, that should stay right there. And I'll slide the manifold in position. There we go.
Slide the studs into the converter, just let that sit like that, and take the gasket. This part of the gasket goes down. You don't want it like that, it probably doesn't make a difference, but you want it to line up.
Take the bolts. Now it's a good idea to replace these manifold bolts because they break. These have been replaced recently so we're just going to reuse ours, but save yourself a headache, replace the bolts.
Once you get the first one started it's a little bit easier, maybe, maybe not. Yeah, there we go, there we go, my battery's dead, oh no. One more, just enough.
Now we're gonna go back and snug those all down, and you can put the nuts on from underneath and just tighten them down. Hope don't lose your socket. Yeah, that's good. Now my socket's stuck. Pull them under here.
Just change the oil, again not change the oil, but drain the oil, because there should be some coolant in here. It doesn't look too bad, we got most of the coolant out, so that's good.
While that's draining, just take the filter off. We're going to change the filter, you're going to have fresh oil, you want to put a fresh filter on. Let that drain a little.
All right, pull that down. Always check, make sure the seal is still on the oil filter, which it is, it's still on there. You don't want to double gasket it or you're going to have oil everywhere.
I'll just wipe that and just make sure it looks pretty clean. You take some fresh oil and just wipe the seal down. Slide the seal up, slide the seal upside, slide the oil filter up, and once it's snug give it another quarter turn, and that's pretty good, it's nice and tight.
Now we can put the drain plug back in. Make sure you put a new seal on the drain plug and snug it up. It's good.
Before we put the intake on, I just want to put this ground strap back in on the back. This could be a little bit easier to do this now. Actually this goes the other way, so the ratchet wrench, get it nice and snug. All right, that's good.
Now we're going to replace the gaskets on the intake. Just unclip them, just like that. Just wipe this down, might be a little bit of oil in there, and that's okay.
Oops, these are the insulators and just foam. Take those off and slide the new gaskets in place. Okay, that looks good, just slide it in position.
And I did clean the other head as well, I didn't show you guys, but I did clean it, the intake ports. Let's look, looks good. Make sure you didn't pinch any wire. This is going to go this way.
Just trying to make sure everything lines up in the right spot. I can put this on now, put the vacuum booster, make sure that's secure. And before I touch, attach the other hoses, make sure they line up. That looks like the way that's supposed to go, and I'll just finger tighten all the bolts.
All right, so I went around, snugged all those up first, and go around and torque them now. So this is pretty much very similar to torquing the head. You want to go your first pass, three foot-pounds, which I pretty much just did that by snugging them down. And then your second pass, 7.4 foot-pounds, which is not very much at all. And you start in the middle and work your way out. There is a sequence, but again it's pretty much working in the middle. So that's one, and then two's over here, and then working your way outwards.
Now you can hook up the lines, disconnect that, cut that zip tie and the wire, tie off the fuel line. Oops, a little bit of fuel leaking, that's all right. Put that on, make sure you get this safety on, lock that down, it's good. Put this PCV valve back on the hose, and then the EVAP hose right here.
All right, so those are locked where they need to be. I can disconnect these wire ties and get the wires lined up. Bracket goes there, like that. These wires go here. There's a little bracket that goes here. The bolts in, make sure you put the right bolts in the right place, I don't want to mess it up. There's a nut that goes right there, it's good.
And I'll start connecting some of the connectors. You can connect the fuel lines, the fuel injectors over here, and just lock them down. Can't really mess these up, they all go in the right spot. And plug in the throttle body while we're over here, that's good.
And we can do the same on the other side. Connect the injectors. This plug is going to plug into the purge valve right here, and that one's broken but it should be okay, we'll have to fix that down the road. And the coil packs, there we go. I'm pinching anything, so that's good.
Where's that other plug? Here it is. Plug that in, lock it down, and there's a little safety lock on this one. All right, and connect all the wires. It's a good idea to replace the wires when you're doing a job like this, and I already put the spark plugs in because those didn't look too good. That's good.
Connector right here, connect that, coolant temp sensor. Line up the alternator. It's pretty heavy to do it this way, but once you get one bolt it's not that bad. It's good, get the other bolts. So I just got to tip it, now it's lined up.
There's this bolt down here, don't forget about that. We've got those grounds that it went through, gonna put those on and tighten that down. So, and plug these in. There's the other wire for the alternator that's over here, goes over here. And last, night from the tray up, that's gonna go over here. And don't forget the coolant hose. This hose should probably be replaced, it's a little bit swollen. I got stuck. Take this off first. Take this off, get this lined up. There we go, put the serpentine belt on, let's go on, pretty easy. All set, surround all the pulleys, and put the intake on the snorkel. And there's a little hose, just pop that on over there and tighten down the worm clamps.
And put some oil in, and make sure you tighten up the gas cap. This thing's on there pretty good. There we go. Now we're gonna put some coolants in there, find the right adapter and put some bolts in.
Now I'm going to put the battery back in. Obviously you don't have to pull the battery out to do this, but just need to disconnect it. Here we go, make sure that's tight, it's good. And connect the negative, that's nice and tight. And might as well put the engine cover back on. There we go.
All right, let's start it up, see what happens, see if we got any noise. Ready? Here we go. A little bit of noise for a second, but then it went away. Sounds pretty good.
All right, so that's nice to know, we fixed it, we took care of the problem. It was just that lifter that was causing all that noise, in the misfire is gone as well. So this vehicle has been resurrected, we can drive it around, it's going to be good to go.
If you enjoyed this video and it helped you out, make sure you subscribe to our channel, ring the bell, turn on all notifications so you don't miss any of our videos. You
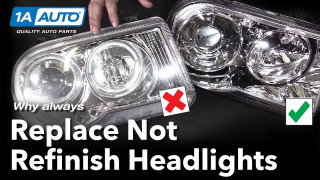
Why you Should Replace Not Restore Headlights
See why replacing your cloudy headlights with new ones is always better than refinishing them Why should you replace your headlights and not clean or refinish them? Three reasons: It's a simple fix, it increases visibility, and it enhances the overall look of your vehicle. Headlights are made from a polycarbonate plastic that can be damaged by UV rays from the sun or suffer pitting caused by road debris light salt and rocks. If you look closely at an old set of headlights, you'll see that the lens is full of micro-cracks. This is called crazing. This crazing, along with pinning, will turn your headlights from crystal clear to hazy yellow and it cuts the output in half, making it very difficult to see at night. It also makes your car look old and dated. With parts from 1AAuto.com and our how-to videos, you can make your vehicle look new and stay safe on the road. To get new headlights for your vehicle, visit 1AAuto.com and visit our YouTube page for do-it-yourself and how-to videos.
