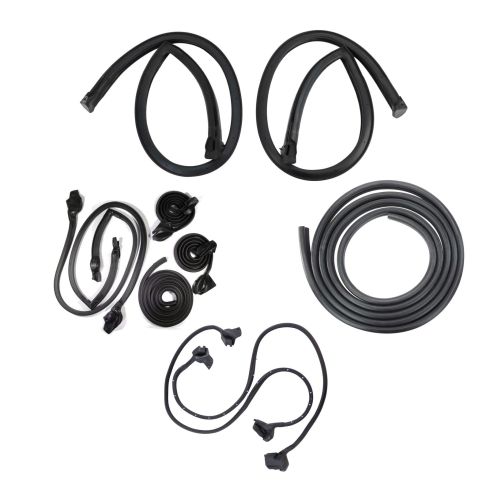
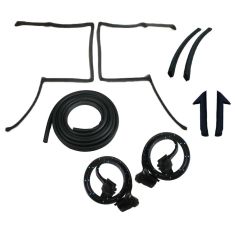
Kit Includes: (1) Trunk Weatherstrip Seal (2) Door Weatherstrip Seals (2) Roofrail Weatherstrip Seals
This GM F-Body Hardtop aftermarket replacement weatherstrip kit includes the following pieces:
Roofrail Seals: Seal the side glass to the body of the vehicle.
Door Seals: Seal the back, bottom, and front of the doors to the body of the vehicle.
Hatch Seal: Seals the rear hatch to the body of the vehicle.
Note: This kit will not fit vehicles with T-tops.
If your weatherstripping is causing leaks allowing damaging rain in, then this weatherstrip kit is for you. Why not replace your old, hardened, rotted seal with this new, ready to install weatherstrip set.
Complete Repair in One Purchase - Stop searching for parts individually and complete your repair with a customized kit or set from DIY Solutions.
High-Quality Parts from Trusted Brands - DIY Solutions' kits and sets are selected from the best automotive brands and include hard-to-find and even obsolete parts you may need for your vehicle.
Guaranteed Fit - DIY Solutions ensures its selected parts are quality-tested to guarantee fit and function.
Item Condition:New
Attention California Customers:
WARNING: This product can expose you to chemicals including Mercaptobenzothiazole, which is known to the State of California to cause cancer, and birth defects or other reproductive harm. For more information, go to www.P65Warnings.ca.gov.
Lifetime Warranty
This item is backed by our limited lifetime warranty. In the event that this item should fail due to manufacturing defects during intended use, we will replace the part free of charge. This warranty covers the cost of the part only.
FREE Shipping is standard on orders shipped to the lower 48 States (Contiguous United States). Standard shipping charges apply to Hawaii and Alaska.
Shipping is not available to a P.O. Box, APO/FPO/DPO addresses, US Territories, or Canada for this item.
Expedited is available on checkout to the United States, excluding Alaska, Hawaii.
Final shipping costs are available at checkout.
How to Replace Door Weatherstrip Seal 1982-92 Chevy Camaro
How to Replace Trunk Weatherstrip Seal w Adhesive 1982-92 Chevy Camaro
Created on:
Tools used
Putty Knife
8mm Wrench
T10 Torx Driver
Flat Blade Screwdriver
T27 Torx Driver
Phillips Head Screwdriver
Heat Gun
8mm Socket
Mineral Spirits
Ratchet
Wire Brush
Cloth Rags
Needle nose pliers
1. Disconnecting the Battery
Disconnect the negative battery cable with an 8mm wrench
2. Removing the Door Panel
Remove the bolts from the door pull
Pull off the door pull
Remove the screws from the door handle bezel
Pull out the window switch
Disconnect the window switch wiring harness
Pull out the door lock switch
Disconnect the door lock wiring harness
Pull off the door handle bezel
Pull out the door handle trim piece
Pry out the door panel with a putty knife
Pull off the door panel
Pull off the door ledge trim piece
For more detailed instructions, please see the 1986 Camaro door panel replacement video
3. Removing the Weather Strip
Remove the four Phillips screws from the top corners of the door
Peel back the weather strip at the top corners of the door
Pull off the weather strip
Pull out the weather strip pins with needle nose pliers
4. Cleaning off the Glue
Heat the glue with a heat gun
Scrape the glue off with a putty knife
Continue heating the glue
Clean the residue with a wire brush
Clean the remaining residue with mineral spirits
Repeat this step for all of the glue spots
Brought to you by 1AAuto.com, your source for quality replacement parts and the best service on the Internet.
In this video, we are going to show you how to remove the door weather strip from the door of this 1986 Camaro IROC-Z. This is the same for any '82 to '92 Camaro IROC-Z and Z28, as well as the Firebird Trans-Am and Formula. The tools you'll need are 8mm wrench or socket and ratchet to disconnect your battery . I will say that now, you do disconnect your battery, just so you don't run down the battery with the interior lights, and also to avoid shock when you are disconnecting the power door locks ., T10 and T27 Torx driver, flat and Phillips screwdrivers, a heat gun, a putty knife, wire brush and mineral spirits or some other type of cleaner to clean off some of the residue of the glue.
We'll start out here in a little bit of fast-forward. You do need to remove your door panel and the upper ledge molding to get to a couple of screws that hold the ends of the weather strip. So I'll show you that. This is in fast motion. If you want to see this in regular speed, just check out our other videos for the Camaro door panel removal, and you can see it there.
There are two Phillips screws to remove so you can pull back the top of the weather strip up here. Then, right into here, you'll see there is a hole in the weather strip. Remove the screw, and you peel that back. I'll pull the screw out here so I don't lose it. Remove the two screws at this end of the weather strip. There's one there and then there is one here. You can see how rough shape the weather strip is in. Once you remove those screws, you'll see the weather strip starts to come off. It is glued there, but the thing is so old, it just came apart. I didn't even force that. Then there is a series of pins. You can probably just pull it right off. We are going to pull these pins out with needle nose pliers. Do the same thing over here. Now take a pair of needle nose pliers and you can see you can just force the pliers right in behind those clips and pry them right out. Just so you can see, a total of about twenty clips come out.
If you're doing this stuff yourself, a great investment, again, is a heat gun. This is just a middle price model from a home improvement store. Just take it, heat it up, which releases the glue. I'm going to really heat this up. I can smell it burning, now. Then I'll fast-forward through this. You just basically use the heat gun, heat up with those spots where it's been glued, and the heat releases the glue and it makes it easier to get it off nice and clean. Once you are finished with the putty knife, and then use your heat gun and heat up the remaining residue. Then, you can see I have a little wire brush. Just use the wire brush to get the remaining weather strip and glue off. Then, once you're done with that, I've get some mineral spirits on that paper towel, just remove the remaining residue. You want to make sure this is nice and clean, so that if you hit it with some paint, the paint sticks to it, or if you are just gluing on new weather strips, they have a good clean surface to stick to. Then, we'll go on very high speed, here, and you want to just repeat that process for the spot up near the front where they glued it on at the factory. Remove as much of that residue as possible. Get a nice clean surface for either your paint and/or your new weather strip to stick onto.
We hope this video helps you out. Brought to you by www.1AAuto.com, your source for quality replacement parts and the best service on the Internet. Please feel free to call us toll-free, 888-844-3393. We're the company that's here for you on the Internet and in person.
Tools used
13mm Socket
8mm Socket
Ratchet
Assistant
1. Removing the Trunk Seal
Pull the trunk seal seam apart
Pull the seal off
2. Cleaning the Trunk Seal Mounting Area
Remove the four 13mm bolts from the trunk glass
Remove the two 8mm bolts from each hatch strut
Pull off the hatch struts
Lower the trunk
Have an assistant help you lift the trunk glass up and off
Clean the trunk seal mounting area
Remove any glue residue from the trunk seal mounting area
3. Installing the New Trunk Seal
Apply adhesive around the trunk seal mounting area
Press on the new trunk seal
4. Reinstalling the Trunk Glass
Have an assistant help you lift the trunk glass into place
Put the hatch struts into place
Insert the two 8mm bolts into each hatch strut
Insert the four 13mm bolts into the trunk glass
Brought to you by 1AAuto.com, your source for quality replacement parts and the best service on the Internet.
Hi, I'm Mike from 1A Auto. I hope this how-to video helps you out, and next time you need parts for your vehicle, think of 1AAuto.com. Thanks.
In this video, we're going to show you how to remove the rear hatch weather strip on this 1986 Camaro Iroc Z, same as any '82-'92 Camaro or Firebird Trans Am, etc. No tools are necessary. You will need some adhesive to put your new seal back on. We do show you how to remove the hatch so you can clean up in the upper area between the hatch and the roof of the vehicle which is sometimes hard to clean. For that you will need a 13 millimeter socket and ratchet, an 8 millimeter socket and ratchet, as well as someone to assist you in lifting off the glass.
This could be a really short video, and to some people it's going to be simple, but to some that don't know all this seal just does, there's usually a seam in it right here. Pull that seam apart. It looks like they did use some adhesive. Just pull the seal right up and off.
To remove this glass, there are four 13 millimeter bolts. I'm going to undo them up in here, in the top of the body of the car. Now, you may ask why I'm taking the hatch off. To be honest with you it's: 1, because we're going to paint this car, and 2, really in order to reinstall this seal correctly you should take the hatch off and really clean up, up above on the roof. Lots of times a whole bunch of debris and dirt and stuff gets in there. It just makes it easier to glue it down and get it on there right. Now, you might think with the third brake light on there, there's some wiring, but there's not. That's what this switch is right here. The third brake light is actually wired through the window and this switch just hits contact down on the vehicle. I've got those four bolts undone. Now I'm going to undo these. These struts won't come off until you take them off. What I mean by that is you can unbolt them and they're not just going to flop off. They'll stay there until you want them to come off. Disconnect the defrost lead. Disconnect the stop light lead. Now, probably, having a helper would be the best thing here. I'm going to remove this. Put the hatch down. Now, with an assistant, pull the glass up and off.
Now with the hatch off you can really clean this properly. You can see how much gunk builds up and stuff in there. Then put your weather strip back on. You'll want to do your best to get all this . it looks like it comes off pretty easy . all this residual glue off.
Then, you just put a bead of glue right up on top all the way around and then press your weather strip down on top of it.
We hope this video helps you out. Brought to you by www.1AAuto.com, your source for quality replacement parts and the best service on the Internet. Please feel free to call us toll-free, 888-844-3393. We're the company that's here for you on the Internet and in person.
WSS00487
In Stock
Product Reviews
Loading reviews
There are no reviews for this item.
Customer Q&A
I have an 89 Camaro with t-tops. I bought your product and had it professionally installed. It still leaks. If I never plan to take the t-tops off will the non t-top kit work?April 13, 2021
Paul M
Is this for one door or two ?April 18, 2022
Harumi I
10
This will be for both doors.
April 19, 2022
Emma F
Will this fit a convertible?December 4, 2022
Miguel L
10
This part will not fit your vehicle, but we may have a part that is listed to fit.
Please enter your vehicle's year make and model in the search bar at the top of the page. This will display parts guaranteed to fit your vehicle. Just be sure to verify all of the information shown in the Vehicle Fit tab before ordering.
December 6, 2022
Kelly S
are these weatherstrips made by fairchild?March 11, 2023
Richard F
10
The weatherstrips will not be form Fairchild. DIY solutions brand parts are manufactured by various aftermarket companies specifically for us and built to your vehicle's exact OEM specifications.
March 14, 2023
Jessica D
Will this fit the 88-89 iroc convertible top model?May 31, 2023
Marcus W
10
Please enter your vehicle's year make and model in the search bar at the top of the page. This will display parts guaranteed to fit your vehicle. Just be sure to verify all of the information shown in the Vehicle Fit tab before ordering.
June 2, 2023
Emma F
Will the kit include clips ?July 16, 2023
John D
10
New hardware is not included with this item. You may be able to reuse your original hardware if it is in good condition.
July 17, 2023
Jessica D
Customer service
877-844-3393
Monday - Friday 8:00am - 9:30pm ET Saturday - Sunday 8:00am - 4:30pm ET
Pontiac is a registered trademark of General Motors Company. 1A Auto is not affiliated with or sponsored by Pontiac or General Motors Company.See all trademarks.
Enter Vehicle Year Make Model
Specify your vehicle's year, make and model to guarantee fit.
Year
Make
Model
Options
Drivetrain
This part doesn’t fit a . Select from parts that fit.