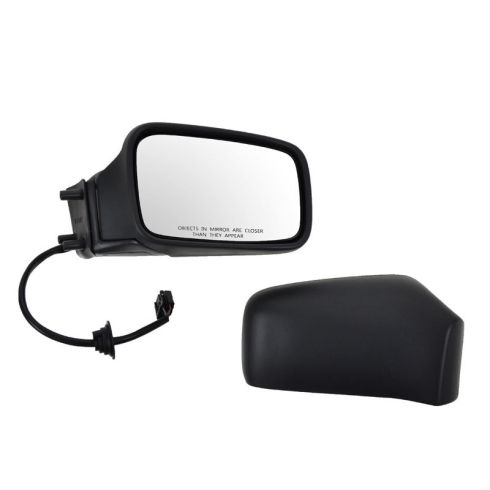
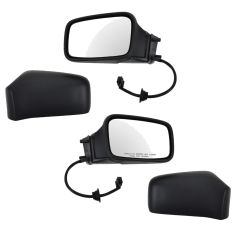
Exact fit - To obtain proper fit and function confirm your vehicle has the exact mirror options listed.
Complete Repair in One Purchase - Stop searching for parts individually and complete your repair with a customized kit or set from DIY Solutions.
High-Quality Parts from Trusted Brands - DIY Solutions' kits and sets are selected from the best automotive brands and include hard-to-find and even obsolete parts you may need for your vehicle.
Guaranteed Fit - DIY Solutions ensures its selected parts are quality-tested to guarantee fit and function.
Paint To Match Note:
"Paint-to-match finish" refers to a smooth, paintable surface. This item is not painted. Paint offers better coverage and adhesion, but it is not necessary for installation.
Direct-fit replacement Manufactured with high quality materials Mirror glass meets or exceeds DOT standards
Item Condition:New
Attention California Customers:
WARNING: This product can expose you to chemicals including Chromium (Hexavalent Compounds), which is known to the State of California to cause cancer, and birth defects or other reproductive harm. For more information, go to www.P65Warnings.ca.gov
Lifetime Warranty
This item is backed by our limited lifetime warranty. In the event that this item should fail due to manufacturing defects during intended use, we will replace the part free of charge. This warranty covers the cost of the part only.
FREE Shipping is standard on Orders shipped to the lower 48 States (Contiguous United States). Standard shipping charges apply to Hawaii, Alaska and US Territories. Shipping is not available to Canada.
Expedited is available on checkout to the United States, excluding Alaska, Hawaii and US Territories as well as P.O. Boxes and APO/FPO/DPO addresses. Final shipping costs are available at checkout.
How to Replace Rear View Mirrors 1998-2000 Volvo S70
Created on:
Tools used
Flat Blade Screwdriver
Putty Knife
10mm Wrench
T25 Torx Driver
1. Removing the Door Panel
Using the 10mm wrench loosen and disconnect the negative battery cable.
Pry the trap door out of the door pull cup.
Remove the T25 torx screw from the door.
Remove the door handle bezel.
Pry out the six clips around the door panel using a clip tool or a putty knife.
Remove the upper triangular trim panel.
Pull the door panel up and off.
Disconnect the harnesses from the door panel.
Any clips left in the door remove and put back into the door panel.
2. Removing the Side Mirror
Disconnect the mirror harness.
Remove the T25 screws securing the mirror.
Lift the mirror up and out, sliding the grommet through.
3. Replacing the Side Mirror
Feed the mirror harness through the door.
Line up the mirror and slide into place.
Replace the T25 screws.
Push the grommet up into place.
Connect the mirror harness.
4. Reinstalling the Door Panel
Reconnect all of the door panel harnesses.
Put the door panel over the lock and into the weather strip.
Push in the clips around the door panel.
Replace the T25 torx screw.
Replace the trap door.
Replace the door handle bezel
Push the triangular trim piece back into place.
Reconnect the negative battery cable.
Brought to you by 1AAuto.com, your source for quality replacement parts and the best service on the internet.
Mike Green: Hi, I'm Mike Green, I'm one of the owners of 1A Auto. I'm going to help you save time and money repairing and maintaining your vehicle. I'm going to use my 20 plus years' experience restoring and repairing cars and trucks like this to show you the correct way to install parts from 1AAuto.com. The right parts, installed correctly , that's going to save you time and money. Thank you, and enjoy the video. In this video we're going to show you side, or rear view mirror replacement on this 1998 Volvo S70, the same as some of the other Volvo 70 models. We'll show you the driver's side, which is basically the same procedure for the passenger side. The tools you'll need are a 10 mm wrench, a small flat blade screwdriver, T25 torx driver and either a door panel clip tool, if you have one, or a household putty knife.
With the 10 mm wrench, loosen up your negative battery cable and disconnect it. To remove your door panel you'll probably notice there's a little trap door here. There's a slot you're going to insert a small screwdriver or just use your fingernail and just pull out. Now inside there's a T25 torx screw. Use a driver to remove that. Now your bezel around your handle you can probably just use your fingers and get them up underneath there, and that bezel comes off. Now around the edge there's about six clips, two in the front, two on the bottom and I think two in the back. Either use the door panel clip tool or a household putty knife, either one will work. The clip tool, if you can get it right on the clips what you want to do is you put them in, slide it until you feel the clip and then slide it out and pull. We'll speed it up here too as we just pop the rest of those clips out all around the edge. Once you have those clips released this panel just pulls right off and you pull your door panel out and lift it up.
Now there's a series of harnesses. They all have little tabs. You press the tab and then pull the harness out. There's a green one here for your trunk and gas door. You press the tab, bring it out. Then there's a couple here that go into your power window and lock switch. Press the tabs , pull out and now your door panel comes out. This harness connection here was a little tough because you have to get your finger right in there to get that tab. You may find after you take your door panel off a couple of the clips stay behind. You just want to pry those out, and you can just slide right back into your door. Your mirror connects right here. There's a little clip onto this panel which it already came off on this vehicle. There's a couple, just a little tab here A tab on this side. Pull out on those tabs and then we'll bring it out, and then T25 screws hold the mirror in. Speed it up here as we remove those three screws. We want to take this grommet, apply it through first and then slide the connector through. Then the mirror's off.
The new mirror from 1A Auto, it comes with the back separate. Obviously you can just pop the back on and put it together as is. If you wanted to paint this to match your vehicle you can do that. You can be as crude as just using some paint from a hardware store or if you want to match it better, take your car to an automotive parts store that has a paint department, they can help you match the paint on your car with some in an air charge can, and then you can spray it. Freeze frame for a second here. I found with that mirror the best way to put the back on is to install the mirror first then fold the mirror in toward the window of the car and then put the back on. Installation is just the reverse of the procedure. Put your harness through, bring that plug through, put the mirror on. Then when putting the screws in I found it's best to put the screw on your torx driver, then start it in, push in on the driver. The new mirror will not be threaded, and those torx screws are meant to be self-threading, so you'll see as I fast-forward here you'll actually have to use some force and it requires a little bit more than just kind of putting the screws in, but they go in, they thread themselves in and tighten them up. Now reinstall the little weather-tight plug on the seal panel there, and plug your harness back in.
To reinstall the door panel just reverse the procedure. You get it close here, plug in the window locks. Put your door lock through. Make sure your top ledge goes into the weather strip and down. Now make sure your clips go in, the T25 torx screw, then your little trap door, the bezel for your door handle, and this little trim piece up here. You're all set. Reconnect your negative battery cable with your 10 mm wrench.
We hope this helps you out. Brought to you by www.1AAuto.com, your source for quality replacement parts and the best service on the internet. Please feel free to call us toll free, 888-844-3393. We're the company that's here for you on the internet and in person.
MIR00419
In Stock
Product Reviews
Loading reviews
5.00/ 5.03
3 reviews
5 Stars
4 Stars
3 Stars
2 Stars
1 Star
3
0
0
0
0
Its good
Tyler
July 31, 2019
Took a while to get here since I'm in Canada but it fit perfectly and works just fine.
Passenger side mirror
M
January 7, 2020
My mechanics did a great job installing the replacement mirror for me. I feel safe driving again with the mirror. The only problem is the fact that the color of the cover does not match the original. Oh well, she is a 1998 vintage!!!
Professional & helpful
Daiva
November 17, 2022
Professional, helpful and respectful client service communication. Good price and free delivery. Thank you!
Customer Q&A
Will the original OEM painted cover fit this replacment mirror?September 6, 2016
Michael B
10
This being an aftermarket part may not accept the OEM cap.
September 7, 2016
Brian F
Will this fit a 4 door V70 2000 STATION WAGON?October 5, 2022
John D
10
Yes, this part will fit your vehicle.
October 5, 2022
Kelly S
Customer service
877-844-3393
Monday - Friday 8:00am - 9:30pm ET Saturday - Sunday 8:00am - 4:30pm ET
Volvo is a registered trademark of Volvo Trademark Holding AB. 1A Auto is not affiliated with or sponsored by Volvo or Volvo Trademark Holding AB.See all trademarks.
Enter Vehicle Year Make Model
Specify your vehicle's year, make and model to guarantee fit.
Year
Make
Model
Options
Drivetrain
This part doesn’t fit a . Select from parts that fit.