Brought to you by www.1AAuto.com. All parts in this video are available on our website.
Hi I am Mike Green. I am one of the owners of 1A Auto. I want to help you save time and money repairing or maintaining your vehicle. I am going to use my 20 plus years experience restoring and repairing cars and trucks like this, to show you the correct way to install parts from 1aauto.com. The right parts installed correctly; that's going to save you time and money. Thank you and enjoy the video.
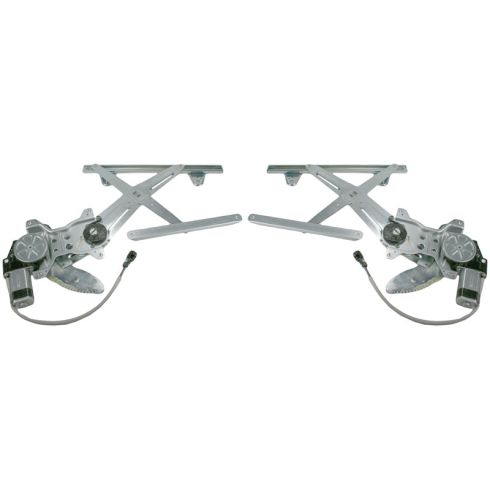
In this video we will be replacing the window regulator on this 1998 Toyota Camry; same as any 1997 to 2001 Camry. The tools you will need are a small regular flat blade screwdriver and a larger flat blade screwdriver, a Philips screwdriver, a putty knife or door panel clip tool, and a 10mm wrench or socket and ratchet. To do the regulator obviously you need to remove the door panel. Here we are going to fast-forward through it just because of the YouTube time limit of ten minutes. If you want to see this video in real-time or real speed, just search our videos for "Camry Door Panel" and you can see it in regular speed. You might be able to pick up enough just from this fast motion video to understand how to get the door panel apart. It is just a few screws and some clips and stuff. Beyond that just wait another 5 or 10 seconds or so and we will get into the regulator.
To attack this regulator you are going to have to remove your door handle, which is one 10mm bolt. Then you are going to want to also remove this plate here, which are three Philip screws. Taking the bolt out and then you are going to slide your handle forward and then rotate it like this and you can remove these rods. See I have taken the plate off, and now you want to gently pull on your water shield. You don't want to rip this, and you want to try not to stretch it too much either.
We actually found that using a putty knife to separate it. You just kind of run the putty knife between the water shield and the door, and that will separate that goop. You pull back the plastic some, and I have actually also reconnected my switch here and I'm just running up the window a little bit because if your motor is broken or your regulator is broken this might be a problem for you, but this is a 10mm bolt here and then there is one in through this access hole here. You remove these bolts, and then raise your window up out of the regulator and tape it up to the top. I have removed my two bolts, and now the window is free from the regulator. I am just going to move it up. I have got some painter tape up here, and then I will put a few more pieces on there just to hold it in place.
See now I have completely removed the water shield, and I am going to unhook this harness here. This is my power window harness. I am reaching in behind, and now I am going to remove one, two, three, four, five, six bolts. Those all hold the window motor and regulator. I have removed almost all those bolts. I am going to feed the harness back into the door. I am going to reach back in with this hand and kind of hold it, and I am just removing this last bolt. Then you kind of rotate, there is a little clip here that is holding it, rotate it up and out, and your regulator assembly comes right out.
Then obviously if you need a new regulator, get a new one; feed it back into the hole. You can see right here there is a little thing that goes in and you may need to turn it a little bit. It all goes to lining it up so you get the window you get this in and this hook in. There is another little line tab down here; got to get those in, hold them in a little bit. This track comes up. Move it around, this wire and stuff there, and that tab goes in there. Take this middle bolt, put it in, and then I will put the five other bolts in as well.
I got all the bolts back in. I am going to tighten, tighten, tighten. Then we are going to hook our motor back up. Clip it into place. Before you put everything back together it is always good to just run a quick test, let's plug the switch back in, and just make sure that we have some motion out of the regulator before we put the window back on. Now you'll undo the tape up here. Put some pressure on the window. Very important, make sure the window stays in its track and it goes down evenly and meets up correctly with the regulator. I got it bolted on, I found the tip. I found it lining up and doing this one first and then doing that one second was what worked best. We will just do a quick test here and looks like it's working just fine.
For reassembly, we are going to put down our window, unplug this, feed the harnesses through and up, and put these rods through. What I like to do is I like to find a reference point, and a good reference point is here; that's where one of the screws goes in. Here is actually even another one, this is where that plate screws in, and this is another hole where a plug goes in. Then those reference points, just start sticking it on. All of that goes into place. Now we will need to put our door handle on. Move these bars in and this one in. Get it on here and slide it backwards; bolt in. Then I will put this plate on with the three screws.
Once you have put that plate on and tightened up that bolt for the door handle, then it is just a matter of replacing your door panel; if you need the video on that just look at our other videos for "Camry Door Panel".
Brought to you by www.1AAuto.com-- your source for quality replacement parts and the best service on the internet. Feel free to call us toll free 888-844-3393. The company that is here for you on the internet and in person. Thank you.