Brought to you by 1aAuto.com your source for quality replacement parts and the best service on the internet.
Hi, I'm Mike Green. I'm one of the owners of 1A Auto. I want to help you save time and money repairing or maintaining your vehicle. I'm going to use my 20-plus years experience restoring and repairing cars and trucks like this to show you the correct way to install parts from 1AAuto.com. The right parts, installed correctlythat's going to save you time and money. Thank you and enjoy the video.
In this video, we'll be showing you the front hub replacement on this 1997 Pontiac Sunfire, exact same for any '95 to '05 Cavalier or Sunfire. This is really similar to many front wheel drive cars, although the tools may be a little different, size sockets and things like that. Tools you'll need for these J-body Cavaliers and Sunfire: 3/8 allen wrench to get the disc calipers off, 19 mm socket and ratchet for your tires, flat blade screwdriver, T55 Torx bit, a large hammer, and a 30 mm socket for that hub nut.
Obviously the first step is to raise and secure the vehicle. Then remove the wheel on whatever side you're going to be working on. What we're going to do is we're going to kind of fast forward to taking off the brakes. It's not a hard process. Basically, you need a 3/8 Allen wrench and you remove two bolts. Then the caliper comes off, then you can take the disc brake rotor off. If you're working with just hand tools, you'll want to loosen the hub nut and take the hub nut off while the car is still on the ground. I have the benefit of air tools, so I can take the hub nut off in the air.
Once you have the rotor off, the hub is held in by three Torx bolts. You can see it right through the little hole here. There's another one through that hole. And then the third one right there through that hole. For those Torx screws, you want to spray the backs with some penetrating oil, just to give yourself a chance at getting them out. What I'm doing here is I'll just, with a little screwdriver, kind of get in here and clean these Torx screws out a little bit just to make sure that the bit can get in there. This is a T55 Torx bit.
I'm going to put it in and I'm going to use my hammer just a little bit to make sure it's nice and seated in that bolt. Then I'm going to use a flex handle. They are pretty tough to break loose at first, so you want to definitely make sure you tap them into the hole, or you'll end up stripping. Then you give a really good pull and they break loose. I'll remove those three and we'll go from there.
I have the benefit of a air ratchet here. If you don't have this benefit, what you're going to want to do to do this hub is actually loosen this nut as the first thing. You want to do it with your wheels on the ground, and then you can use hand tools to loosen up. If you have the access to air tools, then you can just do it this way. I've got the nut off. Now, with a metal hammer you don't want to just whack away because that could damage your CV joint. What I do is I just give it a tap and I watch really close. You just give it a tap and you can see if this shaft moves. If you see it move, then you're all set. Just use a rubber hammer, which won't hurt the CV joint (hammering) and just push that through.
Now you can get the hub out of the steering knuckle, which this can be an exercise in whacking away. I just take a hammer and kind of hit one side, hit the other side. You may need to resort to something bigger. That's what I've done here. I am putting some space in between the hub and the steering knuckle now. There's your hub, removed.
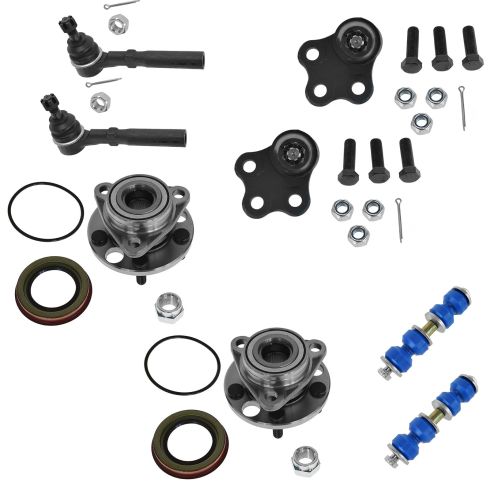
Here's our old hub. Here's the new hub from 1A Auto. You can see it's all the same. Everything's going to bolt up the same. It's just prettier and shinier and it's not going to make all those groaning noises. Now what I'm doing is using a wire brush here clean up the inside of the steering knuckle. You can take your axle and you can kind of push it back and move it around. You just want to try and get as much corrosion and stuff out of here as possible so that your new hub goes in there nice and clean. I'm going to use a little bit of this is Anti-Seize but you can spray in some penetrating oil or even just some motor oil. Just coat this a little bit. Especially on this age car, most likely this hub's going to outlast the car, but if not, now somebody can get it apart pretty easily.
Putting it back together is the opposite of taking it apart pretty much. Put the hub on. Mount to the axle. Push it in some. We'll start with this top one. Again, I put a little bit of Anti-Seize onto the bolt. I use my wrench here to get it started. Put some pressure in it. Make sure you get started right. I'll start all three. Then I'll tighten them up at first with the air ratchet a little bit, and then I'll torque them. Here I'm using the wrench and I'm just kind of tightening each one evenly. You don't want to tighten one up all the way because that will make the hub go into the steering knuckle crooked and that's not what you want. You want it to go in nice and straight and even. I've pretty much uniformly tightened these. Now I'll tighten it to 60 foot-pounds.
Now what we'll do is put this washer back on. I'm going to put the hub nut back on. We're going to put the wheel back on, we're going to lower it down to the ground, and then we're going to torque up this hub nut. The book calls for 144 foot-pounds, so that's what we'll torque it to. Here I'm just going to go through putting the brakes together in fast motion. Again, if you want to see this once you've taken them apart, they're pretty easy to get back together. If you want to see it in regular motion, just check out our other videos and search for Sunfire or Cavalier front brakes. Stay with it, because then we'll put the car back down on the ground, tighten that hub nut and put it back together.
I've got my car on the ground. I've got these two lug nuts on so I can get the wheel cover back on. They're tight. Now I've got my torque wrench set at 144 foot-pounds. I'll put my wheel cover on. Start the rest of my lug nuts. Okay, so my lug nuts are on there, and tighten up a little bit. Now I'm just tightening them to 75 foot-pounds. I use a star pattern. I put the lug nut covers on and just use my socket and by hand just tighten them up. Just a quick note as I'm doing this. You've taken apart the brakes and the hub, so basically when you first road test this car, be very careful. Go slow at first. Make sure your brakes are working. Make sure everything's working.
We hope this helps you out. Brought to you by www.1AAuto.com, your source for quality replacement parts and the best service on the internet. Please feel free to call us toll-free, 888-844-3393. We're the company that's here for you on the internet and in person.