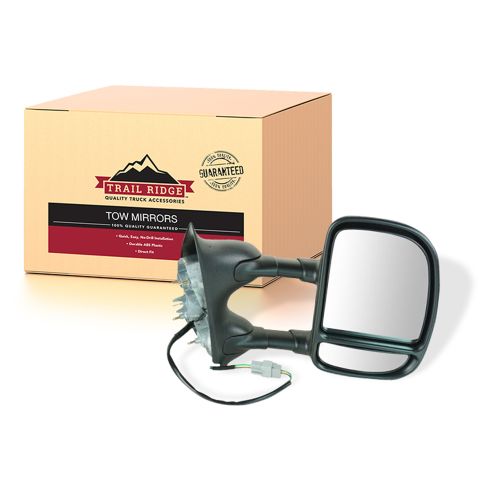
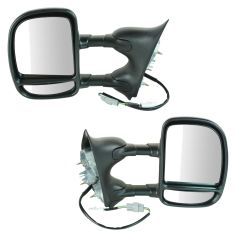
1AMRE01909-1999-05 Ford Passenger Side Mirror Trail Ridge TR00089

Replaces
2004 Ford F250 Super Duty Truck Passenger Side Power 180 Degree Swing Dual Swing Towing Mirror Trail Ridge TR00089

Product Reviews
Loading reviews
4.86/ 5.0
22
22 reviews
Outstanding product and service
February 28, 2017
I am very pleased with the mirror I purchased. It fit perfectly and works like original. The service people I talked to when inquiring and ultimately ordering the mirror were very polite and helpful. Also, the how to replace video provided by 1aauto.com made it so much easier to install. I highly recommend.
Passenger side replacement mirror
February 28, 2017
Excellent product, perfect fit. Installation was easy thanks to the great video from1aauto!
Ford Mirror Replacement
November 20, 2017
Mirror is high quality. Install video was critical to making it easy and fast to replace.
GREAT Aftermarket Mirror
January 23, 2018
This mirror was a perfect fit and very good quality. It was a seamless install. I would recommend this item for anyone in the market for same.
Mirror was perfect fit
April 3, 2018
Thank you 1aauto for such great service. I got the new mirror for my F250 quick and the fit was perfect. I will order all my parts for you in the future if you have them. Thanks again.
Fit Perfectly
June 27, 2018
This mirror is as good or better than an OEM. 1A AUTOS installation video made this job easy and the mirror fit perfectly.
Right and left side rear view mirrors for 99' F350 HD Truck
September 23, 2018
I've bought alot of items online over the years, these mirrors went on with 1A's installation instructions perfectly. The operations of the mirrors met my expectations to the T.
very happy
January 1, 2019
the product fit exactly as needed the video on y tube made it quite easy to install
2002 FordF350 Mirror
February 24, 2019
Perfect fit. No problems what so ever
Ford towing mirror
March 12, 2019
The mirror was a perfect fit, and the installation video very helpful.
2002 Ford F350 Super Duty Passenger Towing Mirror
April 4, 2019
This Mirror was exactly correct for our Truck. It is a High Quality Mirror that was promptly delivered and very easy to install. 1A Auto even had a Video showing the correct installation procedure from start to finish. It is Rock solid at speed because of the High Quality construction with no Vibration or Distortion when riding on the Interstate. I Highly recommend it.
August 18, 2019
More difficult & took longer to replace than 3 grown men anticipated, but they got it done & it works perfectly.
2000 F250 Passenger Side Mirror
June 16, 2020
Price was great. Part fit perfect. The 1aauto removal and installation videos are very helpful.
Mirror exchange
June 22, 2020
I ordered the wrong mirror and didn't realize it until I went to install it 5 months later. Called and explained the situation and was sent the correct mirror and my account was credited when I returned incorrect mirror. Mirror fits like a glove.
These were awesome and easy to do my son did them
January 18, 2021
I sat in the chair and watched while my 15 year old replaced the original small ones with these. It was that easy. The change made the truck look so much better and now I can see around my 5th wheel camper.
Went in great with no issues. Fuck Joe Biden
February 3, 2022
Easy to install
Not Greatest Fit
April 15, 2022
Wasn't the greatest fit. Had to really tighten the nuts to get it to suck down and fit better. Then one of the studs snapped off from having to be tight does that much. It looks like grade 8 hardware but can't be, from breaking so easy. Never the less its on and good enough that I'm not going to bother with it. Probably pretty decent for aftermarket, I've had much worse fits on taillight and other things before.
Great Replacement Mirror for 1999 F250 Super Duty With Round Plug
November 13, 2022
Bought this, and the TR00087 to replace both outside rear view mirrors on my F250 Super Duty, 4WD, diesel truck (early 1999 model). The old mirror mounts were cracked and they no longer slid in and out. The fit is pretty good - it takes a bit of jockeying around to get all of the bolt holes to line up. Start with one bolt and slowly work around to the remaining three bolts. Once installed they look great and work great. A much easier job with two people, but if you are by yourself, roll the window down all the way first. Also - unplug the gray rectangular plug (on the new mirror) before putting the wiring harness through the rectangular hole in the door. My truck had the round plug so I'm glad I got these mirrors with the round plug adapter.
December 1, 2022
Excellent!
Mirror as advertised
February 13, 2023
Purchased this mirror for my 2003 Ford F250 Crew Cab. Excellent aftermarket mirror. Very good quality. Fast delivery. We'll packed. Installation video extremely helpful. Whole process took less than 30 minutes. Fits like a glove. Very satisfied with my purchase.
Grate
March 2, 2023
Fast shipping. Easy checkout.
TR mirror is a good OEM replacement for F250.
July 24, 2024
The package arrived as promised. After watching your video and installation, the first time I hit the button, it was so quiet that I thought it wasn't working at all. I am satisfied with the Trail Ridge mirror and plan to replace the old OEM driver's side mirror, too.
Customer Q&A
Is the blind spot lower mirror adjustable?
December 1, 2020
10
No. Only the upper Mirror.
December 1, 2020
N R
10
The lower mirror glass can be adjusted by hand.
December 1, 2020
T I
Is this mirror heated?
March 23, 2022
10
The one I got for my 02 f250 wasnt heated.
March 23, 2022
Pete B
10
No
March 23, 2022
D E
10
No it is not heated. I can also tell you the motorized mirror head is not very responsive. A person must manually push it into proper position.
March 23, 2022
G O
Ford is a registered trademark of Ford Motor Company. 1A Auto is not affiliated with or sponsored by Ford or Ford Motor Company.
See all trademarks.


