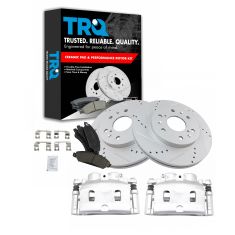
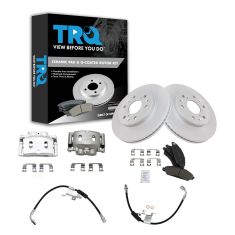
Brought to you by 1AAuto.com your source for quality replacement parts and the best service on the internet.
Hi, I'm Mike from 1A Auto. I hope this how-to video helps you out and next time you need parts for your vehicle think of 1AAuto.com. Thanks. In this video I'm going to show you how to do the front brakes on this 2005 Chevy Silverado. This truck is a 4x4 with the drum rear brakes, there are some differences in the brakes as far as the calipers and the rotors they use. But, generally the procedure for re-doing the brakes is the same for, pretty much any '99 to present actually to 2013 or so Silverado, Sierra, even the Cadillac Escalade, Yukon, Suburban, Yukon Excel, generally the procedure is the same for all of these trucks.
The tools may differ in size a little bit, but what I use for this truck are Jack and Jack Stands, you'll need your lug wrench or 22mm socket with a breaker bar or something else that you could get a good leverage on. 18mm and 19mm sockets with a ratchet, again, you'll need a breaker bar or pipe for some extra leverage on some of those bolts. A small wire brush to clean things up as you put them together. A large C-Clamp, a large hammer, I use the big hammer, big sledge hammer to get my rotor off. You can also use I believe it's an M-12 17mm bolts that you can thread into the rotors and kind of press them off. I just use the big hammer method. Cold chisel, I have that starred because on this vehicle a couple of my slides, my lower slides were in rough shapes so I had to kind of pound them out, you'll see what I mean and you may not have that issue on your vehicle. Then you'll need a torque wrench to get everything back together.
Start off my removing the wheel and tire. If you don't have the benefit of air tools you want to start with the vehicle on the ground, loosen take off the hubcap, the center cap, loosen lug nuts. Then raise and support the vehicle. Remove the lug nuts all the way. Remove the wheel and tire. Turn by hand or use a steering wheel to turn the brakes so you can get to them easily.
Now you're going to inspect the brakes with the wheel off and you can see my brakes are in pretty rough shape. The rotors show that there's only about 30% of the contact pad actually working, their pads are worn. We're going to remove two 19mm bolts to remove the caliper. These 19mm bolts should come off pretty easy. You see I'm just using regular hand tools and they come right off. I'll fast forward here a little bit as I just take those bolts out.
Now you can remove the caliper just buy lifting up. You may want to use a large screwdriver and pry out on the caliper a little bit that will help loosen things up and then the pads should come out fairly easily. See my back ones come out and then I struggle with the front one or the outside one, the inside one came out I struggle with the outside one. Then I look for something to pry it with and just end up using the back pad and pry that other pad right out.
You want to make sure this slides in and out really easily and that one does and this one is totally frozen off from where I can see. I think it's so bad I'm actually going to take my Twin Pack. So, I use my Impact wrench to get it moving and you can use a ratchet and socket 19mm work as well, get it turning and then you can use a hammer and some type of punch and you'll see in the next scene to get it out the rest of the way.
Just using a punch, actually it's a cold chisel to get that out of there. What I do pull it out, clean it all up, put some grease on it, push it back in and basically you go in and out with it a bunch of times, just keep cleaning it off. Use a pick or something to try and clean out inside the hole. You can get it freed up. If you're not happy with that you can also order a new set of the caliper brackets from 1A Auto as well as the slide pins.
Now there's a set of stainless steel slides and you pull those off and we're going to wire brush those and clean them up a little bit later. Now we're going to remove the caliper bracket and there's two 18mm bolts. There's one right there and one there, these will be tighter you'll need a little more leverage to get them off.
As you can see here I'm going to put the 18mm socket on there, put my ratchet on and then use a piece of pipe to basically extend the length of the ratchet give me some more leverage and just pull nice and evenly and they end up coming loose. You can use if you have a breaker bar that's good or if you have the benefit of air tools, obviously that's the way to go. But, this comes off usually with a little extra leverage. I'm just going to fast forward here as I remove them the rest of the way.
Here, I've just threaded the lug nuts on a few threads. That's just to protect the wheel studs. Make sure when you hit it with a hammer you don't damage the threads on the wheel studs. Basically, I'm showing you if you want to keep your old disc, you want to hit the front first that loosens it up and then you can hit it from the back side lighter and it comes off, as you can see it's coming off. I actually know I'm going to junk this disc because it's in pretty rough shape. Also you can see that the lug nuts being threaded on there help you as you hit it off. Make sure that the disc doesn't go flying and hurt somebody.
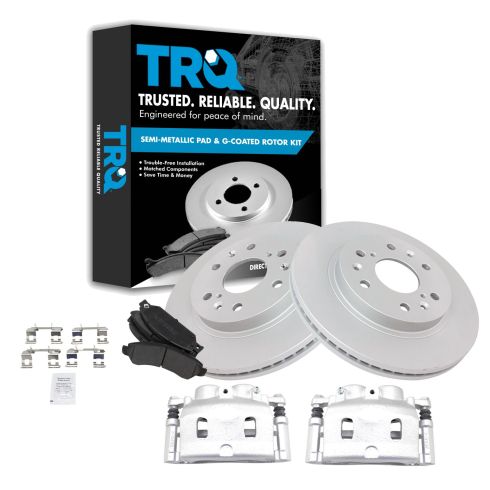
Here I've removed the lug nuts so I can take the old rotor off and then I've got the new rotor from 1A Auto ready to go back on. It's going to go on there just the same as the original, obviously, in much better shape. Provide much greater breaking service area than the old one did.
Here I'm just using a wire brush. I want to clean up the slots where those stainless steel slides go in as well as where the brakes shoes go in. I'm just cleaning those up get the rusty and scale out of there so everything fits together well. I'm actually going to speed it up here as I put the bracket back in place and start the bolts in. I'm just going to tighten them permanently. I'm actually going to next scene I'm going to tighten them up with a torque wrench to between 90 and 95 foot pounds.
Here are my stainless steel slides that I've cleaned up with a wire brush and sometimes the brake pads will come with new slides. Just make sure you install those correctly and they get seeded right down into the caliper bracket. New brake shoes from 1A Auto. There is a front and a rear, the rear has the larger metal backing and you want to put the squeak tab, a little tab, put that down lower and it should slide right in.
Now you want to take your old inner pad and put it against the caliper and then put your use a large C-Clamp and you're basically resetting the caliper. You can see as I tighten up the C-Clamp, the pistons in the caliper go back in and reset. I just slowly tighten up that C-Clamp and push the pistons back into the caliper.
Remember back when we checked those slides and the one was stuck. Now, here's where you can figure out how well you did as far as cleaning them out. You'll have to take the caliper, push it against the slide on the inside a little bit and then get it to come down over the brake pads and that should go right on. I'm going to fast forward here as I just put those 19mm bolts back in to hold the caliper to the caliper slides.
Now you want to torque this to between 55 and 60 foot pounds. I'm just going to fast forward and straighten out the wheels. Put the wheel and tire back on. Put the lug nuts all on, I always thread the first few turns by hand. Make sure you got the lug nut going on correctly and then just kind of tighten them preliminarily.
Here I'm torqueing the lug nuts on the wheel. Always do your brakes in pairs. I'm just going to show the passenger side, but obviously the next thing I do is the driver's side. Then after you torque the lug nuts, when you torque the lug nuts make sure that you do it in a crossing pattern. Torque one then go across the wheel to the next one. Put the cap and all the trim back on the wheel and then there's one more step. After you do brake work make sure you pump the brakes a few times, making a hard solid pedal.
We hope this helps you out. Brought to you by www.1AAuto.com, your source for quality replacement parts and the best service on the internet. Please feel free to call us toll-free, 888-844-3393. We're the company that's here for you on the internet and in person.
