Replaces
This part doesn’t fit a . Select from parts that fit.
Item Condition:
New
Attention California Customers:
 WARNING: This product can expose you to chemicals including Chromium (Hexavalent Compounds), which is known to the State of California to cause cancer, and birth defects or other reproductive harm. For more information, go to www.P65Warnings.ca.gov
Lifetime Warranty
This item is backed by our limited lifetime warranty. In the event this item should fail due to manufacturing defects during intended use, we will replace the part free of charge. This warranty covers the cost of the part only.
FREE Shipping is standard on Orders shipped to the lower 48 States (Contiguous United States). Standard shipping charges apply to Hawaii, Alaska and US Territories. Shipping is not available to Canada.
Expedited is available on checkout to the United States, excluding Alaska, Hawaii and US Territories as well as P.O. Boxes and APO/FPO/DPO addresses. Final shipping costs are available at checkout.

Created on:
Tools used
Brought to you by 1AAuto.com, your source for quality replacement parts and the best service on the Internet. Hi, I'm Don from 1AAuto. I hope this how to video helps you out and the next time you need a part for your vehicle think of 1AAuto.com. Thanks.
In this video we are going to show you how to replace a power window motor on this 2004 Chrysler Sebring. It's pretty much the same procedures for the front doors either the left or right for 2001 to 2006. You will need a new power window motor from 1AAuto.com, flat blade screwdriver, Phillips screwdriver, razor blade, 10 mm socket and ratchet and a T25 Torx bit.
There are two trap doors here. There's one right here behind the door handle and another one here in the pull cup. All you want to do is take a flat blade screwdriver and stick it into the slot on the side of them and just pry them out. Now what you want to do is remove each of these Phillips screws. There are six in total. We'll just fast forward as Don removes those. Take your flat blade screwdriver and pry off that triangle panel. To release the clips on the back of the door panel you just want to pull out all the way around the door panel. Once you've done that you can lift it up and off of your door lock knob. I'm in behind the back of the door panel you will see here's your door handle rod and you just want to pop that clip up and pull that up and out. You want to disconnect the two harnesses here by just pushing in the tab and pulling them out. Now your door panel is free.
The easiest way to remove the water shield is to use a razor blade or a utility knife and carefully cut through the adhesive to separate it between the shield and the door. Even though we're fast forwarding this, you want to do this slowly and carefully so you don't rip the shield and obviously you'd want to be careful not to cut yourself. You will need to separate the window from the regulator and you can see there are a nut right through that hole and then a nut through that hole. Obviously this is in the correct position. If your window is in a position where you can't get to those nuts you can unbolt the regulator first then slide it up and down until you can get to these nuts and separate the window from the regulator. Using a flat blade screwdriver you just want to pry up that weather strip.
Now you pull your regulator forward and push the window back so that those studs slide out of those holes and then you just want to pull your window inwards up and out. You can see that there are four 10 mm bolts on the window motor bracket and there's these two 10 mm nuts right here on the regulator arm. You just want to loosen these up. We'll fast forward as Don does this. Once you've loosened all those, you can just push the regulator up and out of those holes. Then you just want to lean it forward so that you can access the harness on the window motor. On the harness there's a little red locking tab. Push that through and then there's another tab on the harness that you press and disconnect it.
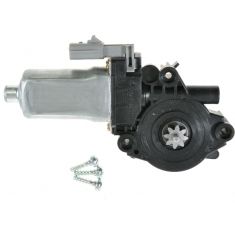
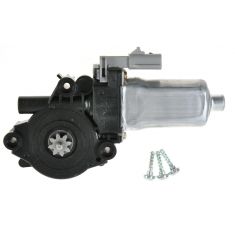
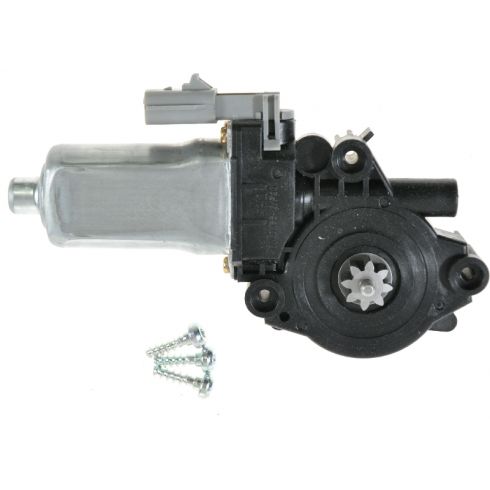
The window motor is held in by three T25 Torx screws. As you can see we have a T25 bit and a ratchet. We will remove those. Install the new motor by lining it up and pushing it on and start the screws in and then tighten them. Now feed your window regulator back into the door and reconnect that harness. Then line up those studs and bolts and put them into the holes. We will continue to fast forward as Don continues to tighten up those nuts and bolts. Now we will do a quick test. Plug the window switch back in, turn the key on and you can run the window regulator up and down. You just want to stop it and make sure it's in the position there where you can get through those holes and get the nuts on the studs for the window easily.
Now if we look through those holes you can see on the regulator there's those large holes with the smaller end and you just want to push the studs of the window into those larger holes so feed your window back down into the door. Make sure that you line up the front edge and the rear edge of the window into the tracks quickly and it moves up and down freely. Then you can pull the regulator towards you as you bring those studs down and line them up in the window track. You can see here the studs are in place. Now what you want to do is just replace those two 10 mm nuts and we will fast forward as Don does this.
We will continue to fast forward as he replaces the water shield and make sure all your cables and harnesses go through it. Replace your weather strip. To reinstall the door panel you just want to take that door handle rod and put it back into place and re-clip it. Then you want to just reconnect your two harnesses. Once you've done that you want to just line up your door, put it up and over the door lock knob and down into place. Then you just want to push those clips in around the edges of the door panel. We will just fast forward here as Don replaces those six Phillips screws. Now just replace your trap doors and that triangular panel.
We hope this helps you out. It was brought to you by www.1AAuto.com your source for quality replacement parts and the best service on the internet. Please feel free to call us toll free 888-844-3393. We are the company with you on the internet and in person.